
User Manual


Yealink Phonebook Generation Tool User Guide
11
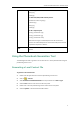
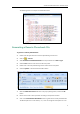
local_contact.data.url = http://10.2.5.214/LocalPhonebook.xml
remote_phonebook.data.1.url = http://10.2.5.214/RemotePhonebook.xml
remote_phonebook.data.1.name = Xmyl
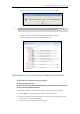
2. Upload the configuration file and two phonebook files to the root directory of the
provisioning server and perform auto provisioning to download the two phonebook files
for Yealink IP phones.
For more information on auto provisioning, refer to the corresponding auto provisioning guide:
For Yealink IP phones running old firmware version (old auto provisioning mechanism), refer to
Yealink_SIP-T2 Series_T19(P) E2_T4_Series_CP860_W56P_IP_Phones_Auto_Provisioning_Guide
.
For Yealink IP phones running new firmware version (new auto provisioning mechanism), refer
to
Yealink_SIP-T2_Series_T19(P) E2_T4_Series_T5
Series_W5_Series_CP860_IP_Phones_Auto_Provisioning_Guide_V81
.
Appendix A: Managing the Config.cfg File
The Config.cfg file is used to specify the stored path for the remote phonebook and local
phonebook. It is especially useful for the users who do not have write permissions for disk C:.
You can open and edit the Config.cfg file with a text editor such as UltraEdit.
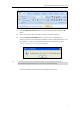
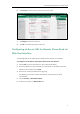
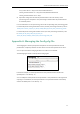
The following figure shows an example of the Config.cfg file:
In the above example, the remote phonebook and local phonebook will be saved to the
specified path: F root directory “F:\”.
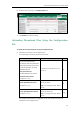
You can modify the stored path for remote phonebook or local phonebook on the right of the
equal sign. If it is left blank, the remote phonebook or local phonebook will be automatically
saved to the default path: C root directory “C:\”.