
Manual
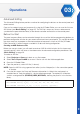

37
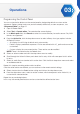
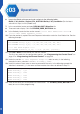
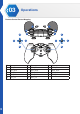
7. In this step, you will modify the RCU_LJU definition, see the following image.
8. Sequence U_s1 was previously defined as ActionNo_1, see “Before You Start”
on page 33
.
Change the RCU_LJU sequence to 1.
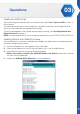
//=== Remote Control ====
#dene RCU_LJU 1
#dene RCU_LJD 0
#dene RCU_LJL 0
#dene RCU_LJR 0
#dene RCU_RJU 0
#dene RCU_RJD 0
#dene RCU_RJL 0
#dene RCU_RJR 0
#dene RCU_L1 0
#dene RCU_L2 0
#dene RCU_L3 0
#dene RCU_R1 0
#dene RCU_R2 0
#dene RCU_R3 0
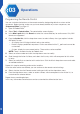
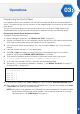
9. From the menu toolbar, click Tools > Board and select the option XYZrobot-BOLIDE option.
10. Next, select the COM port associated with the Robotic Arm. From the menu toolbar, click Tools
> Serial Port and select the associated option.
NOTE: If the device is not detected, the USB driver may not be recognized. The option to select
the associated COM port will not be available. You will need to update or re-install the
serial port drivers, see “USB Drivers”
on page 44
.
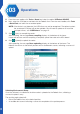
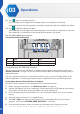
11. Click (Verify) to compile the codes.
After compiling, the message Done compiling displays on the bottom of the frame.
If there are no errors and the compiling is complete, upload the code to the Robotic Arm board.
12. Click (Upload) to upload the codes.
After uploading, the message Done uploading displays and no error on the bottom of the frame.
After uploading, use the button on the remote control to perform user action.
13. Click File > Save to save the file.
03
Operations