
User Manual


14
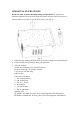
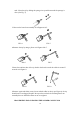
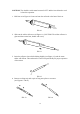
FIG-1 FIG-2
2. Release the vacuum switch only alter the solder on the tip has been removed,
otherwise the tip may clog.
3. Add solder to the joint of the component and allow the solder to melt completely
for improved desoldering.
4. Remove the solder collector and clean it after no more than 200 applications.
However, daily cleaning is strongly recommended.
5. Replace the cotton pad in the solder collector and the in-line filter when they
begin to turn yellow.
6. If there is insufficient vacuum, use the spring wire included to clean the tip and
also check he in-line filters.
7. Be sure that all filters are in place during operation or damage to the vacuum
pump may occur.
8. Follow the steps outlined in the OPERATIOING PROCEDURE section of this
manual if a new tip is to be installed.
COMMON CAUSES FOR TIP UNWETTING
1. Tip temperatures higher than 410℃ (770℉).
2. The tip working surfaces are not tinned while the iron idling.
3. Lack of flux in soldering, wicking, repair, and touch-up operations.
4. Wiping the tip on a high sulfur content, dirty or dry sponge.
5. Contact with organic substances such as plastic, resin, silicone, grease and other
chemicals.
6. Impurities in the solder and/or low tin content.
CARE OF TIPS
CAUTION: The soldering, desoldering irons can reach very high temperature. Be
sure to turn the unit off prior to carrying out any maintenance or trouble shooting
steps listed below!
IMPORATNT:
Remove the tip and clean after each moderate to heavy use or daily for light usage.
Remove any loose build up in the tip retaining assembly to prevent tip freezing.
Both solder, desolder tips supplied are iron clad copper and if used properly should
maintain optimum life.
1. Always tin the tip before returning it to the holder, turning off the station, or
storing it for long periods of time. Wipe the tip on a brass cleaner prior to use.
2. Keeping the iron set at high temperatures (more than 400℃ or 750℉) will