
User guide

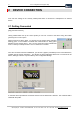
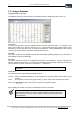
Table Of Contents
- Version: V2.7.1.2
- Contents
- 1 INSTALLATION and OVERVIEW
- 2DEVICE CONNECTION
- 3ENGINEERING RESOURCES
- 4MANAGING PROFILES
- 5MANAGING LOGGED DATA
- 6CONFIGURING DATALOGGERS
- 6.1 Introduction
- 6.2 DS-CPU3 Configuration
- 6.3 DS-4483 Configuration
- 6.3.1 DS-4483 Sensor Configuration Settings
- 6.3.1.1 Retrieving the Datalogger Configuration
- 6.3.1.2 Transferring Configuration Settings to the DS-4483
- 6.3.1.3 Loading a Template into iLink
- 6.3.1.4 Saving a Template to file
- 6.3.1.5 Printing Template Information
- 6.3.1.6 Sensor Selection
- 6.3.1.7 General Setup
- 6.3.1.8 I/O Setup
- 6.3.1.9 Scaling Setup
- 6.3.1.10 Timing/Misc Setup
- 6.3.1.11 Alarms Setup
- 6.3.1.12 Output Setup
- 6.3.1.13 Comment Setup
- 6.3.2 Telemetry Communications Control Configuration
- 6.3.4 New Sensor Wizard
- 6.3.1 DS-4483 Sensor Configuration Settings
- 7LOADING PROGRAMS
- 8DEVICE CALIBRATION
- APPENDIX A
- APPENDIX B
- APPENDIX C
- APPENDIX D
14 iLink - Configuration and Support Utility
iQuest (NZ) Ltd - PO Box 15169 HAMILTON Tel: +64 7 957 8160 - Fax: +64 7 957 8162 - Email: iquest@iquest.co.nz
2 DEVICE CONNECTION
iLink uses the settings in the currently loaded profile when a connection is attempted to an external
device.
2.1 Getting Connected
[File] [Connect to Device]
Having loaded and/or set up the correct profile you can now connect to the device using the toolbar
[Connect] icon or menu option.
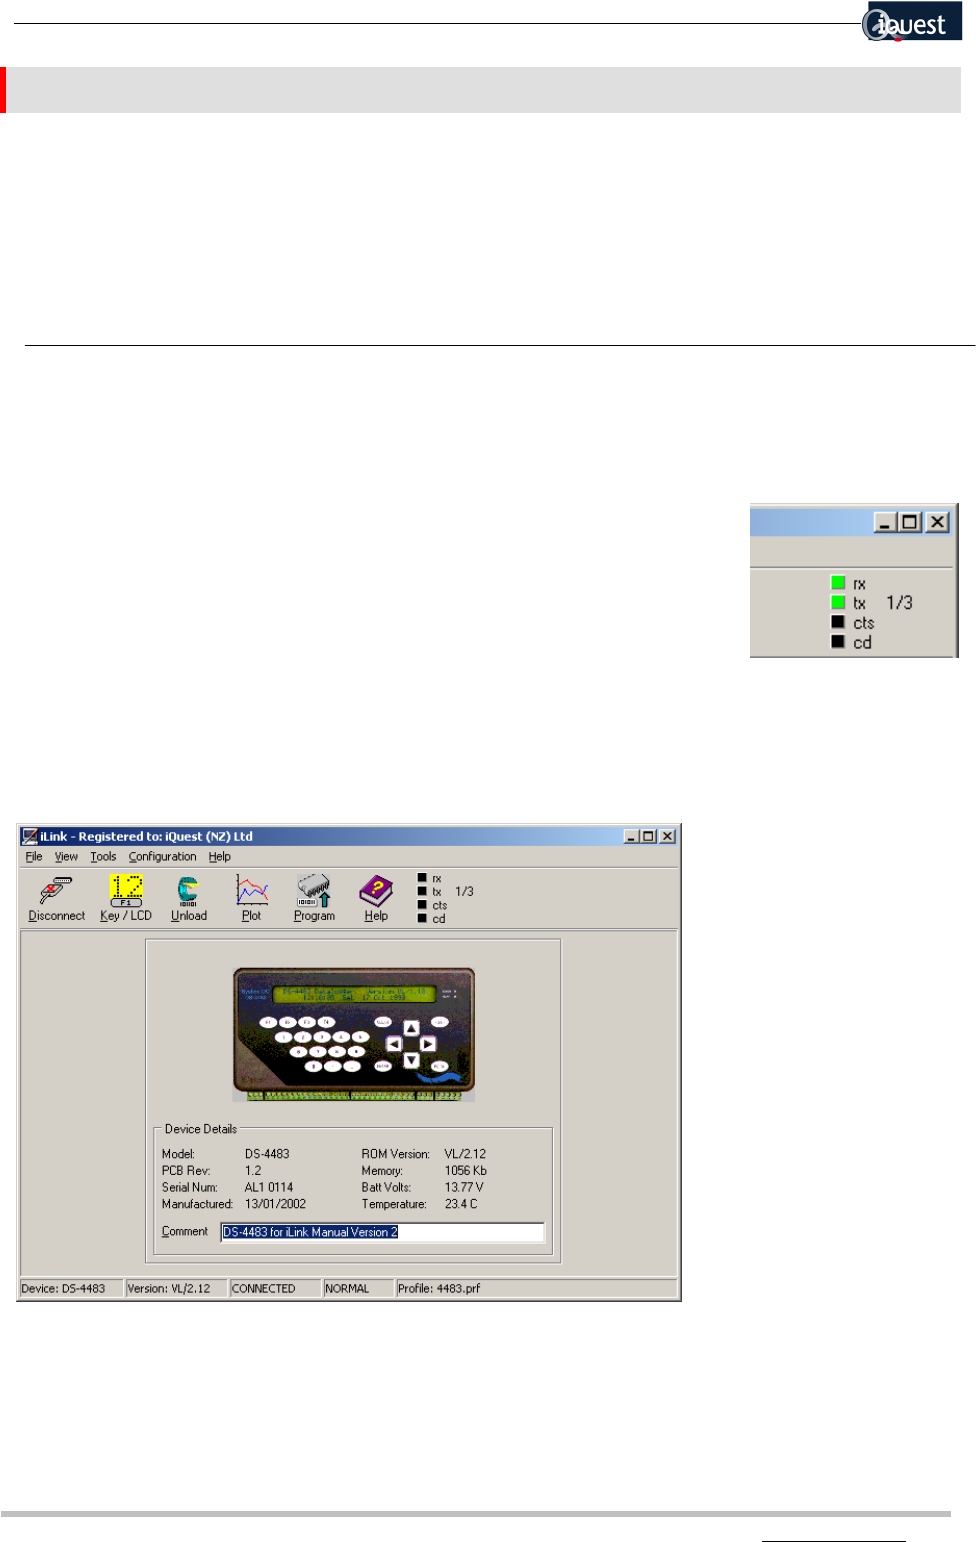
While connection is taking place, you will see the TX and Rx status indicators
flashing green on the Toolbar to indicate that communication is taking place
between the PC and the device. The 1/3 in the screen shot here indicates that
iLink is currently on attempt number 1 out of a maximum of 3 retries.
Once the connection has been established, you will see a graphic (if available) for the connected device,
together with the device information. This window is always displayed whilst iLink is connected to the
device, although at times it may be hidden by other configuration dialogs.
A comment field is provided for the device and this can be edited here if desired. The comment field is
saved with the profile.