
User's Manual


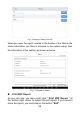

Table Of Contents
- TRADEMARKS
- COPYRIGHT
- DECLARATION
- OPERATION INSTRUCTIONS
- CAUTIONS!
- AFTERSALES-SERVICES
- 1GENERAL INTRODUCTION
- 2GETTING STARTED
- 3UPDATE
- 4DIAGNOSIS
- 5SPECIAL FUNCTIONS
- 6SETTINGS
- 7REPORT
- 8REMOTE ASSISTANCE
- 9FACTORY RESET
- 10FAQ
- Q1: FAILED TO GENERATE DIAGNOSIS REPORT
- Q2: HOW TO PRINT DIAGNOSIS REPORT
- Q3: FAILED TO EXTRACT FILES
- Q4: MAILBOX SUPPORTED
- Q5: HOW TO MAKE AN APPOINTMENT FOR REMOTE SUPPORT
- Q6: HOW TO GENERATE AND UPLOAD DIAGNOSTIC LOG FILE
- Q7: HOW TO SWITCH THE LANGUAGE TO NON-ENGLISH
- Q8: FAILED TO DIAGNOSE VEHICLE
- Q9: FAILED TO ACTIVATE OR REGISTER
- Q10: FAILED TO TURN ON WHEN CHARGING
- Q11: FAILED TO OPEN THE DIAGNOSIS APP
- Q12: FAILED UPDATE APP

60
Please follow the below steps to print your report▼
Step 1: Install an APP that can drive your target printer. Add
the printer and input the IP address of the printer in the APP, or
you can contact your dealer for help.
PS70PRO Smart Diagnosis System doesn’t provide the
printer driver software, please install a third part App on the
tablet if you need the print your diagnosis report.
Step 2: Back to the Android main menu, go to Settings ->
Printing-> Turn the printer on.
Step 3: Report-> Choose report-> Print PDF Report-> Print
Fig 7-4 Click to Print
Step 4: Click the top-left corner of the screen and choose the
printer you added before. Then click the button on the right to print.
Fig 7-5 Choose the printer
REPLAY
This function allows you to replay the living data recorded
during the diagnosis process.