
User Manual


Page 6 on 20
III –APPLICATION OPERATION
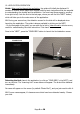
Guide: When you first launch the application, the guide will initially be displayed. It
consists of several simple pages with images outlining basic instructions that are essential
to understanding the product and its calibration. You must read these pages by scrolling
from right to left, from the first to the last page, where you will find the “NEST” button,
which will take you to the main screen of the application.
NB: During your second use, the detection screen for the bird will be displayed when
launching the application. The guide is always available by clicking on the NEST.
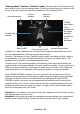
- On the last page of the guide, you can also find a link to video tutorials, which are very
useful for understanding the main instructions “first-hand”.
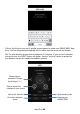
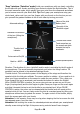
Once in the “NEST”, press the “FIND BIRD” button to launch the bird detection screen.
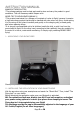
Detecting the bird: Launch the application (or click on “FIND BIRD” in the NEST), and
turn on the bird. The “scanning bird” screen above will appear. The bird will be detected
immediately.
Its name will appear on the screen (by default “Bionic Bird”), and you just need to click it.
NB: If more names appear, it’s because more birds have been detected nearby. Choose
your bird.