
U.M. Android v6.0.1
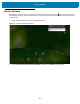
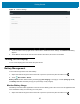
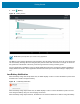
Table Of Contents
- Copyright
- Terms of Use
- Revision History
- Table of Contents
- About This Guide
- Getting Started
- Using the Tablet
- Introduction
- Google Mobile Services
- Home Screen
- Applications
- Suspend Mode
- Rebooting the ET5X
- Applications
- Wireless
- Data Capture
- Expansion Back
- RS507 Hands-Free Imager
- RS6000 Bluetooth Ring Scanner
- Scanning Considerations
- Imaging
- Bar Code Capture Using the SE4750 Expansion Back
- Bar Code Capture Using RS507 Hands-Free Imager
- Bar Code Capture Using RS6000 Bluetooth Scanner
- Bar Code Capture with DS36X8 Scanner
- Pairing the RS507/RS6000 Using SSI
- Connecting a DS3608 USB Scanner
- Pairing a DS3678 Bluetooth Scanner
- Accessories
- Maintenance and Troubleshooting
- Specifications
- Index

Getting Started
27
Battery Optimization
Observe the following battery saving tips:
• Set the screen to turn off after a short period of non-use. See Setting Screen Timeout Setting on page 28.
• Reduce screen brightness. See Setting the Screen Brightness on page 28.
• Turn off all wireless radios when not in use.
• Turn off automatic syncing for Email, Calendar, Contacts and other applications.
• Use the Power Control widget to check and control the status of radios, the screen brightness, and
syncing.
• Minimize use of applications that keep the ET5X from suspending, for example, music and video
applications.
Turning Off the Radios
To turn off all the radios:
1. Press the power button until the menu appears and touch Airplane mode.
or, swipe down from the status bar and touch Airplane mode.
2. The airplane icon appears in the Status bar indicating that all the radios are off.
Setting the Date and Time
The date and time is automatically synchronized using a NITZ server when the ET5X is connected to a Wi-Fi
network. To manually change the date and time:
1. Swipe down with two fingers from the status bar to open the quick access panel and then touch .
2. Touch Date & time.
3. Touch Automatic date & time to disable automatic date and time synchronization.
4. Touch Set date.
5. Touch < and > to select month.
6. Touch day.
7. Touch OK.
8. Touch Set time.
9. Touch and rotate the green circle to the current hour and then release.
10. Touch and rotate the green circle to the current minute and then release.
11. Touch AM or PM.
12. Touch OK.
13. Touch Automatic time zone to disable automatic time zone synchronization.
14. Touch Select time zone.
15. Select the current time zone from the list.
16. Touch .