
U.M. Android v5.1.1
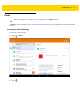


Table Of Contents
- Revision History
- Table of Contents
- About This Guide
- Chapter 1 Getting Started
- Chapter 2 Using the Tablet
- Introduction
- Google Mobile Services
- Home Screen
- Applications
- Suspend Mode
- Rebooting the ET5X
- Chapter 3 Applications
- Chapter 4 Wireless
- Chapter 5 Data Capture
- Chapter 6 Accessories
- Chapter 7 Maintenance and Troubleshooting
- Appendix A Specifications
- Index

Applications 3 - 19
4. Tap .
5. Enter a reply message, and then touch .
Email Setup
The Email application lets users access and manage multiple email accounts simultaneously in one convenient
location. To send and receive email messages through an ISP (Internet Service Provider) account, or to use the
ET5X to access corporate email through a VPN (Virtual Private Network), first set up an account.
•
IMAP (Internet Message Access Protocol) - This mail retrieval protocol is frequently used in large networks
and commercial and institutional settings. IMAP4 is the current standard.
•
POP (Post Office Protocol) - This protocol is supported by most ISPs and is currently more common among
consumer applications. POP3 is the current standard.
•
Exchange - This protocol connects to a Microsoft Exchange server.
Setting Up an IMAP or POP Account
When setting up an IMAP or POP account, the ET5X may be able to retrieve account settings automatically, or the
user may need to enter certain settings manually. If the Automatic configuration was unsuccessful, or if accessing
an account using a VPN server connection, contact the Internet Service Provider (ISP) or network administrator for
the following information and enter it manually:
•
Account type (IMAP4 or POP3)
•
Incoming and outgoing mail server names
•
Username and password
•
Domain name
•
Special security settings (if used).
To set up an email account:
1. Touch > Email.
2. If at least one account is already set up in Email, touch > Settings > Add account.
3. In the Email address text box, enter an email address.
4. Touch Next to allow Email to automatically attempt to configure the email account or touch MAUNUAL SETUP
to manually set up the email account.
5. Select the type of email account: Personal (POP3) or PERSONAL (IMAP). The Sign in screen appears.
6. In the Password text box, enter an associated password.
7. Touch Next. The Incoming server settings screen appears.
8. Configure the incoming server settings.
9. Touch Next. The Outgoing server settings screen appears.
10. Configure the outgoing server settings.
11. Touch Next. The Account options screen appears.