
U.M. Windows 10

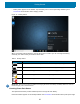
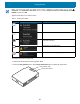


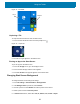
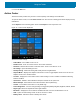
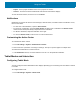
Table Of Contents
- Copyright
- Terms of Use
- Revision History
- About This Guide
- Getting Started
- Introduction
- Unpacking
- Features
- Getting Started
- Replacing the SIM Card
- Replacing the microSD Card
- Using the Tablet
- Wireless
- Data Capture
- Expansion Back
- RS507/RS507X Hands-Free Imager
- RS6000 Bluetooth Ring Scanner
- DS3678 Digital Scanner
- Imaging
- Scanning Considerations
- Scanning with the SE4710 Expansion Back
- Scanning with SE4750 Expansion Back
- Scanning with RS507/RS507X Hands-Free Imager
- Scanning with RS6000 Bluetooth Ring Scanner
- Scanning with the DS3608 USB Scanner or DS3678 Bluetooth Scanner
- Pairing Bluetooth Scanners
- Connecting a USB Scanner
- Accessories
- Maintenance and Troubleshooting
- Specifications
- Index

Getting Started
23
NOTE: The Power Pack Status icon appears when it issues a notification. To always display the icon, select >
Customize. In the Notification Area Icons window, check the Always show all icons and notifications on the
taskbar and then select OK.
Tap the Power Pack icon to see the status.
To view the Power Pack charge level:
1. Remove the Power Pack from the Expansion Back.
2. Press the Charge Status button. The Charge Status LEDs light to indicate the charge level.
Table 5 Power Pack Status
Icon Message Box Description
Power Pack is connected to the device.
Power Pack is removed from to the device.
Power Pack is connected to the device and the device is
in the dock changing.
Power Pack is fully discharged.
Power Pack is experiencing charging failure.
Charge Status Button
Charge Status LEDs