
User's Manual

40 Camera Software Chapter 2 Using Your XSLATE R12 Tablet
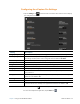
Editing a Photo in the xCapture Pro Application
TIP: You might want to copy one of your photos or take a photo with the tablet and use it to
see how the editing functions work.
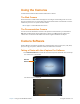
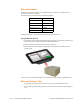
1. Tap the square Last P
icture Taken icon in the lower right corner of the screen to open the
directory where photos are stored.
The photo fills the screen.
2. To pick another picture to work on, swipe left or tap the G
allery icon and double-tap
a different one.
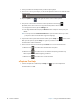
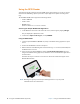
3. To modify a picture tap the Edi
t icon.
Several icons are displayed across the bottom of the screen.
They include rotate, flip, crop, contrast, and brightness features.
a. Practice with these icons to see how they work.
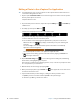
b. You can make contrast and brightness adjustments to your photo in this screen.
Wi
th these two icons, , they display a slider that you can press and drag left
and right.
You can also tap t
o one side of the white square in the slider to incrementally
adjust the contrast or brightness.
+–
You can also tap the on-screen – or + symbols
to adjust the slider.
c. When you are done editing, go back to the main menu by tapping the Arrow ic
on
in the upper left corner.
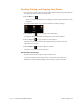
4. Tap the An
notate Image icon to access editing tools for adding text, handwriting,
brush strokes, and highlighting to your photo.
This screen also includes tools for drawing squares
, circles, or arrows on your photo as well
as a color palette for your annotations.
5. When finished, save the changes by tapping Sa
ve.
6. When you finish your photo, tap the Ar
row icon in the upper left corner of the screen
to return to the camera screen.
7. If you have NOT saved your final changes, a dialog box asks if you want to save.
a. Tap No
if you have not saved and then tap Save to keep the changes.
b. Otherwise, tap Ye
s to go back to the camera.