
User's Manual


54 Backing Up Your System Chapter 2 Using Your XSLATE R12 Tablet
Backing Up Your System
To protect against loss or accidental deletion, schedule backups to occur automatically on a
regular basis. Windows 10 has a backup tool called File History that you can use to configure
what you want to back up and to schedule backups on a regular basis. You can use File History
to make automatic backup copies of your files onto an external hard disk or network drive. It
works with folders and files stored in your Windows libraries, which include your Documents,
Music, Photos, and Videos folders as well your Favorites, Contacts, and files on your desktop.
File History performs continuous incremental backups that
allow you to save multiple versions
of a file or document. If you accidentally delete a file or need to revert to a previous version of
that file, you can easily step back through the various saved versions of that file in order to
locate the version that you need.
By default, File History makes hourly back-ups, but you can specify the frequency yourself,
ch
oosing anything from 10 minutes to a single daily back-up. You can also specify how long you
want File History to keep old versions of your files.
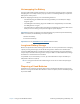
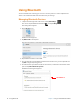
Scheduling Backups with File History
1. On the taskbar, tap the Search area in the left corner next to the Windows Start button.
2. Type backup in
the search box and then choose Save backup copies of your files with
File History from the search results.
3. The File History window opens and displays any external drives connected to your PC.
M
ake sure you have enough room for this backup. If you want to specify another location
for your backups, such as a network drive, tap Select Drive in the left panel.
4. Tap
Advanced Settings to modify the way that File History works.
– S
ave copies of files—the default setting for backups is hourly back-ups, but you can
vary this period from 10 minutes to 24 hours.
– Siz
e of offline cache—use this option to set a limit on the amount of disk space used
for backups.
– Keep saved versions—specify how long you want to keep old versions of your files.
5. Tap Tu
rn on.
6. To restore files, tap Rest
ore Personal Files in the File History window and follow the
instructions.
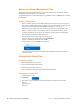
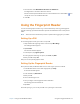
Restoring Your System
Windows 10 includes specialized tools for restoring your system in case of issues or system
failure. This section covers:
• Creating a recovery image to use to restore your computer if necessary
• Using the recovery image to boot your system and easily access a number of recovery and
troubleshooting tools that you can use if you encounter any issues with your Windows 10
installation
• Performing a system restoration