
User's Manual


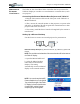
Table Of Contents
- User Guide
- About This User Guide
- Chapter 1 Getting Started with Your Motion Tablet PC
- Chapter 2 Hardware
- Chapter 3 Motion Tablet PC Software
- Motion Software
- You may order one of several different software packages with your Motion Tablet PC. The specific CDs you receive in your Tablet PC package depends upon what you order. Some software packages may require no CDs: in this case, all the necessar...
- Motion Operating System Recovery CDs: Description and Use
- Reinstalling the VirtualDrive Application (Optional)
- Motion Utilities and Drivers CD
- Motion Application Software
- Motion Software
- Chapter 4 Using Your Motion Tablet PC
- Initializing Microsoft Windows XP
- Starting and Stopping Your Tablet PC
- Opening the Motion Dashboard
- Conserving Power With Stand by or Hibernate Modes
- Operating the Motion Digitizer Pen
- Hints for Optimizing Your Display Window
- Making Best Use of the Tablet PC Input Panel
- Hints for Working with the Input Panel
- Eliminating Paper with Windows Journal
- Creating Forms and Editing Them in Windows Journal
- Have Sticky Notes Handy for Jotting Down Information
- Changing Screen Orientation
- Customizing Buttons
- Ambient Light Sensor (ALS)
- Setting “Fixed” Display Brightness: ALS Off
- Setting “Dynamic” Display Brightness: ALS On
- Turning the Display Backlight On and Off
- Keeping Track of Your Battery Power
- Creating New Power Schemes for Special Situations
- Charging the Battery
- Swapping the Battery
- Disposing of Used Batteries
- Battery and Power Management Hints
- Saving Battery Power with the Ambient Light Sensor
- Adding Memory to Improve System Performance
- Installing Optical Disk Drives
- Optical Disk Drive Software
- Mirroring or Extending Your Display
- Setting Up a Wireless Connection
- Configuring the Bluetooth Wireless Radio
- Microphone Design and Functions
- Setting Up the Universal Audio Jacks
- Setting Up Speech Recognition for Dictation
- Using Speech Recognition for Commands
- Creating a Screen- Resolution Scheme for an External Monitor or Similar Device
- Multimedia Applications
- Fingerprint Reader Security
- Setting Up Tablet PC Security
- Clearing Tablet PC Security
- Caring for Your Tablet PC and Its Accessories
- Traveling With Your Tablet PC
- Bluetooth Wireless Radio Set Up
- Bluetooth Operating Tips
- Setting Up the Fingerprint Reader
- About Passwords
- Setting Up a Windows Password
- Enrolling Your Password with OmniPass
- Enrolling a Fingerprint for OmniPass
- Capturing Your Fingerprint
- Setting Fingerprint Options
- Logging into Windows
- Windows Locations Where the Login User Authentication Appears
- Replacing Login Passwords on Other Accounts
- Logging Onto a Remembered Site
- When you return to a “Remembered Site,” depending on the settings for the site (described in Step 7, above), you may be prompted for a fingerprint/ master password authentication.
- Switching Users
- Other OmniPass Features
- Appendix A Troubleshooting and Support
- Appendix B Motion Tablet PC Specifications

Chapter 4
Using Your Motion Tablet PC
Motion Computing M1400 Tablet PC User Guide 43
4. Change the settings to the desired power configuration.
5. Tap Save As and enter a name for the new scheme.
6. Tap Apply.
NOTE: We recommend that you create new power schemes instead of overwriting
the default (Motion Computing Optimized) so you can reactivate it later.
Setting Up Max Battery Mode for Additional Power Savings
Max Battery mode prolongs the battery’s charge.
1. Right-click on the Power/Battery icon in the System Tray,
located in the lower right-hand corner of the display win-
dow. Tap Adjust Power Properties in the menu. This
opens Power Options Properties. Or, go to the Control
Panel and select Power options.
2. Under Power Schemes, tap the down arrow to display a list of
schemes.
3. Select Max Battery as your power scheme.
4. Tap apply.
CHARGING THE
BATTERY
When you connect the Tablet PC to AC power with the battery installed, the
system automatically charges the battery until it reaches full charge.
The Battery Status LED is amber while the battery is charging and changes
to green when fully charged.
WARNING: To avoid personal injury, if the battery is overheated, wait
until it cools to room temperature before recharging or replacing it with
another battery.
To charge the battery:
1. Plug the AC power adapter into the Tablet PC, then into a wall outlet
or power strip. (Completely recharging the battery may take up to
two hours, although the battery reaches an 80% charge in much less
time.)
2. Turn the Tablet PC over to see the battery gauge on the
bottom of the Tablet PC and press the button next to the
battery gauge. If all five LEDs are green, the battery is
fully charged. Or, move the pen over the Power/Battery
icon to display battery power resources. (The blue area on the battery
icon shrinks as the battery runs down.)
SWAPPING THE
B
ATTERY
You can swap the battery while the system is powered on, with or without
having the Tablet PC plugged into an AC power outlet.
1. If the Tablet PC is running, save all active files.
2. Go to Start>Turn Off Computer.