
Manual


76 SAVING AND EXPORTING
Saving recognition results
1. Choose Save As... in the File menu, or click the Export Results
button in the Manual OCR toolbar with Save as File selected in the
drop-down list.
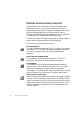
2. The Save As dialog box appears, as shown in its expanded form.
3. Select a folder location and a file type for your document. The special
OPD file type is the last in the file type list.
4. Type in a file name. Click the Advanced button to see all the saving
options. Select these as desired.
5. Click OK. The document is saved to disk as specified. If ‘Save and
Launch’ is selected, the exported file will appear in its target
application; that is the one associated with the selected file type in
your Windows system.
Select this to
automatically open
the saved file in its
target application.
Select this to have
the paragraph
styles from the Text
Editor exported
with the recognized
text.
Click Advanced
to open the lower
panel and Basic
to close it.
Choose from:
Create one file for all pages
Create one file per page
Create a new file at each blank page.