CopyCentre WorkCentre PostScript® User Guide 604P18089 WorkCentre Pro
Prepared by: The Document Company Xerox GKLS European Operations Bessemer Road Welwyn Garden City Hertfordshire AL7 1HE ENGLAND © 2005 by Fuji Xerox Co., Ltd. All rights reserved. Copyright protection claimed includes all forms and matters of copyrighted material and information now allowed by statutory or judicial law or hereinafter granted, including without limitations, material generated from the software programs which are displayed on the screen, such as icons, screen displays, looks etc.
Table of Contents 1 Checking the PostScript® Kit Contents .....................................7 2 Operation with Windows 95/98/Me............................................9 About the Software ............................................................................9 Bundled Software .............................................................................. 9 Hardware/Software Requirements .................................................... 9 Computer System .......................................
Operation with Windows 2000, Windows XP and Windows Server 2003 ............................................................. 27 About the Software ..........................................................................27 Bundled Software .............................................................................27 Hardware/Software Requirements ...................................................28 Computer System .............................................................................
7 Index........................................................................................
Xerox WorkCentre/WorkCentre Pro 123/128/133 PostScript® User Guide
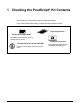
1 Checking the PostScript® Kit Contents The devices and components of the kit are described below. If any of the following are missing, contact the Xerox Welcome Center. License Agreement PostScript Program ROM This ROM makes PostScript printing possible with the printer. PostScript Logo Seal 1 PostScript Driver Library CD-ROM Includes the PostScript drivers and screen fonts. This seal accompanies printers compatible with PostScript.
1 Checking the PostScript® Kit Contents 8 Xerox WorkCentre/WorkCentre Pro 123/128/133 PostScript® User Guide
2 Operation with Windows 95/98/Me The following information can be found in this chapter: • About the Software – Bundled Software – Hardware/Software Requirements • Installing the Adobe PostScript Printer Driver – Installation Procedure • Printer Driver Properties – Configuration Tab Settings – Options Tab Settings – Output Settings Tab Settings • How to Use Help About the Software This section describes the software for Windows 95, Windows 98, and Windows Me included on the PostScript Driver Library CD-R
2 Operation with Windows 95/98/Me Computer System Personal computer in which the Windows 95/Windows 98/Windows Me OS can operate. Basic Software Windows 95, Windows 98 or Windows Me Installing the Adobe PostScript Printer Driver Install Adobe PostScript 4.5.3 printer driver onto Windows 95, Windows 98 or Windows Me by following the procedure below. This section describes how to install the printer driver for Windows 98, as an example.
2 Operation with Windows 95/98/Me 13. Read the End User License Agreement and click [Agree]. If you click [Disagree], see If you click Disagree in the License Agreement on page 11 for details. 14. Confirm that a printer has been added in the Printers window. This completes installation of the printer driver. Remove the CD-ROM from the drive. See Printer Driver Properties on page 11 to configure the printer. Store your CD-ROM in a safe place.
2 Operation with Windows 95/98/Me Configuration Tab Settings This section describes the settings of the Configuration tab. Select the function that you want to set in the Features List and change the settings in the Change box below. NOTE: You can restore defaults by clicking [Restore Defaults]. NOTE: The settings that can be selected vary depending on which options have been installed. Change these settings only after confirming that the option settings are complete. See Options Tab Settings on page 14.
2 Operation with Windows 95/98/Me NOTE: You cannot use staples in the following situations. – When anything other than Finisher Tray is selected for Output Destination in the Advanced tab. – When Job Offset is selected. Bypass Feed Orientation - Specifies the paper orientation when printing from the bypass tray. When feeding the short edge of the paper first, select [Landscape]. When feeding the long edge of the paper, select [Portrait].
2 Operation with Windows 95/98/Me Options Tab Settings This section describes the settings in the Options tab. Select the items in Hardware Options and change them in the Change box below. To use this function, it is necessary to make appropriate settings in this tab. NOTE: You can restore defaults by clicking [Restore Default]. Settings Hard Disk - Specifies whether or not the Hard Disk (optional) is installed. If it is, set to [Available].
2 Operation with Windows 95/98/Me Output Settings Tab Settings This section describes the settings in the Output Settings tab. NOTE: You can restore defaults by clicking [Restore Defaults]. Job Type You can specify the print function for Secure Print, Sample Print, and Delayed Print. Secure Print temporarily stores print jobs in the printer, and then prints them when print instructions are received from the control panel. Sample Print outputs only one copy when multiple copies are specified.
2 Operation with Windows 95/98/Me User ID - Displays the User ID for Job Type. The user ID displayed is the User ID specified on the Configuration tab. This option can only be selected when the setting on the Configuration tab has been completed. This is a display-only item and cannot be changed here. Password - Displays password for Secure Print password specified in the Configuration tab. Each digit that you enter appears as an asterisk (*).
3 Operation with Windows NT 4.0 The following information can be found in this chapter: • About the Software – Bundled Software – Hardware/Software Requirements • Installing the Adobe PostScript Printer Driver – Installation Procedure • Device Options and Print Settings – Device Settings Tab Settings – Configuration Tab Settings – Advanced Tab Settings – Output Settings Tab Settings • How to Use Help About the Software This section describes the software for Windows NT 4.
3 Operation with Windows NT 4.0 Hardware/Software Requirements The minimum system requirements for the Windows NT 4.0 printer driver are described below. Computer System Personal computer in which the Windows NT 4.0 OS can operate. Basic Software Windows NT Workstation 4.0/Windows NT Server 4.0 (Service Pack 6a or later) Installing the Adobe PostScript Printer Driver Install the Adobe PostScript 5.2.2 printer driver onto Windows NT by following the procedure below.
3 Operation with Windows NT 4.0 9. Select your printer model from the Printers list and click [Next]. 10. Enter the printer name, specify if you want to use the printer as the default printer, and click [Next]. 11. Select [Not shared] and click [Next]. We recommend that you install the driver on each computer with the procedure appropriate to the Operating System. 12. Specify whether or not to print a test page, then click [Finish]. Installation begins. 13.
3 Operation with Windows NT 4.0 To view the Advanced or Output Settings tabs, select the printer icon in the Printers window, then click Document Defaults on the File menu. NOTE: This guide uses the screens for WorkCentre M128 but the features of the other products are the same as WorkCentre M128. Device Settings Tab Settings This describes Installable Options in the Device Settings tab. To print correctly, it is necessary to make appropriate settings in this tab.
3 Operation with Windows NT 4.0 Switch Paper Size (8K/16K) - Indicate your language preference to enable the set of 8K and 16K paper size that is best suited to your needs. Configuration Tab Settings This section describes the settings of the Configuration tab. NOTE: You can restore defaults by clicking [Restore Defaults]. Settings Account Mode - Specifies if all users or only System Administrators can change authentication related settings. Detailed User Settings - Sets the authentication information.
3 Operation with Windows NT 4.0 – Display Previous User Details - Check the box to store the user details entered in the [Enter User Details] dialog-box, and display the details in the box as a default next time. – Hide User_ID(***) - Check the box to specify whether a user ID is to be displayed or hidden when it is entered. – Hide Account ID(***) - Check the box to specify whether an account ID is to be displayed or hidden when it is entered.
3 Operation with Windows NT 4.0 Settings Output Destination - Specifies the output destination. NOTE: The items that can be selected vary according to whether the optional side tray kit or finisher has been installed. Offset Stacking - The position of individual jobs or sets of copies are shifted to either side of the output tray to enable easy separation. Feed Separators from - Specifies the paper tray that transparency dividers are to be fed from.
3 Operation with Windows NT 4.0 Substitute Tray - Specifies what action to take when the paper for the print size is not loaded in the machine. Use Printer Settings - Use the printer settings. The settings can be confirmed on the control panel. Display Message - Display paper supply messages on the control panel. Printing is impossible until paper is supplied. Use Nearest Size (Adjust to Fit) - Selects the nearest paper size and automatically adjusts the image size as necessary.
3 Operation with Windows NT 4.0 Job Type You can specify the print function for Secure Print, Sample Print, and Delayed Print. Secure Print temporarily stores print jobs in the printer, and then prints them when print instructions are received from the control panel. Sample Print outputs only one copy when multiple copies are specified. If there is no problem, the remaining sets can be printed. Delayed Print temporarily stores print jobs in the printer, and then prints them at the scheduled time.
3 Operation with Windows NT 4.0 Settings Banner Sheet - Specifies whether or not to add a banner sheet to the printed output. When [Use Printer Settings] is selected, the printer settings are used. When [Print Start Page] is selected, outputs the banner sheet using the start-sheet. E-mail Job Confirmation - Specifies whether or not to use the Mail Notify feature to notify the end of the print job via e-mail. Default is [Off]. E-Mail Address - Specifies the e-mail address for the Mail Notify feature.
4 Operation with Windows 2000, Windows XP and Windows Server 2003 The following information can be found in this chapter: • About the Software – Bundled Software – Hardware/Software Requirements • Installing the Printer Driver – Installation Procedure • Device Options and Print Settings – Device Settings Tab Settings – Configuration Tab Settings – Advanced Options Dialog Box Settings – Output Settings Tab Settings • How to Use Help About the Software This section describes the software for Windows 2000, Wi
4 Operation with Windows 2000, Windows XP and Windows Server 2003 Hardware/Software Requirements The minimum system requirements for the Windows 2000, Windows XP and Windows Server 2003 printer driver are described below. Computer System Personal computer in which the Windows 2000/Windows XP/Windows Server 2003 OS can operate.
4 Operation with Windows 2000, Windows XP and Windows Server 2003 network in the TCP/IP(LPD) environment. Otherwise, select [Network printer]. The following is an example of a Local printer. NOTE: When you select [Local printer], deselect the “Automatically detect and install my Plug and Play printer” check box. NOTE: Specify the target printer in the Connect to printer dialog box if you selected [Network printer]. 6. Select the port you are using and click [Next].
4 Operation with Windows 2000, Windows XP and Windows Server 2003 Device Options and Print Settings This section describes printer specific settings for printer driver properties. For other items, refer to the Help. • Installable Options in the Device Settings Tab • Configuration Tab • Printer Specific Sections in Printer Features of the Advanced Options Dialog Box • Output Settings Tab NOTE: You can also refer to Help for explanations of these settings. See How to Use Help on page 37.
4 Operation with Windows 2000, Windows XP and Windows Server 2003 Device Settings Tab Settings This section describes Installable Options in the Device Settings tab. To print correctly, it is necessary to make the appropriate settings in this tab. Select the items in Installable Options and change the settings in the menu that appears on the right. Settings Memory - Specifies the amount of printer memory. Hard Disk - Specifies whether or not the Hard Disk (optional) is installed.
4 Operation with Windows 2000, Windows XP and Windows Server 2003 Configuration Tab Settings This section describes the settings of the Configuration tab. NOTE: You can restore defaults by clicking [Restore Defaults]. Settings Account Mode - Specifies if all users or only System Administrators can change authentication related settings. Detailed User Settings - Sets the authentication information. Use Default User Settings - The values set in this feature are used as the authentication parameters.
4 Operation with Windows 2000, Windows XP and Windows Server 2003 – Hide User_ID(***) - Check the box to specify whether an account ID is to be displayed or hidden when it is entered. – Hide Account ID(***) - Check the box to specify whether an account ID is to be displayed or hidden when it is entered. High Speed Printing - Set this feature to make improvements in print speed, when using an application that generates PostScript directly.
4 Operation with Windows 2000, Windows XP and Windows Server 2003 Settings Output Destination - Specifies the output destination. NOTE: The items that can be selected vary according to whether the optional side tray kit or finisher has been installed. Offset Stacking - The position of individual jobs or sets of copies are shifted to either side of the output tray to enable easy separation. Feed Separators from - Specifies the paper tray that transparency dividers are to be fed from.
4 Operation with Windows 2000, Windows XP and Windows Server 2003 Display Message - Display paper supply messages on the control panel. Printing is impossible until paper is supplied. Use Nearest Size (Adjust to Fit) - Selects the nearest paper size and automatically adjusts the image size as necessary. Use Nearest Size (No Zoom) - Selects the nearest paper size and prints the same size as the image.
4 Operation with Windows 2000, Windows XP and Windows Server 2003 Job Type You can specify the print function for Secure Print, Sample Print, and Delayed Print. Secure Print temporarily stores print jobs in the printer, and then prints them when print instructions are received from the control panel. Sample Print outputs only one copy when multiple copies are specified. If there is no problem, the remaining sets can be printed. If there is no problem, the remaining sets are printed.
4 Operation with Windows 2000, Windows XP and Windows Server 2003 Settings Banner Sheet - Specifies whether or not to add a banner sheet to the printed output. When [Use Printer Settings] is selected, the printer settings are used. When [Print Start Page] is selected, outputs the banner sheet using the start-sheet. E-mail Job Confirmation - Specifies whether or not to use the Mail Notify feature to notify the end of the print job via e-mail. Default is [Off].
4 Operation with Windows 2000, Windows XP and Windows Server 2003 38 Xerox WorkCentre/WorkCentre Pro 123/128/133 PostScript® User Guide
5 Operation on Macintosh Computers • About the Software – Bundled Software – Hardware/Software Requirements • Installing the Adobe PostScript Printer Driver – Installation Procedure (Mac OS 9.x or earlier) – Setting the Printer Driver (Mac OS 9.
5 Operation on Macintosh Computers Hardware/Software Requirements The minimum system requirements for the Macintosh printer driver and the utility are described below. Computer System • Macintosh • Power Macintosh Basic Software • For Adobe PostScript 8.7 - Mac OS 8.5 and 8.5.1 • For Adobe PostScript 8.8 - Mac OS 8.6 through 9.2.2 • For PPD Installer - Mac OS X 10.2 NOTE: When using Mac OS X, launch the Classic environment to run the applications.
5 Operation on Macintosh Computers 8. When the dialog box showing installation has completed appears, click [Restart] or [Quit]. This completes the installation. Proceed to Setting the Printer Driver (Mac OS 9.x or earlier) on page 41 to continue. Setting the Printer Driver (Mac OS 9.x or earlier) When you finish installing the Adobe PostScript printer driver, set the PostScript Printer Description (PPD) file for this machine to the printer driver.
5 Operation on Macintosh Computers (2) Select your printer model in the list, then click [Select]. The PPD file for this machine is set. 5. Click [Configure] to set the options. See Options on page 45 for details about the options. NOTE: You can change the print settings after you install the printer driver. NOTE: To use the options, it is necessary to set Configure. Always set this according to the configuration of your machine.
5 Operation on Macintosh Computers Installation Procedure (Mac OS X) Install the PostScript Printer Description (PPD) file for the Mac OS X into the Mac OS X v10.2.x Macintosh. This section describes how to install the PPD file on a Mac OS X v10.2.4, as an example. NOTE: The printer driver does not need to be installed on the Mac OS X. It uses the Adobe PostScript driver that is provided with the Operating System. NOTE: This guide uses the screens for WorkCentre M128 as examples. Installation Procedure 1.
5 Operation on Macintosh Computers 2. Check that the machine’s port is set to Enable. – When using AppleTalk, set the EtherTalk port to Enable. – When using IP Printing, set the LPD port to Enable. You can check the EtherTalk and LPD settings in the System Settings List. See the User Guide for details about how to print the “System Settings List.” 3. Start [Print Center]. NOTE: You can find Print Center in the Utilities folder in the Applications folder. 4.
5 Operation on Macintosh Computers When using IP Printing 1. Select [IP Printing] from the menu, and enter the IP address for the printer being used in Printer’s Address. 2. Select [Xerox] from Printer Model, and select the printer to be used. 3. Click [Add]. This completes the addition of a printer. Printer options 1. Click [Printers] on the Print Center menu bar. 2. Select Show Info. 3. Select [Installable Options], and select the options that are installed on the printer.
5 Operation on Macintosh Computers 1. Select the printer using the Chooser and click [Setup]. The Current Printer Description File (PPD) Selected dialog box appears. 2. Click [Configure]. The Installable Options list appears. 3. Set the option menu items in Installable Options, and click [OK]. For Mac OS X This section describes Installable Options for Mac OS X. 1. Click [Printers] on the Print Center menu bar, and select [Show Info]. 2.
5 Operation on Macintosh Computers Settings Memory - Specifies the amount of printer memory. Hard Disk - Click the checkbox on or off to indicate whether or not a Hard Disk is installed on the machine. Tray Options - Sets the tray installed on the machine. When [2-Tray Unit] is selected, Tray 3 and Tray 4 can be used. When [2-Tray Unit (High Capacity)] is selected, Tray 3 and Tray 4 can be used as the high capacity feeder. NOTE: This item is displayed in Mac OS X only.
5 Operation on Macintosh Computers 3. Specify the functions that you want to set. Settings This section describes the settings in the Printer Specific Options list. The settings that can be selected vary depending on which options have been installed. Make these settings after specifying the installed options in Configure. See Printer Specific Options Settings on page 45. Output Destination - Specifies the output destination.
5 Operation on Macintosh Computers Paper Type (Bypass Tray) - Specifies a paper type for the transparency divider. Print Mode - Specifies whether to give priority to the print speed or the image quality. Halftone - Specifies the halftone settings for printing. Select [Fine Dots] for the small size halftone dot commonly used in PostScript. Select [Thick Dots] for coarser dots than the Fine Dots setting. Select [Type 3] for the same halftone setting that is used in PCL.
5 Operation on Macintosh Computers 2. Double-click the [WorkCentre-PS] icon followed by the Screen Font folder and then the [PS3 Fonts Installer]. 3. When the Installer window appears, click [Continue]. The license agreement dialog appears. 4. Read through the agreement carefully and if you have no objections to it, click [Accept]. The PS3FontsInstaller dialog box appears. 5. You may select [Easy Install] or [Custom Install]. Easy Install - installs all the fonts provided in the Screen Font folder.
6 Appendix Cautions and Limitations Troubleshooting See the User Guide for error codes and error messages displayed on the control panel. See the User Guide for how to deal with paper jams. Print operation The printer driver allows you to make selections to print on custom paper and postcards using duplex and/or the stapling feature to the Finisher Tray. However, these features cannot be used when printing on custom paper or postcards. You can feed custom paper from the bypass tray only.
6 Appendix 52 Xerox CopyCentre/WorkCentre/WorkCentre Pro 123/128/133 PostScript® User Guide
7 Index A S Adobe Acrobat Reader 39 Adobe PostScript Printer Driver (ver. 5.2.2) 17 Adobe PostScript Printer Driver (ver. 8.5.1, 8.7.0, and 8.8) 39 Adobe PostScript Printer Driver (ver.4.5.3) 9 Adobe Type Manager 9, 17, 39 Advanced Options Dialog Box 33 Advanced Tab 22 Screen Fonts 39 C W Windows 2000 27 Windows 95 10 Windows 98 10 Windows Me 10 Windows NT 4.