
Manual


Adjusting Copying Options
WorkCentre® C2424 Copier-Printer
3-8
Image Adjustments
This section includes:
■ "Setting the Original Size" on page 3-8
■ "Reducing or Enlarging the Image" on page 3-8
■ "Lightening or Darkening the Image" on page 3-9
■ "Adjusting the Contrast of the Image" on page 3-9
■ "Automatically Suppressing Background Variations" on page 3-9
■ "Adjusting the Color Balance" on page 3-10
■ “Erasing the Edges of Copy Documents” on page 3-10
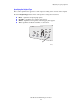
Setting the Original Size
You can specify the size of the original so that the correct area is copied. To do this:
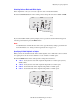
1. On the control panel, press the Copy button.
2. In the menu, select Original Size, then press the Enter button.
Note
You can press the Original Size shortcut button on the control panel to skip Steps 1
and 2.
3. Select one of the preset sizes or Tray/Auto (the factory default), then press the Enter
button.
■ For copies from the document glass, Tray/Auto works with the Book Copy, Auto
Reduce/Enlarge, Poster 4x4, Edge Erase, and Auto Center options to pre-scan each
original to determine its size. Otherwise, the copy area is the same size as the copy
paper.
■ For copies from the document feeder, Tray/Auto sets the copied area to the same size
as the copy paper.
Reducing or Enlarging the Image
You can reduce the image down to 25% of its original size or enlarge it up to 400% of its
original size. If desired, the images can be enlarged and printed on sixteen pages so you can
assemble them into a poster.
To reduce or enlarge the image:
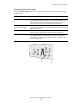
1. On the control panel, press the Copy button.
2. In the menu, select Reduce/Enlarge, then press the Enter button.
Note
You can press the Reduce/Enlarge shortcut button on the control panel to skip Steps 1
and 2.