
User guide

Exposure Adjustments
Xerox WorkCentre C226 User Guide 2-25
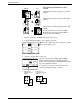
4. Touch the [OK] key.
Make selections and proceed as in steps 3 to 7 on pages 2-22 and 2-23.
Exposure Adjustments
This copier has seven exposure modes to choose from: AUTO, TEXT/PRTD. PHOTO,
TEXT/PHOTO, TEXT, PHOTO, PRINTED PHOTO and MAP.
[AUTO]
This is the standard initial setting for this copier. When a black and white copy is made,
the exposure is automatically adjusted to obtain the best image quality. When a full-
colour copy is made, the image is adjusted in the same way as when [TEXT/
PRTD.PHOTO] (initial settings) is selected.
[TEXT/PRTD. PHOTO, TEXT/PHOTO, TEXT, PHOTO, PRINTED PHOTO and MAP.]
The exposure can be manually adjusted in 9 steps.
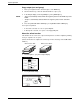
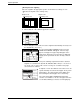
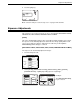
1. Touch the Exposure tab.
2. Select [AUTO], [TEXT/PRTD. PHOTO], [TEXT/PHOTO], [TEXT], [PHOTO],
[PRINTED PHOTO], or [MAP] depending upon the original type.
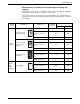
Binding
Change
OK
Pa
C
A
OK
Text/
Prtd.Photo
Printed
Photo
Text/Photo
Text
Photo
Map
Auto
Ready To Copy.
Copy
Of Copy
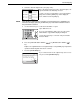
Colour Tone
Enhancement
Manual
Text/
Prtd.Photo
Text
Printed
Photo
Auto
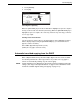
Example:
The [TEXT/PRTD.PHOTO
]
key is selected.