
Instruction Manual


2-4 Installing and Configuring Printer Drivers in OS X
Configuring Installable Options for Printers
Depending on the Xerox system, additional options are available for configuration, such as a Finisher or
Hole Punch unit.
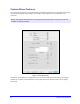
To configure installable options in OS X:
1 Open the Printer Setup Utility.
2 Choose the Xerox System to configure.
3 Click the Show Info icon.
4 Choose Installable Options from the pop-up menu.
5 Choose other options in the dialog, such as Finisher/Output Tray options, from the pop-up menu.
6 When you are finished, click Apply Changes and close the Printer Setup Utility.
Removing Custom Printer Drivers
You remove OS X drivers by manually deleting the files from the workstation. Always remove existing
printer drivers prior to installing new/updated versions.
To remove Xerox printer drivers in OS X:
1 Open the Printer Setup Utility. The Printers List appears.
2 Select the Xerox system that you want to remove and click the Delete icon.
3 Exit the Printer Setup Utility.
4 Locate the /Library/printers/Xerox/PDEs folder on the Macintosh hard drive and remove the plug-in
files (.plugin) associated with the Xerox system being removed.
5 Empty the Trash.
NOTE: Plug-ins for Xerox printers have file names such as WorkCentre<model number>.plugin,
and XeroxWatermark.plugin. If you are not removing all Xerox printers, be careful not to remove
plug-ins needed by an active printer.