
Installation Guide
Installation
Xerox® Smart Card
Installation Guide
16
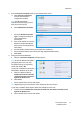
6. If you wish to validate the DC certificate retrieved as part of the user authentication process
against the one stored during installation, check the box for Validate domain controller
certificate returned by the domain controller server matches the domain controller certificate
stored on the device.
Note: To change the Domain Controller search order, select the controller and use the up and
down arrows on the right side of the screen to promote or demote the controller order.
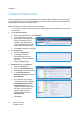
7. Load the DC root and intermediate certificates and the OCSP root and intermediate certificates.
a. Select Security then Trusted Certificate Authorities Page option or select Trusted
Certificate Authorities from the menu.
b. At the Trusted Certificates Authorities screen, select Add.
c. Browse to the previously retrieved certificates and add them one at a time.
d. Select the certificate then select the Upload Certificate Authority button to add each one.
e. Repeat the process until all certificates are installed.
f. Select Close.
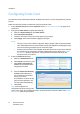
8. Check the Proxy Server details are configured.
a. If required by your network environment, ensure the Proxy Server details have been
configured.
b. Select the Properties tab, then Connectivity, Protocols and Proxy Server and enter the
details.
c. Select Apply.
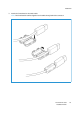
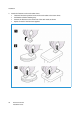
The Smart Card settings are now configured. You are now ready to install the Smart Card hardware
using the instructions starting on the next page.