
Operation Manual


Installation and Setup
WorkCentre 7120/7125 Multifunction Printer
User Guide
38
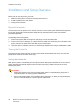
Installation and Setup Overview
Before you can use the printer, you must:
1. Make sure the printer is connected correctly and turned on.
2. Install software drivers and utilities.
3. Configure the software.
Physical Connection
You can connect to the printer over a network. Connect to a functioning and dedicated fax telephone
line for the optional fax. Communication cables are not included with the printer and must be
purchased separately.
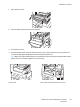
To physically connect the printer:
1. Connect the power cable to the printer, and plug it into an electrical outlet.
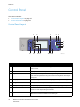
2. Connect one end of a Category 5, or better, Ethernet cable to the Ethernet port in the back of the
printer. Connect the other end of the cable to your network port.
3. If the fax option is installed, connect to a functioning telephone line using a standard RJ11 cable.
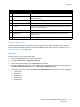
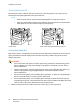
Turning the Printer On
The printer has two power switches, the main power switch located behind the front cover, and the
power switch visible on the lower center tray.
Turning Main Power On
Main printer power is controlled by the main power switch. Main power should be left on for normal
printer operation and should only be turned off when connecting a cable to the printer or when
cleaning the printer.
CAUTIONS:
• Switch main power on first using the main power switch to avoid damaging the printer’s
internal hard drive or causing a printer malfunction.
• Do not switch main power off immediately after switching it on. Doing so may damage the
printer’s internal hard drive or cause a printer malfunction.