
Operation Manual


Printing
WorkCentre 7120/7125 Multifunction Printer
User Guide
90
Printing Special Job Types
You can assign the following special job types from either the Windows or Macintosh printer drivers.
• Printing and Deleting Secure Print Jobs on page 90
• Printing a Sample Set on page 91
• Delayed Printing on page 91
• Charge Print on page 92
• Saving a Print Job to the Printer on page 92
• Sending a Print Job to a Fax Machine on page 93
Printing and Deleting Secure Print Jobs
The Secure Print job type allows you to print a job after you select your user identification and enter
your passcode at the printer control panel.
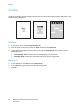
Windows
1. In the printer driver, click Paper/Output, click the Job Type menu, then click Secure Print.
2. In the Secure Print window, type and confirm a 1- to 12-digit passcode.
3. Click OK.
Macintosh
1. In the print dialog box, click Copies & Pages, then click Xerox Features.
2. Click the Job Type menu, then click Secure Print.
3. Type and confirm a 1- to 12-digit passcode.
4. Click OK.
Printing or Deleting Secure Print Jobs at the Printer
CAUTION: Once deleted, a job cannot be restored.
1. On the control panel, press the Job Status button.
2. Touch the Secure Print Jobs & More tab, then touch Secure Print.
3. Touch your user identification in the list, then touch Job List.
4. Enter the passcode using the alphanumeric keypad, then touch Confirm.
5. Touch the document in the job list. If desired, enter the print quantity using the alphanumeric keypad.
6. Touch Print.
7. To delete the job, touch Delete.