Version 1.
©2014 Xerox Corporation. All rights reserved. Xerox® and Xerox and Design® are trademarks of Xerox Corporation in the United States and/or other countries. Version 1.
WorkCentre® 5945/5955 Contents 1 Safety and Regulations Notices and Safety . . . . . . . . . . . . . . . . . . . . . . . . . . . . . . . . . . . . . . . . . . . . . . . . . . . . . . . . . . . . . . . . . 7 Safety Labels and Symbols . . . . . . . . . . . . . . . . . . . . . . . . . . . . . . . . . . . . . . . . . . . . . . . . . . . . . . . . . . 7 Operational Safety Information . . . . . . . . . . . . . . . . . . . . . . . . . . . . . . . . . . . . . . . . . . . . . . . . . . . . . 8 Electrical Supply .
WorkCentre® 5945/5955 Powering the Device On . . . . . . . . . . . . . . . . . . . . . . . . . . . . . . . . . . . . . . . . . . . . . . . . . . . . . . Powering the Device Off . . . . . . . . . . . . . . . . . . . . . . . . . . . . . . . . . . . . . . . . . . . . . . . . . . . . . . Using the Energy Saver Option . . . . . . . . . . . . . . . . . . . . . . . . . . . . . . . . . . . . . . . . . . . . . . . . Loading Documents . . . . . . . . . . . . . . . . . . . . . . . . . . . . . . . . . . . . . . . . .
WorkCentre® 5945/5955 Making Copies into a Booklet . . . . . . . . . . . . . . . . . . . . . . . . . . . . . . . . . . . . . . . . . . . . . . . . 106 Special Pages . . . . . . . . . . . . . . . . . . . . . . . . . . . . . . . . . . . . . . . . . . . . . . . . . . . . . . . . . . . . . . . 107 Annotations. . . . . . . . . . . . . . . . . . . . . . . . . . . . . . . . . . . . . . . . . . . . . . . . . . . . . . . . . . . . . . . . . 114 Using Transparency Separators within Copy Sets . . . . . . . . . . . .
WorkCentre® 5945/5955 Scan To Feature . . . . . . . . . . . . . . . . . . . . . . . . . . . . . . . . . . . . . . . . . . . . . . . . . . . . . . . . . . . . . 286 Scanning to a USB Memory Stick using the Scan To Feature . . . . . . . . . . . . . . . . . . . 288 Single-Touch Scan . . . . . . . . . . . . . . . . . . . . . . . . . . . . . . . . . . . . . . . . . . . . . . . . . . . . . . . . . . . . . . . . 288 Scanning a Document to your Computer or Network using Single-Touch Scan . . .
WorkCentre® 5945/5955 Layout Adjustment . . . . . . . . . . . . . . . . . . . . . . . . . . . . . . . . . . . . . . . . . . . . . . . . . . . . . . . . . . . . . . . 539 Setting the Original Orientation for E-mails . . . . . . . . . . . . . . . . . . . . . . . . . . . . . . . . . . . 539 Specifying the Size of the Original to be E-mailed. . . . . . . . . . . . . . . . . . . . . . . . . . . . . . 541 Erasing Edges from E-mail Attachments . . . . . . . . . . . . . . . . . . . . . . . . . . . . . . . . . . .
WorkCentre® 5945/5955 11 Machine and Job Status Job Status. . . . . . . . . . . . . . . . . . . . . . . . . . . . . . . . . . . . . . . . . . . . . . . . . . . . . . . . . . . . . . . . . . . . . . . . 657 Active Jobs. . . . . . . . . . . . . . . . . . . . . . . . . . . . . . . . . . . . . . . . . . . . . . . . . . . . . . . . . . . . . . . . . . 657 Accessing Your Personal Secure Jobs List using the Job Status Menu . . . . . . . . . . . . 663 Viewing Completed Jobs using the Job Status Menu . . . . . . .
Safety and Regulations 1 Notices and Safety Please read the following instructions carefully before operating the device. Refer to them as needed to ensure the continued safe operation of your device. Your Xerox device and supplies have been designed and tested to meet strict safety requirements. These include safety agency evaluation and certification, and compliance with electromagnetic regulations and established environmental standards.
Safety and Regulations WorkCentre® 5945/5955 Operational Safety Information Your Xerox device and supplies have been designed and tested to meet strict safety requirements. These include safety agency examination, approval, and compliance with established environmental standards. To ensure the continued safe operation of your Xerox device, follow the safety guidelines on this website at all times.
Safety and Regulations WorkCentre® 5945/5955 Device Safety This device has been designed to provide operator access to safe areas only. Operator access to hazardous areas is restricted using covers or guards, which require a tool to enable removal. Never remove the covers or guards that protect hazardous areas. Device Safety - Do These • Always follow all warnings and instructions that are marked on or supplied with the device.
Safety and Regulations WorkCentre® 5945/5955 Emergency Power Off If any of the following conditions occur, turn off the device immediately switch off the device and disconnect the power cable(s) from the electrical outlet(s). Contact an authorized Xerox Service Representative to correct the problem: • The device emits unusual odors or makes unusual noises. • The power cable is damaged or frayed. • A wall panel circuit breaker, fuse, or other safety device has been tripped.
WorkCentre® 5945/5955 Safety and Regulations Product Safety Certification This product is certified by the following Agency using the Safety standards listed below. Agency Standard UL60950-1 (2007) 2nd Edition Underwriters Laboratories Inc. (US / Canada) CSA 22.2 no. 60950-1-07 2nd Edition IEC60950-1:2005, (2nd Edition) +A1:2009 Underwriters Laboratories Inc.
Safety and Regulations WorkCentre® 5945/5955 Any changes or modifications not expressly approved by Xerox could void the user's authority to operate the device. ! WARNING Shielded cables must be used with this equipment to maintain compliance with FCC regulations. Canada (Regulations) This Class A digital apparatus complies with Canadian ICES-003. Cet appareil numérique de la classe A est conforme à la norme NMB-003 du Canada. European Union ! WARNING This is a Class A product.
Safety and Regulations WorkCentre® 5945/5955 In scope products are Household and Office equipment that meet the following criteria. • Standard monochrome format products with a maximum speed less than 64 A4 images per minute. • Standard color format products with a maximum speed less than 51 A4 images per minute. Environmental Benefits of Duplex Printing Most Xerox products have duplex printing, also known as 2-sided printing, capability.
Safety and Regulations WorkCentre® 5945/5955 Copy Regulations United States Congress, by statute, has forbidden the reproduction of the following subjects under certain circumstances. Penalties of fine or imprisonment may be imposed on those guilty of making such reproductions. 1.
Safety and Regulations WorkCentre® 5945/5955 • Earnings or Income • Court Record • Physical or mental condition • Dependency Status • Previous military service Exception: United States military discharge certificates may be photographed. 10. Badges, Identification Cards, Passes, or Insignia carried by military personnel, or by members of the various Federal Departments, such as FBI, Treasure, etc. (Unless photograph is ordered by the head of such department or bureau.
Safety and Regulations WorkCentre® 5945/5955 Other Countries Copying certain documents may be illegal in your country.
Safety and Regulations WorkCentre® 5945/5955 exceed five (5.0). To be certain of the number of devices that may be connected to a line, as determined by the total RENs, contact the local Telephone Company. For products approved after July 23, 2001, the REN for this device is part of the device identifier that has the format US:AAAEQ##TXXXX. The digits represented by ## are the REN without a decimal point (e.g., 03 is a REN of 0.3). For earlier products, the REN is separately shown on the label.
Safety and Regulations WorkCentre® 5945/5955 Before installing this device, users must make sure that it is permissible to be connected to the facilities of the local telecommunications company. The device must also be installed using an acceptable method of connection. The customer should be aware that compliance with the above conditions may not prevent degradation of service in some situations. Repairs to certified equipment should be coordinated by a representative designated by the supplier.
Safety and Regulations WorkCentre® 5945/5955 South Africa This modem must be used in conjunction with an approved surge protection device. New Zealand The grant of a Telepermit for any item of terminal equipment indicates only that Telecom has accepted that the item complies with minimum conditions for connection to its network.
Safety and Regulations WorkCentre® 5945/5955 Product Recycling and Disposal USA and Canada Xerox operates a worldwide equipment takeback and reuse/recycle program. Contact your Xerox sales representative (1-800-ASK-XEROX) to determine whether this Xerox device is part of the program. For more information about Xerox environmental programs, visit www.xerox.com/ environment.html.
Safety and Regulations WorkCentre® 5945/5955 Energy Program Compliance All Markets ENERGY STAR The Xerox WorkCentre® 5945 / 5955 is ENERGY STAR® qualified under the ENERGY STAR Program Requirements for Imaging Equipment. The ENERGY STAR and ENERGY STAR MARK are registered United States trademarks. The ENERGY STAR Office Equipment Program is a team effort between U.S.
Safety and Regulations WorkCentre® 5945/5955 Canada Environmental Choice Certified to Office Machines CCD-035 This product is certified to Environmental Choice® standard for Office Machines, meeting all requirements for reduced environmental impact. As part of achieving certification, Xerox Corporation has proven this product meets the standard’s criteria for energy efficiency.
Safety and Regulations WorkCentre® 5945/5955 Material Safety Data For Material Safety Data information regarding your machine see the support information for your area. North American material safety data can be found here: www.xerox.com/msds. European Union material safety data can be found here: www.xerox.com/environment_europe. For the Customer Support Center phone numbers, go to www.xerox.com/office/worldcontacts.
Safety and Regulations 24 WorkCentre® 5945/5955 User Guide
Getting Started 2 Identifying the Parts of Your Device Your new device is not simply a conventional copier, it is a digital device capable of copying, faxing, printing and scanning, dependent on your model and configuration. All features and functions described within the User Guide relate to a fully configured WorkCentre and may not be available on your device.
Getting Started WorkCentre® 5945/5955 5. Paper Tray 3: This tray is standard on all models. The tray can be used for media size A4 LEF (8.5 x 11” LEF). 6. Paper Tray 4: This tray is standard on all models. The tray can be used for media size A4 LEF (8.5 x 11” LEF). 7. Bypass Tray: Used for non-standard printing media from A6 SEF (2.8 x 4.3" SEF) to A3 (11 x 17"). 8. Offset Catch Tray: The optional offset catch tray delivers output collated or uncollated.
Getting Started WorkCentre® 5945/5955 Services and Options Identifying the WorkCentre 5945 Standard and Optional Services There are a number of services and options available for use with your device. Many services and options are provided as standard and simply require enabling, or configuring with additional third party hardware. Additional optional functions and kits are also available and can be purchased and installed. The options available are dependent on your device model.
Getting Started WorkCentre® 5945/5955 • New Office Finisher Booklet Maker 3 Hole Punch Kit enables the New Office Finisher Booklet Maker to make 3 hole punches. Other hole punch kits are available for this finisher. Only one hole punch kit can be fitted at one time. • New Office Finisher Booklet Maker 4 Hole Punch Kit enables the New Office Finisher Booklet Maker to make 4 hole punches. Other hole punch kits are available for this finisher. Only one hole punch kit can be fitted at one time.
Getting Started WorkCentre® 5945/5955 Identifying the WorkCentre 5955 Standard and Optional Services There are a number of services and options available for use with your device. Many services and options are provided as standard and simply require enabling, or configuring with additional third party hardware. Additional optional functions and kits are also available and can be purchased and installed. The options available are dependent on your device model.
Getting Started WorkCentre® 5945/5955 • New Office Finisher Booklet Maker 4 Hole Punch Kit enables the New Office Finisher Booklet Maker to make 4 hole punches. Other hole punch kits are available for this finisher. Only one hole punch kit can be fitted at one time. • New Office Finisher Booklet Maker Swedish 4 Hole Punch Kit enables the New Office Finisher Booklet Maker to make 4 hole punches. Other hole punch kits are available for this finisher. Only one hole punch kit can be fitted at one time.
Getting Started WorkCentre® 5945/5955 Describing the Finishing Devices Office Finisher • Holds up to 250 sheets of paper in the Top Tray, and up to 2000 sheets in the Stacker Tray. • Paper weight 60 to 216 gsm (16 to 57 lb). • The Office Finisher can collate, stack, staple and hole punch (if available) your output depending on the features selected. It staples between 2 and 50 sheets of 80 gsm (20 lb) paper, less if using heavyweight paper or tabs.
Getting Started WorkCentre® 5945/5955 5. Touch Screen: Use to select programing features and display fault clearance procedures and general device information. 6. Log In/Out: Use to enter log in details, and to log out. 7. Help: Displays help messages for device features. 8. Numeric Keypad: Use to enter alphanumeric characters. 9. Dial Pause: Use to insert a pause when dialing a fax number. 10. ‘C’ Cancel Entry: Cancels the previous entry made on the Numeric Keypad. 11.
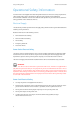
Getting Started WorkCentre® 5945/5955 Power On and Off Powering the Device On 1. Ensure that your device is connected to a suitable power supply and that the power cord is fully plugged in to the electrical inlet of the device. 2. Press the Power button. The entire powering on process (to power on all installed options) takes less than 3 minutes 50 seconds.
Getting Started WorkCentre® 5945/5955 More Information Using the Energy Saver Option Using the Energy Saver Option Energy Saver ends the current session and keeps the device running on low power. When in Energy Saver Mode, press the Power button to wake up the device. 1. Press the Power button on the control panel. 2. Select the Energy Saver button on the touch screen. 3. Select the Energy Saver button again to confirm that the device should go into the Energy Saver state.
Getting Started WorkCentre® 5945/5955 Loading Documents Original documents can be loaded either into the document feeder or onto the document glass. 1. Load your documents face up in the document feeder input tray. Adjust the guide to just touch the documents. Or Lift up the document feeder. Place the document face down onto the document glass and register it to the arrow at the top left corner. Close the document feeder.
Getting Started WorkCentre® 5945/5955 Making Copies When you press the Start button to make a copy, the device scans your originals and temporarily stores the images. It then prints the images based on the selections made. If Authentication or Accounting has been enabled on your device you may have to enter login details to access the Copy features. 1. Load your documents face up in the document feeder input tray. Adjust the guide to just touch the documents. Or Lift up the document feeder.
Getting Started WorkCentre® 5945/5955 Print Printing a Document using the PostScript Print Driver You can print to the device from your computer through a print driver. There are a variety of Xerox print drivers available for the device to support all the popular operating systems. The Xerox print drivers allow you to use the specific features available on your device. Note: The device is enabled for AirPrint.
Getting Started WorkCentre® 5945/5955 Refer to the System Administrator Guide for further information. 1. Open the document to be printed. From most applications select the Office button or select File, then select Print from the file menu. 2. Enter the number of copies you want to produce. Depending on the application you are using you may also be able to select a page range and make other print selections. 3. Select the Xerox PS driver from the list of print drivers available. 4.
Getting Started WorkCentre® 5945/5955 Your System Administrator may have loaded a specific print driver on your computer. However, if the choice of driver is yours, the following information may help you decide which driver to install. • PS (PostScript) gives you the most options to scale and manipulate images; it offers more precision with high-end graphics. PostScript also provides you with different types of errorhandling and font substitution options.
Getting Started WorkCentre® 5945/5955 6. Click the OK button to save your settings. 7. Select the confirmation button, the name will vary depending on the application you are printing from. From most applications select the OK or Print button. 8. Print jobs are usually shown in the Active Jobs list, however if your System Administrator has enabled the Hold All Jobs feature, your job will be listed in either the Held Print Jobs or the Unidentified Print Jobs list.
Getting Started WorkCentre® 5945/5955 Refer to the System Administrator Guide for further information. 1. Open the document to be printed. From most applications select File, then select Print from the file menu. 2. Enter the number of copies you want to produce. Depending on the application you are using you may also be able to select a page range and make other print selections. 3. Select the Xerox driver from the list of print drivers available. 4.
Getting Started WorkCentre® 5945/5955 Printing a Document using the XPS Print Driver You can print to the device from your computer through a print driver. There are a variety of Xerox print drivers available for the device to support all the popular operating systems. The Xerox print drivers allow you to use the specific features available on your device. Your System Administrator may have loaded a specific print driver on your computer.
Getting Started WorkCentre® 5945/5955 Refer to the System Administrator Guide for further information. 1. Open the document to be printed. From most applications select the Office button or select File, then select Print from the file menu. 2. Enter the number of copies you want to produce. Depending on the application you are using you may also be able to select a page range and make other print selections. 3. Select the Xerox XPS driver from the list of print drivers available. 4.
Getting Started WorkCentre® 5945/5955 Fax Explaining the Fax Options There are three Fax services which can be installed or enabled on your device, Fax (Embedded Fax), Internet Fax and Server Fax. If the Fax (Embedded Fax) service is installed, your device is connected directly to a telephone line and therefore gives you direct control over your fax transmissions. This type of fax travels over normal telephone lines and will therefore be charged at telephone rates.
Getting Started WorkCentre® 5945/5955 If Authentication or Accounting has been enabled on your device you may have to enter login details to access the Fax features. 1. Load your documents face up in the document feeder input tray. Adjust the guide to just touch the documents. Or Lift up the document feeder. Place the document face down onto the document glass and register it to the arrow at the top left corner. Close the document feeder. 2.
Getting Started WorkCentre® 5945/5955 If Authentication or Accounting has been enabled on your device you may have to enter login details to access the Internet Fax features. 1. Load your documents face up in the document feeder input tray. Adjust the guide to just touch the documents. Or Lift up the document feeder. Place the document face down onto the document glass and register it to the arrow at the top left corner. Close the document feeder. 2.
Getting Started WorkCentre® 5945/5955 Sending a Server Fax There are three Fax services which can be installed or enabled on your device, Fax (Embedded Fax), Internet Fax and Server Fax. Server Fax scans your documents and sends them to any type of fax machine that is connected to a telephone network. Your images are sent from your device to a third party fax server, which relays them over the telephone network to the fax number of your choice.
Getting Started WorkCentre® 5945/5955 Faxing from your Computer Sending a Fax using the PostScript Print Driver You can print to the device from your computer through a print driver. There are a variety of Xerox print drivers available for the device to support all the popular operating systems. The Xerox print drivers allow you to use the specific features available on your device. If Authentication has been enabled on your device you may have to login at the device to see or release your jobs.
Getting Started - WorkCentre® 5945/5955 Click the OK button. Or • • • Click the Add From Phonebook button to add a recipient stored in the address book. - Select the option required. - Personal Phonebook displays contacts you have added to the phonebook using your print driver. - Shared Phonebook lists contacts you have added, but also contacts added by other people. This address book is usually saved on a network server and must be made available by your System Administrator.
Getting Started • • WorkCentre® 5945/5955 If you want to add a watermark to your cover sheet, click the Image tab. - Select the Watermark option required. - Select the option required. - Text activates a text entry box where you can type in your text. There are options to select a font, color, orientation and position for your text. - Picture activates the graphic settings. Click the folder icon to browse to your image. There are options to select a scale, the position and the lightness of your graphic.
Getting Started WorkCentre® 5945/5955 Sending a Fax using the PCL Print Driver You can print to the device from your computer through a print driver. There are a variety of Xerox print drivers available for the device to support all the popular operating systems. The Xerox print drivers allow you to use the specific features available on your device. If Authentication has been enabled on your device you may have to login at the device to see or release your jobs.
Getting Started WorkCentre® 5945/5955 Or • • • Click the Add From Phonebook button to add a recipient stored in the address book. - Select the option required. - Personal Phonebook displays contacts you have added to the phonebook using your print driver. - Shared Phonebook lists contacts you have added, but also contacts added by other people. This address book is usually saved on a network server and must be made available by your System Administrator.
Getting Started • • WorkCentre® 5945/5955 If you want to add a watermark to your cover sheet, click the Image tab. - Select the Watermark option required. - Select the option required. - Text activates a text entry box where you can type in your text. There are options to select a font, color, orientation and position for your text. - Picture activates the graphic settings. Click the folder icon to browse to your image. There are options to select a scale, the position and the lightness of your graphic.
Getting Started WorkCentre® 5945/5955 Sending a Fax using the Mac Print Driver You can print to the device from your computer through a print driver. There are a variety of Xerox print drivers available for the device to support all the popular operating systems. The Xerox print drivers allow you to use the specific features available on your device. If Authentication has been enabled on your device you may have to login at the device to see or release your jobs.
Getting Started WorkCentre® 5945/5955 Or • • • Click the Add From Address Book button to add a recipient stored in the address book. - Select the contact required from the list. If the contact list is long, click in the Search... entry box and use your keyboard to enter the contact details. Click the OK button to see the search results. - Select the Add button.
Getting Started WorkCentre® 5945/5955 11. If you want the device to print a confirmation sheet, use a specific send speed or resolution, send at a specific time, use a dialing prefix or include credit card details, click the Options tab. • • • • • • • If required, select Print a Confirmation Sheet from the Confirmation Sheet menu to have the device print a page stating that your job has successfully faxed.
Getting Started WorkCentre® 5945/5955 3. Select the Xerox XPS driver from the list of print drivers available. 4. Open the print driver Properties window - the method will vary depending on the application you are printing from. From most Microsoft applications select the Properties or Preferences button to open the window. 5. If required, click the Printing Options tab. This is usually the active tab when the print driver opens. 6. Select Fax from the Job Type dropdown menu.
Getting Started WorkCentre® 5945/5955 9. Select Print a Cover Sheet from the Cover Sheet Options menu. • • • • Select the Information tab. This is usually the active tab when the Cover Sheet options box opens. - If required, select the Sender Name entry box and use your keyboard to enter your name. - If required, select the Sender Organization entry box and use your keyboard to enter your company name.
Getting Started WorkCentre® 5945/5955 11. Click the OK button to save your settings. 12. Select the confirmation button, the name will vary depending on the application you are printing from. From most applications select the OK or Print button. 13. Depending on how your device has been set up, the Fax Confirmation screen may display with the fax recipients for your job. If required, click the OK button to confirm.
Getting Started WorkCentre® 5945/5955 12. Press the Job Status button on the device control panel to view the job list and check the status of the job. More Information Explaining What Workflow Scanning Does and How It Works Using a User ID to Log In at the Device Scanning a Document to your Computer or Network using Single-Touch Scan Creating a New Template in Internet Services Using Internet Services to find System Administrator Contact Details System Administrator Guide www.xerox.com/support.
Getting Started WorkCentre® 5945/5955 9. If required, select Cc from the To: dropdown menu to copy a recipient on the e-mail. Use the touch screen keyboard to enter the recipient details and then select the Add button. Note: At least one To address must be selected, documents cannot be sent to a Cc address alone. 10. Select the Close button to save the information you entered. 11. If required, select the From... button and use the touch screen keyboard to enter or edit the From address for the e-mail.
Getting Started WorkCentre® 5945/5955 Note: Your System Administrator must enable the Job Storage feature on your print driver before you can use the Saved Job option. If you are able to update your own driver settings, this feature can be found by opening the drivers window, right clicking the driver, selecting Printer Properties and then the Configuration tab. Use the dropdown menu to set the Job Storage Module status in the Installable Options section to Installed.
Getting Started WorkCentre® 5945/5955 Saving Jobs using the PCL Print Driver You can print to the device from your computer through a print driver. There are a variety of Xerox print drivers available for the device to support all the popular operating systems. The Xerox print drivers allow you to use the specific features available on your device. If Authentication has been enabled on your device you may have to login at the device to see or release your jobs.
Getting Started WorkCentre® 5945/5955 11. Click the OK button. 12. Select the option(s) required. 13. Click the OK button to save your settings. 14. Select the confirmation button, the name will vary depending on the application you are printing from. From most applications select the OK or Print button.
Getting Started • WorkCentre® 5945/5955 If your required folder does not display, you can use your keyboard to enter the name of the folder where your job should be saved. The Default Public Folder is available for all users to save their jobs to. 9. If required, select the Print and Save button. If the Save button is selected your job will be saved, but not printed. 10. If required, select the Private button to passcode protect your document.
Getting Started WorkCentre® 5945/5955 Refer to the System Administrator Guide for further information. 1. Open the document to be printed. From most applications select the Office button or select File, then select Print from the file menu. 2. Enter the number of copies you want to produce. Depending on the application you are using you may also be able to select a page range and make other print selections. 3. Select the Xerox XPS driver from the list of print drivers available. 4.
Getting Started WorkCentre® 5945/5955 Printing Saved Jobs Printing a Saved Job using the Print From Feature The Print From feature prints jobs which have been saved on the device or on a USB stick. This is a useful feature if you have documents that you need to print regularly. Note: This option must be made available by your System Administrator. If Authentication or Accounting has been enabled on your device you may have to enter login details to access the Print From feature.
Getting Started WorkCentre® 5945/5955 Using the Job Type Feature with the PostScript Print Driver Using a User ID to Log In at the Device System Administrator Guide www.xerox.com/support. Using Internet Services to find System Administrator Contact Details Printing Saved Jobs from Internet Services Internet Services uses the embedded web server on the device. This allows you to communicate with the device over the internet or intranet through your web browser.
Getting Started WorkCentre® 5945/5955 More Information Saving Jobs using the PostScript Print Driver Printing a Saved Job using the Print From Feature Using Internet Services to find System Administrator Contact Details System Administrator Guide www.xerox.com/support.
Getting Started WorkCentre® 5945/5955 Maintenance and Consumables Identifying the Replaceable Units There are several consumables on the device that need replenishing or replacing, such as paper, staples, and customer replaceable units. 1. Toner Cartridge 2. Print Cartridge The device will display a message on the touch screen when any of the units need to be re-ordered. This message is a warning that the unit is nearing the end of its life.
Getting Started WorkCentre® 5945/5955 When you use the document feeder, your documents will pass over the stationary scanners using the Constant Velocity Transport glass and side 2 scanner window. Any dirt or marks on the glass will cause lines or streaks on your copies, faxes or scanned images. 1.
Getting Started WorkCentre® 5945/5955 Help Accessing the Help Features On the Device When using your device, detailed and timely help is available at your fingertips. You can access Help information and tips from a variety of sources. 1. Press the Help (?) button on the Control Panel at any time to access the Help screens. 2. Use the scroll bar to locate the item required, then select the item. Messages, screen instructions and graphics provide additional information. 3.
Getting Started WorkCentre® 5945/5955 Accessing the PCL Print Driver Help Pages You can print to the device from your computer through a print driver. There are a variety of Xerox print drivers available for the device to support all the popular operating systems. The Xerox print drivers allow you to use the specific features available on your device. If Authentication has been enabled on your device you may have to login at the device to see or release your jobs.
Getting Started WorkCentre® 5945/5955 More Information Printing a Document using the Mac Print Driver System Administrator Guide www.xerox.com/support. Using Internet Services to find System Administrator Contact Details Accessing the XPS Print Driver Help Pages You can print to the device from your computer through a print driver. There are a variety of Xerox print drivers available for the device to support all the popular operating systems.
Getting Started WorkCentre® 5945/5955 Using the Internet Services Help Feature Internet Services uses the embedded web server on the device. This allows you to communicate with the device over the internet or intranet through your web browser. If Authentication or Accounting has been enabled on your device you may have to enter login details to access this feature. Use the Internet Services Help link to see instructions and information on how to use the features in Internet Services.
Getting Started 76 WorkCentre® 5945/5955 User Guide
Copy 3 Making Copies When you press the Start button to make a copy, the device scans your originals and temporarily stores the images. It then prints the images based on the selections made. If Authentication or Accounting has been enabled on your device you may have to enter login details to access the Copy features. 1. Load your documents face up in the document feeder input tray. Adjust the guide to just touch the documents. Or Lift up the document feeder.
WorkCentre® 5945/5955 Copy Copy Options Reduce or Enlarge Reducing or Enlarging Copies When you press the Start button to make a copy, the device scans your originals and temporarily stores the images. It then prints the images based on the selections made. If Authentication or Accounting has been enabled on your device you may have to enter login details to access the Copy features. A variety of options are available on your device to enable you to reduce or enlarge the output from your original.
WorkCentre® 5945/5955 Copy More Information Reducing or Enlarging Copies by Proportional % Reducing or Enlarging Copies by Independent X-Y % Using a User ID to Log In at the Device Viewing the Progress and Details of a Job using the Job Status Menu Setting the Paper Supply for Copies Reducing or Enlarging Copies by Proportional % When you press the Start button to make a copy, the device scans your originals and temporarily stores the images. It then prints the images based on the selections made.
WorkCentre® 5945/5955 Copy 12. Remove the original from the document feeder or document glass when scanning has completed. The job enters the job list ready for processing. 13. Press the Job Status button on the device control panel to view the job list and check the status of the job. 14. If your job remains held in the Active Jobs list, the device needs you to supply additional resources, such as paper or staples before it can complete the job.
WorkCentre® 5945/5955 Copy • • 100% / 100% will keep your output image the same size as your original. This option is useful if you are programming a complex job and want to cancel any reduce or enlarge settings without cancelling other settings you have made. Auto Independent X-Y% automatically fits the image of your original onto the paper you have selected. The reduction or enlargement may not be proportional, the device will distort the image so that it will fit onto the paper.
WorkCentre® 5945/5955 Copy If the Auto Selection feature has been enabled by your System Administrator and the same size, color and type of media is loaded in more than one tray, the device will automatically switch from the active tray to another if the media in the active tray runs out. If you have an administrator login you will be able to activate the Auto Selection feature. 1. Load your documents face up in the document feeder input tray. Adjust the guide to just touch the documents.
WorkCentre® 5945/5955 Copy Making 2 Sided Copies or Copying 2 Sided Originals When you press the Start button to make a copy, the device scans your originals and temporarily stores the images. It then prints the images based on the selections made. If Authentication or Accounting has been enabled on your device you may have to enter login details to access the Copy features.
WorkCentre® 5945/5955 Copy Copy Output Choosing an Output Option for Copies When you press the Start button to make a copy, the device scans your originals and temporarily stores the images. It then prints the images based on the selections made. If Authentication or Accounting has been enabled on your device you may have to enter login details to access the Copy features.
WorkCentre® 5945/5955 Copy • • • • • Collation Stapled Hole Punched / Stapled Booklet Tri-Folded 8. Select the OK button. 9. Enter the number of prints required using the numeric keypad on the control panel. 10. Press the Start button on the control panel to scan the original. 11. Remove the original from the document feeder or document glass when scanning has completed. The job enters the job list ready for processing. 12.
Copy WorkCentre® 5945/5955 6. If required, select the More... button at the bottom of the Copy Output section to access all the finishing options. The number of options displayed will depend upon the finishing device and kits installed (there may not be enough to require a More... button). 7. Select None from the Copy Output section. 8. Enter the number of prints required using the numeric keypad on the control panel. 9. Press the Start button on the control panel to scan the original. 10.
WorkCentre® 5945/5955 Copy 7. Select the Collation option required. • • Collated sorts your copies into sets 1,2,3 1,2,3 1,2,3. Uncollated sorts your copies into stacks 1,1,1 2,2,2 3,3,3. 8. Enter the number of prints required using the numeric keypad on the control panel. 9. Press the Start button on the control panel to scan the original. 10. Remove the original from the document feeder or document glass when scanning has completed. The job enters the job list ready for processing. 11.
WorkCentre® 5945/5955 Copy Use the stapling options to staple your document. The options available are dependent on the finishing device installed. The basic stapling options are Off, 1 Staple and 2 Staples. • • • If required, select the Off button to cancel any programming you have entered. 1 Staple positions a single staple the top left corner of your document. 2 Staples positions 2 staples along the trail edge of your document. Note: For some staple selections the device will rotate the image.
WorkCentre® 5945/5955 Copy Note: SEF is Short Edge Feed (where the short edge of the paper is the leading edge when the paper is fed into the device). LEF is Long Edge Feed (where the paper is oriented so that the long edge is fed into the device first). 1. Load your documents face up in the document feeder input tray. Adjust the guide to just touch the documents. Or Lift up the document feeder. Place the document face down onto the document glass and register it to the arrow at the top left corner.
WorkCentre® 5945/5955 Copy Preparing Copies to be made into a Booklet When you press the Start button to make a copy, the device scans your originals and temporarily stores the images. It then prints the images based on the selections made. If Authentication or Accounting has been enabled on your device you may have to enter login details to access the Copy features.
Copy WorkCentre® 5945/5955 14. If your job remains held in the Active Jobs list, the device needs you to supply additional resources, such as paper or staples before it can complete the job. To find out what resources are needed, select the job and then select the Details button. Once the resources are available the job will print. The following Booklet Maker specifications apply. • Paper Sizes A3 (11x17”), A4 (8.5x11”), 8.5x13” and 8.5x14”. • Paper weight 60 to 216 gsm (16 to 57 lb).
WorkCentre® 5945/5955 Copy Image Quality Setting the Original Type for Copies When you press the Start button to make a copy, the device scans your originals and temporarily stores the images. It then prints the images based on the selections made. If Authentication or Accounting has been enabled on your device you may have to enter login details to access the Copy features. Use the Original Type options to enhance the quality of your output based on the type of original images and how they were produced.
Copy WorkCentre® 5945/5955 12. Remove the original from the document feeder or document glass when scanning has completed. The job enters the job list ready for processing. 13. Press the Job Status button on the device control panel to view the job list and check the status of the job. 14. If your job remains held in the Active Jobs list, the device needs you to supply additional resources, such as paper or staples before it can complete the job.
WorkCentre® 5945/5955 Copy 12. Press the Job Status button on the device control panel to view the job list and check the status of the job. 13. If your job remains held in the Active Jobs list, the device needs you to supply additional resources, such as paper or staples before it can complete the job. To find out what resources are needed, select the job and then select the Details button. Once the resources are available the job will print.
WorkCentre® 5945/5955 Copy 13. If your job remains held in the Active Jobs list, the device needs you to supply additional resources, such as paper or staples before it can complete the job. To find out what resources are needed, select the job and then select the Details button. Once the resources are available the job will print.
Copy WorkCentre® 5945/5955 More Information Using a User ID to Log In at the Device Viewing the Progress and Details of a Job using the Job Status Menu Lightening or Darkening Copies Image Enhancement Choosing an Image Enhancement Option for Copies When you press the Start button to make a copy, the device scans your originals and temporarily stores the images. It then prints the images based on the selections made.
WorkCentre® 5945/5955 Copy More Information Setting the Background Suppression for Copies Setting the Copy Contrast Using a User ID to Log In at the Device Viewing the Progress and Details of a Job using the Job Status Menu Setting the Background Suppression for Copies When you press the Start button to make a copy, the device scans your originals and temporarily stores the images. It then prints the images based on the selections made.
WorkCentre® 5945/5955 Copy Setting the Copy Contrast When you press the Start button to make a copy, the device scans your originals and temporarily stores the images. It then prints the images based on the selections made. If Authentication or Accounting has been enabled on your device you may have to enter login details to access the Copy features. Use the Contrast option to control the image density on the output and compensate for an original that has too much or too little contrast on the image. 1.
WorkCentre® 5945/5955 Copy Layout Adjustment Setting the Original Orientation for Copies When you press the Start button to make a copy, the device scans your originals and temporarily stores the images. It then prints the images based on the selections made. If Authentication or Accounting has been enabled on your device you may have to enter login details to access the Copy features.
WorkCentre® 5945/5955 Copy More Information Using a User ID to Log In at the Device Viewing the Progress and Details of a Job using the Job Status Menu Specifying the Size of the Original to be Copied When you press the Start button to make a copy, the device scans your originals and temporarily stores the images. It then prints the images based on the selections made. If Authentication or Accounting has been enabled on your device you may have to enter login details to access the Copy features.
WorkCentre® 5945/5955 Copy 12. Press the Job Status button on the device control panel to view the job list and check the status of the job. 13. If your job remains held in the Active Jobs list, the device needs you to supply additional resources, such as paper or staples before it can complete the job. To find out what resources are needed, select the job and then select the Details button. Once the resources are available the job will print.
WorkCentre® 5945/5955 Copy - Mixed Size Originals scans documents containing different sized pages. The pages must be the same width, such as A4 (8.5 x 11”) LEF and A3 (11 x 17”) SEF, other combinations are shown on the device touchscreen. The device detects the size of the documents and will produce different output depending on the combinations selected. Note: SEF is Short Edge Feed (where the short edge of the paper is the leading edge when the paper is fed into the device).
WorkCentre® 5945/5955 Copy Use the Image Shift option to move the position of the image on the output page. This is useful when the output needs to be bound as it allows you to move the image to the left or right to leave enough room for the binding. 1. Load your documents face up in the document feeder input tray. Adjust the guide to just touch the documents. Or Lift up the document feeder. Place the document face down onto the document glass and register it to the arrow at the top left corner.
WorkCentre® 5945/5955 Copy Erasing Edges from Copies When you press the Start button to make a copy, the device scans your originals and temporarily stores the images. It then prints the images based on the selections made. If Authentication or Accounting has been enabled on your device you may have to enter login details to access the Copy features. Use the Edge Erase options to specify the scan area so that only a specific section of your document is scanned.
WorkCentre® 5945/5955 Copy Either - Select the Side 2 button. Select the Top, Right, Bottom and Left entry boxes as required and use the arrow buttons to adjust the amount to be erased from 3mm (0.1”) to 50mm (2.0”) or use the numeric keypad to enter the amount required. - Check the Mirror Side 1 entry checkbox to reverse the side 1 settings on side 2. Depending on the page orientation the left and right or top and bottom settings will be reversed. Or 8. Select the OK button. 9.
WorkCentre® 5945/5955 Copy • • Normal Image produces output that matches the original. Mirror Image reverses the original image creating a mirror of the original. 8. Select the Negative Image option required. • • Positive Image produces output that matches the original. Negative Image converts the dark image areas in the original to light, and the light areas to dark. 9. Select the OK button. 10. Enter the number of prints required using the numeric keypad on the control panel. 11.
WorkCentre® 5945/5955 Copy 5. Select the Output Format tab. 6. Select the Booklet Creation button. 7. Select the On button. 8. Select the required Original Input option. • • 1-Sided Originals 2-Sided Originals 9. Set the Paper Supply required for the job. If stapling and / or folding is required a Short Edge Feed (SEF) paper supply must be selected. Note: SEF is Short Edge Feed (where the short edge of the paper is the leading edge when the paper is fed into the device).
WorkCentre® 5945/5955 Copy Use the Covers option to add blank or printed pages to the front, back or front and back of your set. This option is also used to add a cover to a booklet. The covers can be a different media to the rest of your job. Use the Chapter Starts option to ensure that a chapter begins on the right or left side of the page, with a blank page automatically inserted if needed.
WorkCentre® 5945/5955 Copy Adding Chapter Start Sections to Copies Adding Inserts into Copy Sets Selecting Exceptions within Copy Sets Using a User ID to Log In at the Device Viewing the Progress and Details of a Job using the Job Status Menu Adding Covers to Copies When you press the Start button to make a copy, the device scans your originals and temporarily stores the images. It then prints the images based on the selections made.
WorkCentre® 5945/5955 Copy • • • • Blank Cover provides a blank sheet as the cover. Print on Side 1 prints an image on side 1 of the cover. Print on Side 2 prints an image on side 2 of the cover. Select Rotate Side 2 to rotate the image on the second side. Print on Both Sides prints an image on both sides of the cover. Select Rotate Side 2 to rotate the image on the second side. 14. Select the Paper Supply required for the selected covers. If required, select the More...
WorkCentre® 5945/5955 Copy 4. Select the Copy button on the touch screen. The copy features are displayed. 5. If required, select the Copy tab. This is usually the active tab when the Copy service opens. Note: This feature is not available until a specific paper tray has been selected. It is not available if the paper Auto Select option is active. 6. Set the Paper Supply required for the main body of the job. 7. Select the Output Format tab. 8. Select the Special Pages button. 9.
WorkCentre® 5945/5955 Copy Use the Inserts option to add blank pages on a different media into your document, or to specify pages to be printed on a different media. Up to two sources of media can be used for the inserts. If inserting blank pages, a blank sheet must be inserted in the appropriate place in your original document. 1. Load your documents face up in the document feeder input tray. Adjust the guide to just touch the documents. Or Lift up the document feeder.
Copy WorkCentre® 5945/5955 23. If your job remains held in the Active Jobs list, the device needs you to supply additional resources, such as paper or staples before it can complete the job. To find out what resources are needed, select the job and then select the Details button. Once the resources are available the job will print.
Copy WorkCentre® 5945/5955 14. Select the OK button. 15. Enter the number of prints required using the numeric keypad on the control panel. 16. Press the Start button on the control panel to scan the original. 17. Press the Job Status button on the device control panel to view the job list and check the status of the job. 18. If your job remains held in the Active Jobs list, the device needs you to supply additional resources, such as paper or staples before it can complete the job.
WorkCentre® 5945/5955 Copy Use the Format and Style options to specify the orientation, style and printing requirements for the selected annotations. Note: The Format and Style options are not available until at least one annotation has been programmed. 1. Load your documents face up in the document feeder input tray. Adjust the guide to just touch the documents. Or Lift up the document feeder. Place the document face down onto the document glass and register it to the arrow at the top left corner.
WorkCentre® 5945/5955 Copy Use the Page Numbers option to automatically print a page number in a specified position on the page. Page numbers are automatically increased by one. For 2 sided copy output the page number is printed on both sides and counts as two pages. 1. Load your documents face up in the document feeder input tray. Adjust the guide to just touch the documents. Or Lift up the document feeder.
WorkCentre® 5945/5955 Copy 19. Enter the number of prints required using the numeric keypad on the control panel. 20. Press the Start button on the control panel to scan the original. 21. Remove the original from the document feeder or document glass when scanning has completed. The job enters the job list ready for processing. 22. Press the Job Status button on the device control panel to view the job list and check the status of the job. 23.
WorkCentre® 5945/5955 Copy 12. Select the OK button. After an annotation has been programmed the Format and Style button becomes visible. 13. Select the Format and Style button. 14. Select the Text Background option required. • • Opaque creates solid annotations placed on top of the copy output with no image visible under the annotated text. Transparent creates semi-transparent annotations with the copy image visible under the annotated text. 15.
WorkCentre® 5945/5955 Copy Printing a Date on Copies When you press the Start button to make a copy, the device scans your originals and temporarily stores the images. It then prints the images based on the selections made. If Authentication or Accounting has been enabled on your device you may have to enter login details to access the Copy features. Use the Date annotation to add the current date to your chosen position on the page.
WorkCentre® 5945/5955 Copy 16. Select the Side 2 Option required. • • • Same as Side 1 applies the same settings to both Side 1 and Side 2 of your output. Mirror Side 1 Flip on Horizontal output will open from right to left like a book, with the binding edge on the left. The position of the annotation on Side 2 will mirror Side 1 across the binding edge. For example, if a page number is positioned in the bottom left corner of Side 1, it will appear in the bottom right corner of Side 2.
WorkCentre® 5945/5955 Copy 4. Select the Copy button on the touch screen. The copy features are displayed. 5. Select the Output Format tab. 6. Select the Annotations button. 7. Select the Bates Stamp button. 8. Select the On button to apply a Bates Stamp to your output. • If required, select the Off button to produce output without a Bates Stamp. 9. Select the Bates Stamp you require from the Stored Prefixes list, if a prefix hasn’t been programmed yet it will be listed as Available.
WorkCentre® 5945/5955 Copy 24. If your job remains held in the Active Jobs list, the device needs you to supply additional resources, such as paper or staples before it can complete the job. To find out what resources are needed, select the job and then select the Details button. Once the resources are available the job will print.
WorkCentre® 5945/5955 Copy 16. Press the Job Status button on the device control panel to view the job list and check the status of the job. 17. If your job remains held in the Active Jobs list, the device needs you to supply additional resources, such as paper or staples before it can complete the job. To find out what resources are needed, select the job and then select the Details button. Once the resources are available the job will print.
Copy WorkCentre® 5945/5955 9. Select the Original Orientation option required. • Portrait Originals if the images on the originals are in a portrait orientation. • Landscape Originals if the images on the originals are in a landscape orientation. 10. Select the OK button. 11. Enter the number of prints required using the numeric keypad on the control panel. 12. Press the Start button on the control panel to scan the original. 13.
WorkCentre® 5945/5955 Copy Job Assembly Building a Copy Job with Multiple Page or Segment Settings When you press the Start button to make a copy, the device scans your originals and temporarily stores the images. It then prints the images based on the selections made. If Authentication or Accounting has been enabled on your device you may have to enter login details to access the Copy features.
WorkCentre® 5945/5955 Copy 14. Press the Start button on the control panel to scan the original. 15. Remove the first segment originals after they have been scanned. The Build Job screen displays the first segment in the list. 16. If required, select the options for the segment. • • • Sample Last Segment produces a proof print of the last segment scanned. If you are satisfied with the proof you can continue programming the Build Job. Delete Last Segment deletes the last segment scanned.
WorkCentre® 5945/5955 Copy 5. Select the Job Assembly tab. 6. Select the Sample Job button. 7. Select the On button to turn the Build Job feature on and enable the Build Job options. • If required, select the Off button to cancel any programming you have entered. 8. Select the OK button. 9. Enter the number of prints required using the numeric keypad on the control panel. 10. Press the Start button on the control panel to scan the original. One copy set of the job, the Sample Job, is printed.
Copy WorkCentre® 5945/5955 Saving Current Settings for Copying When you press the Start button to make a copy, the device scans your originals and temporarily stores the images. It then prints the images based on the selections made. If Authentication or Accounting has been enabled on your device you may have to enter login details to access the Copy features. Use the Save Current Settings option to save up to 50 combinations of commonly used feature selections in the device memory.
Copy WorkCentre® 5945/5955 Retrieving Saved Settings for Copying When you press the Start button to make a copy, the device scans your originals and temporarily stores the images. It then prints the images based on the selections made. If Authentication or Accounting has been enabled on your device you may have to enter login details to access the Copy features. Use the Retrieve Saved Settings option to re-use settings from a previous job.
Copy WorkCentre® 5945/5955 Deleting Saved Settings for Copying When you press the Start button to make a copy, the device scans your originals and temporarily stores the images. It then prints the images based on the selections made. If Authentication or Accounting has been enabled on your device you may have to enter login details to access the Copy features. Use the Delete Settings option to delete saved settings from the device memory.
Fax 4 Fax (Embedded Fax) Sending a Fax (Embedded Fax) There are three Fax services which can be installed or enabled on your device, Fax (Embedded Fax), Internet Fax and Server Fax. Use the Fax (Embedded Fax) service to scan your documents and send them to most types of fax machines that are connected to the telephone network. Note: This option must be made available by your System Administrator.
WorkCentre® 5945/5955 Fax Fax Using Dialing Characters in a Fax number (Embedded Fax) Use the Fax (Embedded Fax) service to scan your documents and send them to most types of fax machines that are connected to the telephone network. Note: This option must be made available by your System Administrator. If Authentication or Accounting has been enabled on your device you may have to enter login details to access the Fax features.
WorkCentre® 5945/5955 Fax 12. Remove the original from the document feeder or document glass when scanning has completed. 13. Press the Job Status button on the device control panel to view the job list and check the status of the job.
WorkCentre® 5945/5955 Fax Explaining the Fax Options Using Internet Services to find System Administrator Contact Details System Administrator Guide www.xerox.com/support. Saving an Address Book Number as a Favorite (Embedded Fax) Use the Fax (Embedded Fax) service to scan your documents and send them to most types of fax machines that are connected to the telephone network. Note: This option must be made available by your System Administrator.
WorkCentre® 5945/5955 Fax Address Book Sending a Fax using the Address Book (Embedded Fax) Use the Fax (Embedded Fax) service to scan your documents and send them to most types of fax machines that are connected to the telephone network. Note: This option must be made available by your System Administrator. If Authentication or Accounting has been enabled on your device you may have to enter login details to access the Fax features.
WorkCentre® 5945/5955 Fax 15. Press the Job Status button on the device control panel to view the job list and check the status of the job.
Fax WorkCentre® 5945/5955 More Information Adding To an Existing Fax Address Book Contact (Embedded Fax) Sending a Fax using the Address Book (Embedded Fax) Using Dialing Characters in a Fax number (Embedded Fax) Sending a Fax to a Number Saved as a Favorite (Embedded Fax) Using a User ID to Log In at the Device Explaining the Fax Options Creating a Fax Address using Internet Services Using Internet Services to find System Administrator Contact Details System Administrator Guide www.xerox.com/support.
WorkCentre® 5945/5955 Fax Faxing 2-Sided Originals (Embedded Fax) Use the Fax (Embedded Fax) service to scan your documents and send them to most types of fax machines that are connected to the telephone network. Note: This option must be made available by your System Administrator. If Authentication or Accounting has been enabled on your device you may have to enter login details to access the Fax features. Use the 2-Sided Scanning options to scan both sides of your document.
WorkCentre® 5945/5955 Fax Setting the Original Type for Faxes (Embedded Fax) Use the Fax (Embedded Fax) service to scan your documents and send them to most types of fax machines that are connected to the telephone network. Note: This option must be made available by your System Administrator. If Authentication or Accounting has been enabled on your device you may have to enter login details to access the Fax features. Use the Original Type options to define the type of original being scanned.
WorkCentre® 5945/5955 Fax Specifying the Fax Resolution (Embedded Fax) Use the Fax (Embedded Fax) service to scan your documents and send them to most types of fax machines that are connected to the telephone network. Note: This option must be made available by your System Administrator. If Authentication or Accounting has been enabled on your device you may have to enter login details to access the Fax features.
WorkCentre® 5945/5955 Fax Adding a Fax Cover Sheet (Embedded Fax) Use the Fax (Embedded Fax) service to scan your documents and send them to most types of fax machines that are connected to the telephone network. Note: This option must be made available by your System Administrator. If Authentication or Accounting has been enabled on your device you may have to enter login details to access the Fax features. Use the Cover Sheet option to add an introduction page to the beginning of your fax.
WorkCentre® 5945/5955 Fax Explaining the Fax Options Using Internet Services to find System Administrator Contact Details System Administrator Guide www.xerox.com/support. Image Quality Image Options Choosing the Image Options for Faxes (Embedded Fax) Use the Fax (Embedded Fax) service to scan your documents and send them to most types of fax machines that are connected to the telephone network. Note: This option must be made available by your System Administrator.
WorkCentre® 5945/5955 Fax 14. Remove the original from the document feeder or document glass when scanning has completed. 15. Press the Job Status button on the device control panel to view the job list and check the status of the job.
WorkCentre® 5945/5955 Fax 11. Select the Lighten / Darken option required. • • Move the indicator down to darken the scanned image. If this creates an output with too dark a background, use the Background Suppression feature to remove the background. Move the indicator up to lighten the scanned image. 12. Select the OK button. 13. Press the Start button on the control panel to scan the original. 14. Remove the original from the document feeder or document glass when scanning has completed. 15.
WorkCentre® 5945/5955 Fax 11. Select the Sharpness option required. • • Move the indicator up to sharpen the scanned image. Text images are more likely to be improved by sharpening than photo images. Move the indicator down to soften the scanned image. This is particularly useful when scanning photos. 12. Select the OK button. 13. Press the Start button on the control panel to scan the original. 14. Remove the original from the document feeder or document glass when scanning has completed. 15.
WorkCentre® 5945/5955 Fax 6. Select the Enter Fax Number entry box and use the numeric keypad, or the touch screen keypad to enter the recipient’s fax number. 7. Select the Add button. • If you want to send the document to more than one recipient enter the additional details, one recipient at a time, and select the Add button again until all the recipients have been added. 8. Select the Close button to save the information you entered. 9. Select the Image Quality tab. 10.
WorkCentre® 5945/5955 Fax 6. Select the Enter Fax Number entry box and use the numeric keypad, or the touch screen keypad to enter the recipient’s fax number. 7. Select the Add button. • If you want to send the document to more than one recipient enter the additional details, one recipient at a time, and select the Add button again until all the recipients have been added. 8. Select the Close button to save the information you entered. 9. Select the Image Quality tab. 10.
WorkCentre® 5945/5955 Fax 3. Press the Services Home button. 4. Select the Fax button on the touch screen. 5. If required, select the Fax tab. This is usually the active tab when the Fax service opens. 6. Select the Enter Fax Number entry box and use the numeric keypad, or the touch screen keypad to enter the recipient’s fax number. 7. Select the Add button.
WorkCentre® 5945/5955 Fax Use the Original Size options to select automatic size detection of the originals, specify the sizes of mixed size originals, or specify the exact size of an image to be scanned. 1. Load your documents face up in the document feeder input tray. Adjust the guide to just touch the documents. Or Lift up the document feeder. Place the document face down onto the document glass and register it to the arrow at the top left corner. Close the document feeder. 2.
WorkCentre® 5945/5955 Fax Using Internet Services to find System Administrator Contact Details System Administrator Guide www.xerox.com/support. Setting a Fax to Reduce Size or Split when Received (Embedded Fax) Use the Fax (Embedded Fax) service to scan your documents and send them to most types of fax machines that are connected to the telephone network. Note: This option must be made available by your System Administrator.
WorkCentre® 5945/5955 Fax Using Internet Services to find System Administrator Contact Details System Administrator Guide www.xerox.com/support. Faxing Book Pages (Embedded Fax) Use the Fax (Embedded Fax) service to scan your documents and send them to most types of fax machines that are connected to the telephone network. Note: This option must be made available by your System Administrator.
WorkCentre® 5945/5955 Fax 13. Remove the original from the document feeder or document glass when scanning has completed. 14. Press the Job Status button on the device control panel to view the job list and check the status of the job.
WorkCentre® 5945/5955 Fax 11. Select the option required. • • Print Confirmation prints a transmission report containing details about the fax, together with a reduced copy of the first faxed page. A confirmation report is printed after every transmission. When sending a fax to multiple recipients, one report is printed listing all the recipients. Print On Error Only only prints a report if an error occurs. 12. Select the OK button. 13. Select any options required. 14.
WorkCentre® 5945/5955 Fax 9. Select Fax Options tab. 10. Select the Starting Rate button. 11. Select the option required. • • • Super G3 (33.6 Kbps) initially transmits at 33,600 Bits Per Second (bps) and uses Error Correction Mode (ECM) to minimize transmission errors. This is the fastest fax transmission rate and the default option. G3 (14.4 Kbps) initially transmits at 14,400 Bits Per Second (bps), which is the standard Group 3 digital fax transmission rate.
WorkCentre® 5945/5955 Fax 5. If required, select the Fax tab. This is usually the active tab when the Fax service opens. 6. Select the Enter Fax Number entry box and use the numeric keypad, or the touch screen keypad to enter the recipient’s fax number. 7. Select the Add button. • If you want to send the document to more than one recipient enter the additional details, one recipient at a time, and select the Add button again until all the recipients have been added. 8.
WorkCentre® 5945/5955 Fax 1. Load your documents face up in the document feeder input tray. Adjust the guide to just touch the documents. Or Lift up the document feeder. Place the document face down onto the document glass and register it to the arrow at the top left corner. Close the document feeder. 2. Press the Clear All button on the control panel to cancel any previous programming selections. 3. Press the Services Home button. 4. Select the Fax button on the touch screen. 5. Select Fax Options tab.
WorkCentre® 5945/5955 Fax Note: If the mailbox has been set up with a passcode of 0000 then any combination of numbers, including no numbers, can be entered as the passcode to gain access to the mailbox. Note: Polling is where a fax is not sent to a recipient but is saved on the originating device. When the recipient is ready to receive the fax they contact (poll) the device and request the fax.
WorkCentre® 5945/5955 Fax Mailboxes are areas of device memory where incoming faxes are stored or from which outgoing faxes can be polled (retrieved). Mailboxes enable you to store all received fax documents until it is convenient to retrieve them, or store fax documents in a mailbox for polling. Mailboxes are set up by your System Administrator, at least one mailbox must be set up before this feature can be used. Up to 200 mailboxes can be set up.
Fax WorkCentre® 5945/5955 Printing Faxes Stored in the Local Mailbox (Embedded Fax) Use the Fax (Embedded Fax) service to scan your documents and send them to most types of fax machines that are connected to the telephone network. Note: This option must be made available by your System Administrator. If Authentication or Accounting has been enabled on your device you may have to enter login details to access the Fax features.
Fax WorkCentre® 5945/5955 Deleting Faxes Stored in the Local Mailbox (Embedded Fax) Use the Fax (Embedded Fax) service to scan your documents and send them to most types of fax machines that are connected to the telephone network. Note: This option must be made available by your System Administrator. If Authentication or Accounting has been enabled on your device you may have to enter login details to access the Fax features.
WorkCentre® 5945/5955 Fax Local Polling Distributing Documents using Non-Secure Fax Polling (Embedded Fax) Use the Fax (Embedded Fax) service to scan your documents and send them to most types of fax machines that are connected to the telephone network. Note: This option must be made available by your System Administrator. If Authentication or Accounting has been enabled on your device you may have to enter login details to access the Fax features.
Fax WorkCentre® 5945/5955 If Authentication or Accounting has been enabled on your device you may have to enter login details to access the Fax features. Use the Delete All Stored Documents option to delete all the documents stored on the device for polling. Note: Polling is where a fax is not sent to a recipient but is saved on the originating device. When the recipient is ready to receive the fax they contact (poll) the device and request the fax. 1.
WorkCentre® 5945/5955 Fax More Information Using a User ID to Log In at the Device Explaining the Fax Options Using Internet Services to find System Administrator Contact Details System Administrator Guide www.xerox.com/support. Using Secure Fax Polling (Embedded Fax) Use the Fax (Embedded Fax) service to scan your documents and send them to most types of fax machines that are connected to the telephone network. Note: This option must be made available by your System Administrator.
WorkCentre® 5945/5955 Fax Remote Polling Polling a Remote Fax Machine (Embedded Fax) Use the Fax (Embedded Fax) service to scan your documents and send them to most types of fax machines that are connected to the telephone network. Note: This option must be made available by your System Administrator. If Authentication or Accounting has been enabled on your device you may have to enter login details to access the Fax features.
Fax WorkCentre® 5945/5955 Polling a Remote Fax Mailbox (Embedded Fax) Use the Fax (Embedded Fax) service to scan your documents and send them to most types of fax machines that are connected to the telephone network. Note: This option must be made available by your System Administrator. If Authentication or Accounting has been enabled on your device you may have to enter login details to access the Fax features.
WorkCentre® 5945/5955 Fax Building a Fax Job with Multiple Page or Segment Settings (Embedded Fax) Use the Fax (Embedded Fax) service to scan your documents and send them to most types of fax machines that are connected to the telephone network. Note: This option must be made available by your System Administrator. If Authentication or Accounting has been enabled on your device you may have to enter login details to access the Fax features.
WorkCentre® 5945/5955 Fax Or Lift up the document feeder. Place the first segment face down onto the document glass and register it to the arrow at the top left corner. Close the document feeder. 17. Press the Start button on the control panel to scan the original. 18. Remove the first segment originals after they have been scanned. The Build Job screen displays the first segment in the list. 19. If required, select the options for the segment. • • Delete Last Segment deletes the last segment scanned.
WorkCentre® 5945/5955 Fax Server Fax Sending a Server Fax There are three Fax services which can be installed or enabled on your device, Fax (Embedded Fax), Internet Fax and Server Fax. Server Fax scans your documents and sends them to any type of fax machine that is connected to a telephone network. Your images are sent from your device to a third party fax server, which relays them over the telephone network to the fax number of your choice.
WorkCentre® 5945/5955 Fax Sending a Server Fax using the Workflow Scanning Feature There are three Fax services which can be installed or enabled on your device, Fax (Embedded Fax), Internet Fax and Server Fax. Server Fax scans your documents and sends them to any type of fax machine that is connected to a telephone network. Your images are sent from your device to a third party fax server, which relays them over the telephone network to the fax number of your choice.
WorkCentre® 5945/5955 Fax 5. If required, select the Server Fax tab. This is usually the active tab when the Server Fax service opens. 6. Select the Dialing Characters... button. 7. Use the touchscreen number pad to enter the recipient’s fax number plus the additional dialing characters. • • • • • • • • Dial Pause [,] adds a delay between numbers. The pause allows time to switch from an inside to an outside line during automatic dialing. For additional pause time, add multiple pauses.
WorkCentre® 5945/5955 Fax Fax Directory Sending a Fax Using the Fax Directory (Server Fax) Server Fax scans your documents and sends them to any type of fax machine that is connected to a telephone network. Your images are sent from your device to a third party fax server, which relays them over the telephone network to the fax number of your choice. Note: This option must be made available by your System Administrator.
WorkCentre® 5945/5955 Fax Adding a Number to the Fax Directory (Server Fax) Server Fax scans your documents and sends them to any type of fax machine that is connected to a telephone network. Your images are sent from your device to a third party fax server, which relays them over the telephone network to the fax number of your choice. Note: . This option must be made available by your System Administrator.
WorkCentre® 5945/5955 Fax Faxing 2-Sided Originals (Server Fax) Server Fax scans your documents and sends them to any type of fax machine that is connected to a telephone network. Your images are sent from your device to a third party fax server, which relays them over the telephone network to the fax number of your choice. Note: This option must be made available by your System Administrator.
WorkCentre® 5945/5955 Fax Setting the Original Type for Faxes (Server Fax) Server Fax scans your documents and sends them to any type of fax machine that is connected to a telephone network. Your images are sent from your device to a third party fax server, which relays them over the telephone network to the fax number of your choice. Note: This option must be made available by your System Administrator.
WorkCentre® 5945/5955 Fax Specifying the Fax Resolution (Server Fax) Server Fax scans your documents and sends them to any type of fax machine that is connected to a telephone network. Your images are sent from your device to a third party fax server, which relays them over the telephone network to the fax number of your choice. Note: This option must be made available by your System Administrator.
WorkCentre® 5945/5955 Fax Image Quality Choosing the Image Options for Server Faxes Server Fax scans your documents and sends them to any type of fax machine that is connected to a telephone network. Your images are sent from your device to a third party fax server, which relays them over the telephone network to the fax number of your choice. Note: This option must be made available by your System Administrator.
WorkCentre® 5945/5955 Fax More Information Choosing the Image Enhancement Options for Server Faxes Using a User ID to Log In at the Device Adding or Removing the Background Suppression for Server Faxes Explaining the Fax Options Using Internet Services to find System Administrator Contact Details System Administrator Guide www.xerox.com/support.
WorkCentre® 5945/5955 Fax 11. Select the option(s) required. 12. Select the OK button. 13. Press the Start button on the control panel to scan the original. 14. Remove the original from the document feeder or document glass when scanning has completed. 15. Press the Job Status button on the device control panel to view the job list and check the status of the job.
WorkCentre® 5945/5955 Fax • If you want to send the document to more than one recipient enter the additional details, one recipient at a time, and select the Add button again until all the recipients have been added. 8. Select the Close button to save the information you entered. 9. Select the Image Quality tab. 10. Select the Image Enhancement button. 11. Select Auto Suppression from the Background Suppression menu to automatically suppress unwanted background.
WorkCentre® 5945/5955 Fax 3. Press the Services Home button. 4. Select the Server Fax button. 5. If required, select the Server Fax tab. This is usually the active tab when the Server Fax service opens. 6. Select the Enter Fax Number entry box and use the numeric keypad, or the touch screen keypad to enter the recipient’s fax number. 7. Select the Add button.
WorkCentre® 5945/5955 Fax Use the Original Orientation option to specify the layout of the originals being scanned, whether the image on the page is in portrait, landscape, upright or rotated orientation in relation to the page itself. The orientation of the images on the originals must match the orientation selected. The device uses this information to identify if the images require rotating to produce the required output. 1. Load your documents face up in the document feeder input tray.
WorkCentre® 5945/5955 Fax Specifying the Size of the Original to be Faxed (Server Fax) Server Fax scans your documents and sends them to any type of fax machine that is connected to a telephone network. Your images are sent from your device to a third party fax server, which relays them over the telephone network to the fax number of your choice. Note: This option must be made available by your System Administrator.
WorkCentre® 5945/5955 Fax 15. Press the Job Status button on the device control panel to view the job list and check the status of the job. More Information Setting the Original Orientation for Server Faxes Using a User ID to Log In at the Device Explaining the Fax Options Using Internet Services to find System Administrator Contact Details System Administrator Guide www.xerox.com/support.
WorkCentre® 5945/5955 Fax • If required, select the Off button to cancel any programming you have entered. 12. Use the arrow buttons to specify a time to send your fax. • If your device uses a 12 hour clock, select either the AM or PM button. 13. Select the OK button. 14. Select any options required. 15. Press the Start button on the control panel to scan the original. 16. Remove the original from the document feeder or document glass when scanning has completed. 17.
WorkCentre® 5945/5955 Fax 11. Select the On button to turn the Build Job feature on and enable the Build Job options. • If required, select the Off button to cancel any programming you have entered. 12. Select the Options... button and choose the options required. • • Display summary window between segments shows the status of your job after each section has been scanned. Turn Build Job Off after job is submitted turns the feature off automatically after the final segment has been scanned. 13.
WorkCentre® 5945/5955 Fax Internet Fax Sending an Internet Fax Internet Fax is similar to the E-mail feature in that it sends documents across the internet or intranet using e-mail addresses. There are several key differences between Internet Fax and the E-mail feature. • Use Internet Fax if you need tracking evidence to confirm your document has been delivered, this is useful for audit purposes. • Use Internet Fax if you need to send to and receive from other Internet Fax enabled devices.
WorkCentre® 5945/5955 Fax 12. Press the Start button on the control panel to scan the original. 13. Remove the original from the document feeder or document glass when scanning has completed. 14. Press the Job Status button on the device control panel to view the job list and check the status of the job.
WorkCentre® 5945/5955 Fax 8. Select the required recipient and select To or CC from the menu. Continue adding recipients as required. Note: At least one To address must be selected, documents cannot be sent to a CC address alone. • To clear an entry from the list, select the entry and then select Remove Recipient from the menu. At the confirmation screen select the Remove button to approve the deletion. 9. Select the Close button. 10. Select any options required. 11.
WorkCentre® 5945/5955 Fax 5. If required, select the Internet Fax tab. This is usually the active tab when the Internet Fax service opens. 6. Select the New Recipient... button. 7. Use the touchscreen keyboard to enter the e-mail address of the recipient. • • • • • The number of alphanumeric characters that can be entered depends on the size of the characters chosen. Once the end of the entry box has been reached no more characters can be added. To delete a character use the backspace X button.
WorkCentre® 5945/5955 Fax Setting the Output Color for an Internet Fax Internet Fax is similar to the E-mail feature in that it sends documents across the internet or intranet using e-mail addresses. There are several key differences between Internet Fax and the E-mail feature. • Use Internet Fax if you need tracking evidence to confirm your document has been delivered, this is useful for audit purposes. • Use Internet Fax if you need to send to and receive from other Internet Fax enabled devices.
WorkCentre® 5945/5955 Fax 11. Select the Output Color option required. • • • • Auto Detect allows the device to select the most appropriate color setting. Black and White produces black and white output even if the originals were color. Grayscale produces output using various shades of gray. Color produces full color output. 12. Press the Start button on the control panel to scan the original. 13. Remove the original from the document feeder or document glass when scanning has completed. 14.
WorkCentre® 5945/5955 Fax 7. Use the touch screen keyboard to enter the e-mail address of the recipient. • • • • • The number of alphanumeric characters that can be entered depends on the size of the characters chosen. Once the end of the entry box has been reached no more characters can be added. To delete a character use the backspace X button. Use the special characters button to access special characters such as $ and %.
WorkCentre® 5945/5955 Fax If Authentication or Accounting has been enabled on your device you may have to enter login details to access the Internet Fax features. Use the Original Type options to define the type of original being scanned. Making the correct selection enhances the quality of your output image. 1. Load your documents face up in the document feeder input tray. Adjust the guide to just touch the documents. Or Lift up the document feeder.
WorkCentre® 5945/5955 Fax 12. For Print and Text originals, select the How Original was Produced option required. • • • • • Printed produces the best results for newspaper, magazine, map and other professionally printed originals. Photocopied is used for most photocopied and laser printed originals. Photograph is recommended for originals containing high quality photographs on photographic paper. Inkjet is used specifically for originals produced on inkjet printers.
WorkCentre® 5945/5955 Fax Use the Sharpness option to manually control the sharpness of the scanned images. 1. Load your documents face up in the document feeder input tray. Adjust the guide to just touch the documents. Or Lift up the document feeder. Place the document face down onto the document glass and register it to the arrow at the top left corner. Close the document feeder. 2. Press the Clear All button on the control panel to cancel any previous programming selections. 3.
WorkCentre® 5945/5955 Fax Sending an E-mail Explaining the Fax Options Using Internet Services to find System Administrator Contact Details System Administrator Guide www.xerox.com/support. Lightening or Darkening Internet Faxes Internet Fax is similar to the E-mail feature in that it sends documents across the internet or intranet using e-mail addresses. There are several key differences between Internet Fax and the E-mail feature.
WorkCentre® 5945/5955 Fax • If you want to send the document to more than one recipient enter the additional details, one recipient at a time, and select the Add button again until all the recipients have been added. 9. If required, select Cc from the To: dropdown menu to copy a recipient on the e-mail. Use the touch screen keyboard to enter the recipient details and then select the Add button. Note: At least one To address must be selected, documents cannot be sent to a Cc address alone. 10.
WorkCentre® 5945/5955 Fax Use the Sharpness option to manually control the sharpness of the scanned images. 1. Load your documents face up in the document feeder input tray. Adjust the guide to just touch the documents. Or Lift up the document feeder. Place the document face down onto the document glass and register it to the arrow at the top left corner. Close the document feeder. 2. Press the Clear All button on the control panel to cancel any previous programming selections. 3.
WorkCentre® 5945/5955 Fax More Information Choosing the Image Options for Internet Faxes Lightening or Darkening Internet Faxes Setting the Saturation for Internet Faxes Using a User ID to Log In at the Device Sending an E-mail Explaining the Fax Options Using Internet Services to find System Administrator Contact Details System Administrator Guide www.xerox.com/support.
WorkCentre® 5945/5955 Fax 8. Select the Add button. • If you want to send the document to more than one recipient enter the additional details, one recipient at a time, and select the Add button again until all the recipients have been added. 9. If required, select Cc from the To: dropdown menu to copy a recipient on the e-mail. Use the touch screen keyboard to enter the recipient details and then select the Add button.
WorkCentre® 5945/5955 Fax Use the Background Suppression option to enhance originals that have colored backgrounds, by reducing or eliminating the background on the output. This option is useful when your original is on colored paper. Use the Contrast option to control the image density on the output and compensate for an original that has too much or too little contrast on the image. 1. Load your documents face up in the document feeder input tray. Adjust the guide to just touch the documents.
WorkCentre® 5945/5955 Fax More Information Adding or Removing the Background Suppression for Internet Faxes Setting the Internet Fax Contrast Using a User ID to Log In at the Device Sending an E-mail Explaining the Fax Options Using Internet Services to find System Administrator Contact Details System Administrator Guide www.xerox.com/support.
WorkCentre® 5945/5955 Fax • Use the ENG button to access additional language keyboards. 8. Select the Add button. • If you want to send the document to more than one recipient enter the additional details, one recipient at a time, and select the Add button again until all the recipients have been added. 9. If required, select Cc from the To: dropdown menu to copy a recipient on the e-mail. Use the touch screen keyboard to enter the recipient details and then select the Add button.
WorkCentre® 5945/5955 Fax The Image Enhancement options improve the quality of your output by reducing the background or adjusting the contrast. Use the Contrast option to control the image density on the output and compensate for an original that has too much or too little contrast on the image. 1. Load your documents face up in the document feeder input tray. Adjust the guide to just touch the documents. Or Lift up the document feeder.
WorkCentre® 5945/5955 Fax 16. Remove the original from the document feeder or document glass when scanning has completed. 17. Press the Job Status button on the device control panel to view the job list and check the status of the job.
WorkCentre® 5945/5955 Fax • • Buttons with an icon in the lower right corner have accented or additional characters available. Select and hold the button to view related characters in a pop-up menu. Select the desired character from the pop-up menu. Use the ENG button to access additional language keyboards. 8. Select the Add button.
WorkCentre® 5945/5955 Fax Setting the Quality or File Size for Internet Faxes Internet Fax is similar to the E-mail feature in that it sends documents across the internet or intranet using e-mail addresses. There are several key differences between Internet Fax and the E-mail feature. • Use Internet Fax if you need tracking evidence to confirm your document has been delivered, this is useful for audit purposes.
WorkCentre® 5945/5955 Fax Note: At least one To address must be selected, documents cannot be sent to a Cc address alone. 10. Select the Close button to save the information you entered. 11. Select the Advanced Settings tab. 12. Select the Quality / File Size button. 13. Select the Quality / File Size option required. • • • Move the indicator towards Normal Quality / Small File Size for a smaller file and lower quality image. This produces small files by using advanced compression techniques.
WorkCentre® 5945/5955 Fax Use the Original Orientation option to specify the layout of the originals being scanned, whether the image on the page is in portrait, landscape, upright or rotated orientation in relation to the page itself. The orientation of the images on the originals must match the orientation selected. The device uses this information to identify if the images require rotating to produce the required output. 1. Load your documents face up in the document feeder input tray.
WorkCentre® 5945/5955 Fax Note: SEF is Short Edge Feed (where the short edge of the paper is the leading edge when the paper is fed into the device). LEF is Long Edge Feed (where the paper is oriented so that the long edge is fed into the device first). Note: If you are using the Document Glass, the orientation is as seen before turning the original over. 14. Select the OK button. 15. Press the Start button on the control panel to scan the original. 16.
WorkCentre® 5945/5955 Fax 7. Use the touch screen keyboard to enter the e-mail address of the recipient. • • • • • The number of alphanumeric characters that can be entered depends on the size of the characters chosen. Once the end of the entry box has been reached no more characters can be added. To delete a character use the backspace X button. Use the special characters button to access special characters such as $ and %.
WorkCentre® 5945/5955 Fax Internet Fax Options Adding a Message to an Internet Fax Internet Fax is similar to the E-mail feature in that it sends documents across the internet or intranet using e-mail addresses. There are several key differences between Internet Fax and the E-mail feature. • Use Internet Fax if you need tracking evidence to confirm your document has been delivered, this is useful for audit purposes.
WorkCentre® 5945/5955 Fax 11. Select the Internet Fax Options tab. 12. Select the Message button. 13. Use the touchscreen keyboard to enter the text required. • • • • • The number of alphanumeric characters that can be entered depends on the size of the characters chosen. Once the end of the entry box has been reached no more characters can be added. To delete a character use the backspace X button. Use the special characters button to access special characters such as $ and %.
WorkCentre® 5945/5955 Fax Note: This option must be made available by your System Administrator. 1. Load your documents face up in the document feeder input tray. Adjust the guide to just touch the documents. Or Lift up the document feeder. Place the document face down onto the document glass and register it to the arrow at the top left corner. Close the document feeder. 2. Press the Clear All button on the control panel to cancel any previous programming selections. 3. Press the Services Home button. 4.
WorkCentre® 5945/5955 Fax 16. Remove the original from the document feeder or document glass when scanning has completed. 17. Press the Job Status button on the device control panel to view the job list and check the status of the job. More Information Using a User ID to Log In at the Device Sending an E-mail Explaining the Fax Options Using Internet Services to find System Administrator Contact Details System Administrator Guide www.xerox.com/support.
WorkCentre® 5945/5955 Fax • Use the ENG button to access additional language keyboards. 8. Select the Add button. • If you want to send the document to more than one recipient enter the additional details, one recipient at a time, and select the Add button again until all the recipients have been added. 9. If required, select Cc from the To: dropdown menu to copy a recipient on the e-mail. Use the touch screen keyboard to enter the recipient details and then select the Add button.
WorkCentre® 5945/5955 Fax Build Job can also be used to assemble individual pages scanned using the document glass into a single job. 1. Split the originals into sections for individual programming. 2. Press the Clear All button on the control panel to cancel any previous programming selections. 3. Press the Services Home button. 4. Select the Internet Fax button. 5. If required, select the Internet Fax tab. This is usually the active tab when the Internet Fax service opens. 6. Select the New Recipient...
WorkCentre® 5945/5955 Fax 18. Load your first segment originals face up in the document feeder input tray. Adjust the guide to just touch the documents. Or Lift up the document feeder. Place the first segment face down onto the document glass and register it to the arrow at the top left corner. Close the document feeder. 19. Press the Start button on the control panel to scan the original. 20. Remove the first segment originals after they have been scanned.
Scan 5 Workflow Scanning Explaining What Workflow Scanning Does and How It Works The standard Workflow Scanning option enables the electronic images to be stored and retrieved from a server or workstation on the network. Two further options are available: • Scan to Mailbox will store the image on the device hard disk and the user can retrieve the file using Internet Services. • Scan to Home allows the user to send the files to a location on the network specified as their Home destination.
WorkCentre® 5945/5955 Scan Templates Use the Templates feature when you want to scan or fax jobs using the Workflow Scanning service on your device. Templates contain information to tell the device where to file a scanned document. They also contain settings, such as image quality and file format. Templates help you scan images more quickly because the template contains all the pre-programmed settings for your scan. If necessary, you can change the settings at the device.
WorkCentre® 5945/5955 Scan More Information Explaining What Workflow Scanning Does and How It Works Using a User ID to Log In at the Device Scanning a Document to your Computer or Network using Single-Touch Scan Creating a New Template in Internet Services Using Internet Services to find System Administrator Contact Details System Administrator Guide www.xerox.com/support.
WorkCentre® 5945/5955 Scan • • Grayscale produces output using various shades of gray. Color produces full color output. 10. Press the Start button on the control panel to scan the original. 11. Remove the original from the document feeder or document glass when scanning has completed. 12. Press the Job Status button on the device control panel to view the job list and check the status of the job.
WorkCentre® 5945/5955 Scan 9. Select the 2-Sided Scanning option required. • • • 1-Sided use this option if your originals are printed on 1 side. 2-Sided use this option if your originals are 2-sided. The document feeder must be used to scan your originals with this option. 2-Sided, Rotate Side 2 use this option if your originals are 2-sided and open up like a calendar. The document feeder must be used to scan your originals with this option. 10.
WorkCentre® 5945/5955 Scan Note: If your System Administrator has added mandatory fields to the default template you will be asked to complete the required document information as soon as you select the Workflow Scanning button. 5. If required, select the Workflow Scanning tab. This is usually the active tab when the Workflow Scanning service opens. 6. Select a template type from the All Templates dropdown menu. 7.
WorkCentre® 5945/5955 Scan 13. Remove the original from the document feeder or document glass when scanning has completed. 14. Press the Job Status button on the device control panel to view the job list and check the status of the job. More Information Explaining What Workflow Scanning Does and How It Works Using a User ID to Log In at the Device Using Internet Services to find System Administrator Contact Details System Administrator Guide www.xerox.com/support.
WorkCentre® 5945/5955 Scan 10. Use the touch screen keyboard to enter the file name. • • • • Up to 40 alphanumeric characters can be entered. To delete a character use the backspace X button. Use the special characters button to access special characters such as $ and %. Buttons with an icon in the lower right corner have accented or additional characters available. Select and hold the button to view related characters in a pop-up menu. Select the desired character from the pop-up menu. 11.
WorkCentre® 5945/5955 Scan Note: If your System Administrator has added mandatory fields to the default template you will be asked to complete the required document information as soon as you select the Workflow Scanning button. 5. If required, select the Workflow Scanning tab. This is usually the active tab when the Workflow Scanning service opens. 6. Select the All Templates button. 7. Select the Machine Stored Templates button. 8. Select the template required. 9.
WorkCentre® 5945/5955 Scan 4. Select the Workflow Scanning button on the touch screen. Note: If your System Administrator has added mandatory fields to the default template you will be asked to complete the required document information as soon as you select the Workflow Scanning button. 5. If required, select the Workflow Scanning tab. This is usually the active tab when the Workflow Scanning service opens. 6. Select the All Templates button. 7. Select the Remotely Stored Templates button. 8.
WorkCentre® 5945/5955 Scan To store images in a folder, select the template required and scan your images. Refer to the System Administrator Guide for further information. 1. Load your documents face up in the document feeder input tray. Adjust the guide to just touch the documents. Or Lift up the document feeder. Place the document face down onto the document glass and register it to the arrow at the top left corner. Close the document feeder. 2.
WorkCentre® 5945/5955 Scan A Template must be used when a scan is made - the template contains the filing destination address and other scan settings such as the image quality. When making a scan you can edit the scan settings but not the filing destination. Note: This option must be made available by your System Administrator. If Authentication or Accounting has been enabled on your device you may have to enter login details to access the Workflow Scanning features.
WorkCentre® 5945/5955 Scan 16. Press the Log In / Out button on the Control Panel. 17. At the confirmation screen, select the Logout button. More Information Using a User ID to Log In at the Device Using Internet Services to find System Administrator Contact Details System Administrator Guide www.xerox.com/support.
WorkCentre® 5945/5955 Scan 12. Remove the USB Flash Drive from the USB port when you have finished. More Information Using a User ID to Log In at the Device Using Internet Services to find System Administrator Contact Details System Administrator Guide www.xerox.com/support.
WorkCentre® 5945/5955 Scan 7. If required, ensure the latest templates are available by selecting Update Templates from the Advanced Settings tab. 8. Select the template required. 9. Select the Advanced Settings tab. 10. Select the Image Options button. 11. Select the option(s) required. 12. Select the OK button. 13. Press the Start button on the control panel to scan the original. 14. Remove the original from the document feeder or document glass when scanning has completed. 15.
WorkCentre® 5945/5955 Scan Note: If your System Administrator has added mandatory fields to the default template you will be asked to complete the required document information as soon as you select the Workflow Scanning button. 5. If required, select the Workflow Scanning tab. This is usually the active tab when the Workflow Scanning service opens. 6. Select a template type from the All Templates dropdown menu. 7.
WorkCentre® 5945/5955 Scan Use the Sharpness option to manually control the sharpness of the scanned images. 1. Load your documents face up in the document feeder input tray. Adjust the guide to just touch the documents. Or Lift up the document feeder. Place the document face down onto the document glass and register it to the arrow at the top left corner. Close the document feeder. 2. Press the Clear All button on the control panel to cancel any previous programming selections. 3.
WorkCentre® 5945/5955 Scan A Template must be used when a scan is made - the template contains the filing destination address and other scan settings such as the image quality. When making a scan you can edit the scan settings but not the filing destination. Note: This option must be made available by your System Administrator. Use the Saturation option to manually control the brightness of the color in the scanned images.
WorkCentre® 5945/5955 Scan Image Enhancement Choosing an Image Enhancement Option for Workflow Scanning Workflow Scanning converts hard copy documents into electronic images and saves them into network filing destinations (repositories). A Template must be used when a scan is made - the template contains the filing destination address and other scan settings such as the image quality. When making a scan you can edit the scan settings but not the filing destination.
WorkCentre® 5945/5955 Scan 14. Remove the original from the document feeder or document glass when scanning has completed. 15. Press the Job Status button on the device control panel to view the job list and check the status of the job.
WorkCentre® 5945/5955 Scan 10. Select the Image Enhancement button. 11. Select Auto Suppression from the Background Suppression menu to automatically suppress unwanted background. • If required, select Off to turn the Background Suppression feature off.
WorkCentre® 5945/5955 Scan Note: If your System Administrator has added mandatory fields to the default template you will be asked to complete the required document information as soon as you select the Workflow Scanning button. 5. If required, select the Workflow Scanning tab. This is usually the active tab when the Workflow Scanning service opens. 6. Select a template type from the All Templates dropdown menu. 7.
WorkCentre® 5945/5955 Scan Use the Scan Presets options to select a group of commonly used scan settings. These options are useful if you aren’t sure exactly what settings you need, but do know what your scanned images will be used for. 1. Load your documents face up in the document feeder input tray. Adjust the guide to just touch the documents. Or Lift up the document feeder. Place the document face down onto the document glass and register it to the arrow at the top left corner.
WorkCentre® 5945/5955 Scan Specifying the Workflow Scanning Resolution Workflow Scanning converts hard copy documents into electronic images and saves them into network filing destinations (repositories). A Template must be used when a scan is made - the template contains the filing destination address and other scan settings such as the image quality. When making a scan you can edit the scan settings but not the filing destination. Note: This option must be made available by your System Administrator.
WorkCentre® 5945/5955 Scan • • • 300 dpi produces higher quality output. This setting is recommended for high quality text documents that are to pass through OCR (Optical Character Recognition) applications. It is also recommended for high quality line art or medium quality photos and graphics. This is the best default resolution choice in most cases. 400 dpi produces average image quality for photos and graphics and is recommended for photos and graphics.
WorkCentre® 5945/5955 Scan Note: If you change the Quality / File Size settings you may affect the settings in the Scan Presets options. 1. Load your documents face up in the document feeder input tray. Adjust the guide to just touch the documents. Or Lift up the document feeder. Place the document face down onto the document glass and register it to the arrow at the top left corner. Close the document feeder. 2.
WorkCentre® 5945/5955 Scan Updating the Workflow Scanning Templates List on the Device Workflow Scanning converts hard copy documents into electronic images and saves them into network filing destinations (repositories). A Template must be used when a scan is made - the template contains the filing destination address and other scan settings such as the image quality. When making a scan you can edit the scan settings but not the filing destination.
WorkCentre® 5945/5955 Scan Layout Adjustment Setting the Original Orientation for Workflow Scanning Workflow Scanning converts hard copy documents into electronic images and saves them into network filing destinations (repositories). A Template must be used when a scan is made - the template contains the filing destination address and other scan settings such as the image quality. When making a scan you can edit the scan settings but not the filing destination.
WorkCentre® 5945/5955 Scan Note: If you are using the Document Glass, the orientation is as seen before turning the original over. 12. Select the OK button. 13. Press the Start button on the control panel to scan the original. 14. Remove the original from the document feeder or document glass when scanning has completed. 15. Press the Job Status button on the device control panel to view the job list and check the status of the job.
WorkCentre® 5945/5955 Scan 8. Select the template required. 9. Select the Layout Adjustment tab. 10. Select the Original Size button. 11. Select the Original Size option required. • • • • Auto Detect enables automatic size sensing, this is the default setting. The size detected is matched to a standard paper size. Preset Scan Area defines the size of your original from a list of preset, standard original sizes. You can view the list by using the scroll bar.
WorkCentre® 5945/5955 Scan Use the Edge Erase options to specify the scan area so that only a specific section of your document is scanned. This is useful if you want to remove the marks caused by punched holes or staples in your original. 1. Load your documents face up in the document feeder input tray. Adjust the guide to just touch the documents. Or Lift up the document feeder. Place the document face down onto the document glass and register it to the arrow at the top left corner.
WorkCentre® 5945/5955 Scan Removing Blank Pages from Workflow Scan Originals During Scanning Workflow Scanning converts hard copy documents into electronic images and saves them into network filing destinations (repositories). A Template must be used when a scan is made - the template contains the filing destination address and other scan settings such as the image quality. When making a scan you can edit the scan settings but not the filing destination.
WorkCentre® 5945/5955 Scan More Information Explaining What Workflow Scanning Does and How It Works Using a User ID to Log In at the Device Erasing Edges from Workflow Scans Setting the Background Suppression for Workflow Scans Using Internet Services to find System Administrator Contact Details System Administrator Guide www.xerox.com/support.
WorkCentre® 5945/5955 Scan 11. Select the type of file required. • • • • • PDF (Portable Document Format) produces a single file, or an individual file per page.The output is not searchable. Depending on the receiving device, the PDF selection may not be compatible when the resolution is set to 200 dpi. This option is best used for sharing and printing documents. PDF/A produces a single file, or an individual file per page. The output is not searchable.
WorkCentre® 5945/5955 Scan Use the Filing Options to determine how the device handles duplicate file names. It can overwrite the existing file, cancel the scan process or automatically generate a new file name. 1. Load your documents face up in the document feeder input tray. Adjust the guide to just touch the documents. Or Lift up the document feeder. Place the document face down onto the document glass and register it to the arrow at the top left corner. Close the document feeder. 2.
WorkCentre® 5945/5955 Scan Assigning Descriptive Data to a Workflow Scanning Job Workflow Scanning converts hard copy documents into electronic images and saves them into network filing destinations (repositories). A Template must be used when a scan is made - the template contains the filing destination address and other scan settings such as the image quality. When making a scan you can edit the scan settings but not the filing destination.
WorkCentre® 5945/5955 Scan Or • If your System Administrator has not set up the Document Management feature with mandatory fields select the Filing Options tab. - Select the Document Management button. - Select the section you want to edit. - Use the touch screen keyboard to enter or edit the document information as required. - Up to 40 alphanumeric characters can be entered. - To delete a character use the backspace X button.
WorkCentre® 5945/5955 Scan 4. Select the Workflow Scanning button on the touch screen. Note: If your System Administrator has added mandatory fields to the default template you will be asked to complete the required document information as soon as you select the Workflow Scanning button. 5. If required, select the Workflow Scanning tab. This is usually the active tab when the Workflow Scanning service opens. 6. Select a template type from the All Templates dropdown menu. 7.
WorkCentre® 5945/5955 Scan Build Job can also be used to assemble individual pages scanned using the document glass into a single job. 1. Load your documents face up in the document feeder input tray. Adjust the guide to just touch the documents. Or Lift up the document feeder. Place the document face down onto the document glass and register it to the arrow at the top left corner. Close the document feeder. 2. Press the Clear All button on the control panel to cancel any previous programming selections.
WorkCentre® 5945/5955 Scan 18. If required, select the options for the segment. • • • Sample Last Segment produces a proof print of the last segment scanned. If you are satisfied with the proof you can continue programming the Build Job. Delete Last Segment deletes the last segment scanned. You can continue programming the Build Job. Delete All Segments deletes the current Build Job and returns you to the main Build Job screen. 19. Select the features required for the second segment. 20.
WorkCentre® 5945/5955 Scan Scan To Using the Scan To Feature Use the Scan To... Feature to scan a document and store it in a folder on your computer or network. To use Scan To you need to create an entry in the Device Address Book which contains the path to the location that you want to scan to. The Scan To button is grayed out on the device touch screen if there are no Scan To entries in the Device Address Book. Note: This option must be made available by your System Administrator.
WorkCentre® 5945/5955 Scan The Scan To button is grayed out on the device touch screen if there are no Scan To entries in the Device Address Book. Note: This option must be made available by your System Administrator. If Authentication or Accounting has been enabled on your device you may have to enter login details to access the Scan To features. Use the Favorites option to select a stored address from the E-mail, Fax, Internet Fax or Scan To services.
WorkCentre® 5945/5955 Scan • • • • • • • - Solid Ink is recommended for originals produced on solid ink devices. Select the OK button. Photo gives the best quality for photos but reduced quality text and line art. It is the best option for originals containing photos or continuous tones without any text or line art. Select the How Original was Produced option required. - Printed produces the best results for newspaper, magazine, map and other professionally printed originals.
WorkCentre® 5945/5955 Scan Scan To Setting the Output Color using the Scan To Feature Use the Scan To... Feature to scan a document and store it in a folder on your computer or network. To use Scan To you need to create an entry in the Device Address Book which contains the path to the location that you want to scan to. The Scan To button is grayed out on the device touch screen if there are no Scan To entries in the Device Address Book.
WorkCentre® 5945/5955 Scan Using the Scan To Feature to send 2-Sided Originals Use the Scan To... Feature to scan a document and store it in a folder on your computer or network. To use Scan To you need to create an entry in the Device Address Book which contains the path to the location that you want to scan to. The Scan To button is grayed out on the device touch screen if there are no Scan To entries in the Device Address Book. Note: This option must be made available by your System Administrator.
WorkCentre® 5945/5955 Scan Setting the Original Type using the Scan To Feature Use the Scan To... Feature to scan a document and store it in a folder on your computer or network. To use Scan To you need to create an entry in the Device Address Book which contains the path to the location that you want to scan to. The Scan To button is grayed out on the device touch screen if there are no Scan To entries in the Device Address Book. Note: This option must be made available by your System Administrator.
WorkCentre® 5945/5955 Scan Photograph is recommended for originals containing high quality photographs on photographic paper. - Inkjet is used specifically for originals produced on inkjet printers. - Solid Ink is recommended for originals produced on solid ink devices. Select the OK button. Text produces sharper edges and is recommended for text and line art. Select the How Original was Produced option required.
WorkCentre® 5945/5955 Scan Use the File Name option to specify a name for the file containing the scanned images. 1. Load your documents face up in the document feeder input tray. Adjust the guide to just touch the documents. Or Lift up the document feeder. Place the document face down onto the document glass and register it to the arrow at the top left corner. Close the document feeder. 2. Press the Clear All button on the control panel to cancel any previous programming selections. 3.
WorkCentre® 5945/5955 Scan Note: This option must be made available by your System Administrator. If Authentication or Accounting has been enabled on your device you may have to enter login details to access the Scan To features. The Image Options features give you choices for changing the appearance of the output. Use the Lighten / Darken options to manually adjust the lightness or darkness of the image. Light originals containing pencil images may produce better output if the darkness is increased.
WorkCentre® 5945/5955 Scan Lightening or Darkening Documents using the Scan To Feature Use the Scan To... Feature to scan a document and store it in a folder on your computer or network. To use Scan To you need to create an entry in the Device Address Book which contains the path to the location that you want to scan to. The Scan To button is grayed out on the device touch screen if there are no Scan To entries in the Device Address Book.
WorkCentre® 5945/5955 Scan Changing the Sharpness of Scan To Documents Use the Scan To... Feature to scan a document and store it in a folder on your computer or network. To use Scan To you need to create an entry in the Device Address Book which contains the path to the location that you want to scan to. The Scan To button is grayed out on the device touch screen if there are no Scan To entries in the Device Address Book. Note: This option must be made available by your System Administrator.
WorkCentre® 5945/5955 Scan Changing the Saturation of Scan To Documents Use the Scan To... Feature to scan a document and store it in a folder on your computer or network. To use Scan To you need to create an entry in the Device Address Book which contains the path to the location that you want to scan to. The Scan To button is grayed out on the device touch screen if there are no Scan To entries in the Device Address Book. Note: This option must be made available by your System Administrator.
WorkCentre® 5945/5955 Scan Image Enhancement Choosing an Image Enhancement Option when using the Scan To Feature Use the Scan To... Feature to scan a document and store it in a folder on your computer or network. To use Scan To you need to create an entry in the Device Address Book which contains the path to the location that you want to scan to. The Scan To button is grayed out on the device touch screen if there are no Scan To entries in the Device Address Book.
WorkCentre® 5945/5955 Scan More Information Using a User ID to Log In at the Device System Administrator Guide www.xerox.com/support. Using the Scan To Feature Setting the Background Suppression using the Scan To Feature Setting the Contrast using the Scan To Feature Setting the Background Suppression using the Scan To Feature Use the Scan To... Feature to scan a document and store it in a folder on your computer or network.
WorkCentre® 5945/5955 Scan 14. Remove the original from the document feeder or document glass when scanning has completed. 15. Press the Job Status button on the device control panel to view the job list and check the status of the job. More Information Using a User ID to Log In at the Device Using Internet Services to find System Administrator Contact Details System Administrator Guide www.xerox.com/support.
WorkCentre® 5945/5955 Scan • Move the Manual Contrast indicator towards Less to produce more detail in light and dark areas of the original. 12. Select the OK button. 13. Press the Start button on the control panel to scan the original. 14. Remove the original from the document feeder or document glass when scanning has completed. 15. Press the Job Status button on the device control panel to view the job list and check the status of the job.
WorkCentre® 5945/5955 Scan 11. Select the Scan Presets option required. • • • • • Sharing and Printing produces a medium sized file, small enough to share but high enough quality to print. High Quality Printing produces a large, high quality file. Archival - Small File Size produces a small, lower quality file suitable for viewing on a screen, but the print quality will be poor. Simple Scan produces a basic scanned file, no advanced settings are selected.
WorkCentre® 5945/5955 Scan 6. Select the address required. 7. Select the Add To Recipients button. 8. Select the OK button. 9. Select the Advanced Settings tab. 10. Select the Resolution button. 11. Select the Resolution option required. • • • • • • • 72 dpi produces the smallest file size and is recommended for output displayed on a computer. 100 dpi delivers low image quality and is recommended for low quality text documents.
WorkCentre® 5945/5955 Scan Use the Quality / File Size options to choose between scan image quality and file size. You can select the highest quality, the smallest files or adjust the settings to balance quality against file size. • A small file size delivers slightly reduced image quality but is better when sharing the file over a network. • A larger file size delivers improved image quality but requires more time when transmitting over the network.
WorkCentre® 5945/5955 Scan Layout Adjustment Setting the Original Orientation using the Scan To Feature Use the Scan To... Feature to scan a document and store it in a folder on your computer or network. To use Scan To you need to create an entry in the Device Address Book which contains the path to the location that you want to scan to. The Scan To button is grayed out on the device touch screen if there are no Scan To entries in the Device Address Book.
WorkCentre® 5945/5955 Scan 13. Press the Start button on the control panel to scan the original. 14. Remove the original from the document feeder or document glass when scanning has completed. 15. Press the Job Status button on the device control panel to view the job list and check the status of the job. More Information Using a User ID to Log In at the Device Using Internet Services to find System Administrator Contact Details System Administrator Guide www.xerox.com/support.
WorkCentre® 5945/5955 Scan 11. Select the Original Size option required. • • • • Auto Detect enables automatic size sensing, this is the default setting. The size detected is matched to a standard paper size. Preset Scan Area defines the size of your original from a list of preset, standard original sizes. You can view the list by using the scroll bar. Custom Scan Area sets a specific area for scanning and is useful for scanning receipts.
WorkCentre® 5945/5955 Scan Use the Edge Erase options to specify the scan area so that only a specific section of your document is scanned. This is useful if you want to remove the marks caused by punched holes or staples in your original. 1. Load your documents face up in the document feeder input tray. Adjust the guide to just touch the documents. Or Lift up the document feeder. Place the document face down onto the document glass and register it to the arrow at the top left corner.
WorkCentre® 5945/5955 Scan Removing Blank Pages from Originals During Scanning using the Scan To Feature Use the Scan To... Feature to scan a document and store it in a folder on your computer or network. To use Scan To you need to create an entry in the Device Address Book which contains the path to the location that you want to scan to. The Scan To button is grayed out on the device touch screen if there are no Scan To entries in the Device Address Book.
WorkCentre® 5945/5955 Scan More Information Using a User ID to Log In at the Device Using Internet Services to find System Administrator Contact Details System Administrator Guide www.xerox.com/support. Using the Scan To Feature Filing Options Setting a File Format using the Scan To Feature Use the Scan To... Feature to scan a document and store it in a folder on your computer or network.
WorkCentre® 5945/5955 Scan • • • XPS (XML Paper Specification) outputs a single file, or an individual file per page. The output is not searchable. XPS is best used for sharing and printing documents containing text and photos. TIFF (Tagged Image File Format) produces a single file or an individual file per page. The output is not searchable. TIFFs are best used for archiving. JPEG produces files best used for on-screen viewing and sharing of files.
WorkCentre® 5945/5955 Scan Use the Filing Options to determine how the device handles duplicate file names. It can overwrite the existing file, cancel the scan process or automatically generate a new file name. 1. Load your documents face up in the document feeder input tray. Adjust the guide to just touch the documents. Or Lift up the document feeder. Place the document face down onto the document glass and register it to the arrow at the top left corner. Close the document feeder. 2.
WorkCentre® 5945/5955 Scan Building a Job with Multiple Page or Segment Settings using the Scan To Feature Use the Scan To... Feature to scan a document and store it in a folder on your computer or network. To use Scan To you need to create an entry in the Device Address Book which contains the path to the location that you want to scan to. The Scan To button is grayed out on the device touch screen if there are no Scan To entries in the Device Address Book.
WorkCentre® 5945/5955 Scan Note: If tab media is selected, the image will be shifted 13mm (0.5”) to the right automatically if the tab original is A4 or 8.5x11” size. 15. Load your first segment originals face up in the document feeder input tray. Adjust the guide to just touch the documents. Or Lift up the document feeder. Place the first segment face down onto the document glass and register it to the arrow at the top left corner. Close the document feeder. 16.
WorkCentre® 5945/5955 Scan Scanning to a USB Memory Stick using the Scan To Feature Use the Scan To... USB option to scan documents directly onto your USB flash drive / memory stick. Note: This option must be made available by your System Administrator. Refer to the System Administrator Guide for further information. If Authentication or Accounting has been enabled on your device you may have to enter login details to access the Scan To features. 1.
WorkCentre® 5945/5955 Scan The Single-Touch Scan service can be configured with scan settings already specified so that you can scan your document quickly. Your System Administrator can also customize the service so that you can select the Build Job, Output Color, Original Type, 2-Sided Scanning and File Name settings each time you scan your document. Note: This option must be made available by your System Administrator.
WorkCentre® 5945/5955 Scan Use the Build Job option to build a job that requires different settings for each page, or for groups of pages (segments) of your document. Build Job can also be used to assemble individual pages scanned using the document glass into a single job. 1. Split the originals into sections for individual programming. 2. Press the Clear All button on the control panel to cancel any previous programming selections. 3. Press the Services Home button. 4.
WorkCentre® 5945/5955 Scan Setting the Output Color for a Single-Touch Scan The Single-Touch Scan feature is a fast and convenient way to scan a document and send it to a predefined scan destination on your computer or network location. Your System Administrator will create a button on the device touch screen for each Single-Touch Scan destination (up to 10 buttons) and can customize the color scheme, logo and instructional text that displays when you select the Single-Touch Scan button.
WorkCentre® 5945/5955 Scan Using Single-Touch Scan to Send 2-Sided Originals The Single-Touch Scan feature is a fast and convenient way to scan a document and send it to a predefined scan destination on your computer or network location. Your System Administrator will create a button on the device touch screen for each Single-Touch Scan destination (up to 10 buttons) and can customize the color scheme, logo and instructional text that displays when you select the Single-Touch Scan button.
WorkCentre® 5945/5955 Scan Setting the Original Type for Single-Touch Scans The Single-Touch Scan feature is a fast and convenient way to scan a document and send it to a predefined scan destination on your computer or network location. Your System Administrator will create a button on the device touch screen for each Single-Touch Scan destination (up to 10 buttons) and can customize the color scheme, logo and instructional text that displays when you select the Single-Touch Scan button.
WorkCentre® 5945/5955 Scan • • Inkjet is used specifically for originals produced on inkjet printers. Solid Ink is recommended for originals produced on solid ink devices. 7. Select the OK button. 8. Press the Start button on the control panel to scan the original. 9. Remove the original from the document feeder or document glass when scanning has completed. 10. Press the Job Status button on the device control panel to view the job list and check the status of the job.
WorkCentre® 5945/5955 Scan • • Use the special characters button to access special characters such as $ and %. Buttons with an icon in the lower right corner have accented or additional characters available. Select and hold the button to view related characters in a pop-up menu. Select the desired character from the pop-up menu. 6. Select the OK button. 7. Press the Start button on the control panel to scan the original. 8.
WorkCentre® 5945/5955 Scan Remote Scan Scanning an image using the Xerox TWAIN Scan Driver The Xerox TWAIN scan driver scans images directly to your computer. The TWAIN driver can be used by many popular software applications to import scanned images. The scan driver allows you to use the specific features available on your device. Your System Administrator can configure access to the remote scanning feature.
WorkCentre® 5945/5955 Scan • • 400 dpi produces average image quality for photos and graphics and is recommended for photos and graphics. 600 dpi produces the largest image file size, but delivers the best image quality. This setting is recommended for high quality photos and graphics. 11. Select the Image Color option required. • • • • Auto Detect allows the device to select the most appropriate color setting. Color produces full color output. Grayscale produces output using various shades of gray.
Scan 298 WorkCentre® 5945/5955 User Guide
Print 6 PCL Driver Printing a Document using the PCL Print Driver You can print to the device from your computer through a print driver. There are a variety of Xerox print drivers available for the device to support all the popular operating systems. The Xerox print drivers allow you to use the specific features available on your device. Note: The device is enabled for AirPrint.
WorkCentre® 5945/5955 Print • Setting specific print settings for applications, for example, setting all Microsoft Word documents to print single sided. • Limiting print jobs to secure print jobs. Your System Administrator may also configure your print driver to prompt you to enter login details when you print a document. Refer to the System Administrator Guide for further information. 1. Open the document to be printed.
Print WorkCentre® 5945/5955 Tab menu Printing Options Job Type Using the Job Type Feature with the PCL Print Driver You can print to the device from your computer through a print driver. There are a variety of Xerox print drivers available for the device to support all the popular operating systems. The Xerox print drivers allow you to use the specific features available on your device. If Authentication has been enabled on your device you may have to login at the device to see or release your jobs.
Print WorkCentre® 5945/5955 Note: To use this feature, your System Administrator must install and enable the fax option on your device. 1. Open the document to be printed. From most applications select the Office button or select File, then select Print from the file menu. 2. Enter the number of copies you want to produce. Depending on the application you are using you may also be able to select a page range and make other print selections. 3.
Print WorkCentre® 5945/5955 Printing a Normal Print Job using the PCL Print Driver You can print to the device from your computer through a print driver. There are a variety of Xerox print drivers available for the device to support all the popular operating systems. The Xerox print drivers allow you to use the specific features available on your device. If Authentication has been enabled on your device you may have to login at the device to see or release your jobs.
WorkCentre® 5945/5955 Print Printing a Secure Print Job using the PCL Print Driver You can print to the device from your computer through a print driver. There are a variety of Xerox print drivers available for the device to support all the popular operating systems. The Xerox print drivers allow you to use the specific features available on your device. Note: The device is enabled for AirPrint.
WorkCentre® 5945/5955 Print 16. If your job remains held in the Active Jobs list, the device needs you to supply additional resources, such as paper or staples before it can complete the job. To find out what resources are needed, select the job and then select the Details button. Once the resources are available the job will print. More Information Printing a Document using the PCL Print Driver Using the Job Type Feature with the PCL Print Driver System Administrator Guide www.xerox.com/support.
WorkCentre® 5945/5955 Print 11. Print jobs are usually shown in the Active Jobs list, however if your System Administrator has enabled the Hold All Jobs feature, your job will be listed in either the Held Print Jobs or the Unidentified Print Jobs list. Select the job in the required list and select the Release button to print the sample set. 12. Check the printed sample is correct. 13. Select the job required from the list.
Print WorkCentre® 5945/5955 9. Select the option(s) required. 10. Click the OK button to save your settings. 11. Select the confirmation button, the name will vary depending on the application you are printing from. From most applications select the OK or Print button. 12. At the specified time, collect your document at the device. 13. Press the Job Status button on the device control panel to view the job list and check the status of the job. 14.
WorkCentre® 5945/5955 Print 4. Open the print driver Properties window - the method will vary depending on the application you are printing from. From most Microsoft applications select the Properties or Preferences button to open the window. 5. If required, click the Printing Options tab. This is usually the active tab when the print driver opens. 6. Select Saved Job from the Job Type dropdown menu. 7. Select the Job Name entry box and use your keyboard to enter a name for your job.
WorkCentre® 5945/5955 Print Use the Fax option in your print driver to send a document to a fax address. The job is sent from your computer to the device in the same way as a print job, but instead of being printed it is then faxed over a telephone line to the specified fax destination. Note: To use this feature, your System Administrator must install and enable the fax option on your device. 1. Open the document to be printed.
WorkCentre® 5945/5955 Print • • - Select the contact required from the list. If the contact list is long, click in the Search... entry box and use your keyboard to enter the contact details. Click the OK button to see the search results. - Select the Add button. - Click the OK button. 7.
WorkCentre® 5945/5955 Print 10. If you want the device to print a confirmation sheet, use a specific send speed or resolution, send at a specific time, use a dialing prefix or include credit card details, click the Options tab. • • • • • • • • If required, select Send to Printer from the Confirmation menu to have the device print a page stating that your job has successfully faxed. Depending on how your System Administrator has configured the device an error sheet may print if the job fails.
WorkCentre® 5945/5955 Print The paper types loaded in the device are listed. You can select other paper types - but you will need to load them into the appropriate tray before your job will print correctly. It is usually easier to load the paper required into the device before programming your job as this helps to ensure you select both the correct paper type and the correct tray when sending your job. 1. Open the document to be printed.
WorkCentre® 5945/5955 Print Loading Tray 2 and Changing the Tray Settings Loading Tray 3 Loading Tray 4 Loading the Bypass Tray and Changing the Tray Settings Printing 2-Sided using the PCL Print Driver You can print to the device from your computer through a print driver. There are a variety of Xerox print drivers available for the device to support all the popular operating systems. The Xerox print drivers allow you to use the specific features available on your device.
Print WorkCentre® 5945/5955 12. If your job remains held in the Active Jobs list, the device needs you to supply additional resources, such as paper or staples before it can complete the job. To find out what resources are needed, select the job and then select the Details button. Once the resources are available the job will print. More Information Printing a Document using the PCL Print Driver System Administrator Guide www.xerox.com/support.
Print WorkCentre® 5945/5955 4. Open the print driver Properties window - the method will vary depending on the application you are printing from. From most Microsoft applications select the Properties or Preferences button to open the window. 5. If required, click the Printing Options tab. This is usually the active tab when the print driver opens. 6. Select the Finishing option required. 7. Click the OK button to save your settings. 8.
WorkCentre® 5945/5955 Print 6. Select the stapling option required from the Finishing menu. • • 1 Staple positions a single staple the top left corner of your document. 2 Staples positions 2 staples along the trail edge of your document. 7. Click the OK button to save your settings. 8. Select the confirmation button, the name will vary depending on the application you are printing from. From most applications select the OK or Print button. 9. Collect your job from the device. 10.
Print WorkCentre® 5945/5955 Note: SEF is Short Edge Feed (where the short edge of the paper is the leading edge when the paper is fed into the device). LEF is Long Edge Feed (where the paper is oriented so that the long edge is fed into the device first). 1. Open the document to be printed. From most applications select the Office button or select File, then select Print from the file menu. 2. Enter the number of copies you want to produce.
WorkCentre® 5945/5955 Print Note: This option must be made available by your System Administrator. The options available from your print driver depend on how your System Administrator has configured the print driver on your computer. The folding options vary depending on the type of finisher attached to your device. If there is no finisher attached to your device you will not be able to choose any folding options.
Print WorkCentre® 5945/5955 More Information Printing a Document using the PCL Print Driver Choosing a Finishing Option when using the PCL Print Driver System Administrator Guide www.xerox.com/support. Using Internet Services to find System Administrator Contact Details Viewing the Progress and Details of a Job using the Job Status Menu Stapling and Hole Punching using the PCL Print Driver You can print to the device from your computer through a print driver.
WorkCentre® 5945/5955 Print 7. Select the Stapling option required. • • • • No Stapling cancels any stapling programming you have entered. 1 Staple positions a single staple the top left corner of your document. 2 Staples positions 2 staples along the trail edge of your document. Multiple Staples positions either three or four staples on the edge selected. The number of staples depends on the size of the media chosen. For example: 4 Staples = A4 LEF (8.5 x 11” LEF), A3 (11 x 17”) and 8 x 10” LEF.
WorkCentre® 5945/5955 Print Note: This option must be made available by your System Administrator. The options available from your print driver depend on how your System Administrator has configured the print driver on your computer. Use the Booklet Layout option to have the device automatically reduce and arrange the pages of your original in the correct sequence to form a booklet when the pages are folded in half.
WorkCentre® 5945/5955 Print More Information Printing a Document using the PCL Print Driver Choosing a Finishing Option when using the PCL Print Driver System Administrator Guide www.xerox.com/support. Using Internet Services to find System Administrator Contact Details Viewing the Progress and Details of a Job using the Job Status Menu Folding Booklets using the PCL Print Driver You can print to the device from your computer through a print driver.
WorkCentre® 5945/5955 Print • • • • Select the Booklet Paper Size option required. - Use Job Setting creates the booklet using the paper size selected in your source document. - Manual activates a dropdown menu where you can select the paper size required. Select Standard from the Booklet Margins menu to create a margin between each image on your booklet. If required, select None to cancel any programming you have made. Click the OK button. 9.
WorkCentre® 5945/5955 Print Use the Booklet Fold and Staple option to have the device automatically reduce and arrange the pages of your original in the correct sequence to form a booklet when the pages are folded in half - and to fold and staple the pages automatically when they are printed. 1. Open the document to be printed. From most applications select the Office button or select File, then select Print from the file menu. 2. Enter the number of copies you want to produce.
WorkCentre® 5945/5955 Print More Information Printing a Document using the PCL Print Driver Choosing a Finishing Option when using the PCL Print Driver System Administrator Guide www.xerox.com/support. Using Internet Services to find System Administrator Contact Details Viewing the Progress and Details of a Job using the Job Status Menu Setting the Print Quality using the PCL Print Driver You can print to the device from your computer through a print driver.
WorkCentre® 5945/5955 Print 12. If your job remains held in the Active Jobs list, the device needs you to supply additional resources, such as paper or staples before it can complete the job. To find out what resources are needed, select the job and then select the Details button. Once the resources are available the job will print. More Information Printing a Document using the PCL Print Driver System Administrator Guide www.xerox.com/support.
WorkCentre® 5945/5955 Print 11. Print jobs are usually shown in the Active Jobs list, however if your System Administrator has enabled the Hold All Jobs feature, your job will be listed in either the Held Print Jobs or the Unidentified Print Jobs list. To release a held job select the job in the required list and then select the Release button. 12. If your job remains held in the Active Jobs list, the device needs you to supply additional resources, such as paper or staples before it can complete the job.
WorkCentre® 5945/5955 Print 9. If required, select a 1 or 2-Sided option from the dropdown menu located under the preview picture. • • • 1-Sided Print prints on 1 side of the paper or transparency. Use this option when printing on transparencies, envelopes or labels. 2-Sided Print prints on both sides of a sheet of paper. The images are printed so the job can be bound on the long edge of the sheet. 2-Sided Print, Flip on Short Edge prints on both sides of a sheet of paper.
WorkCentre® 5945/5955 Print If your device is fitted with a Booklet Maker you can use the Booklet Finishing feature to automatically produce folded and stapled booklets. 1. Open the document to be printed. From most applications select the Office button or select File, then select Print from the file menu. 2. Enter the number of copies you want to produce. Depending on the application you are using you may also be able to select a page range and make other print selections. 3.
WorkCentre® 5945/5955 Print Folding Booklets using the PCL Print Driver Layout Options You can print to the device from your computer through a print driver. There are a variety of Xerox print drivers available for the device to support all the popular operating systems. The Xerox print drivers allow you to use the specific features available on your device. If Authentication has been enabled on your device you may have to login at the device to see or release your jobs.
Print WorkCentre® 5945/5955 14. Press the Job Status button on the device control panel to view the job list and check the status of the job. 15. Print jobs are usually shown in the Active Jobs list, however if your System Administrator has enabled the Hold All Jobs feature, your job will be listed in either the Held Print Jobs or the Unidentified Print Jobs list. To release a held job select the job in the required list and then select the Release button. 16.
WorkCentre® 5945/5955 Print 9. If required, click the Booklet Adjustments button to specify precise layout options. • • • • • Select the Imposition Source option required. - Imposed By Driver automatically arranges the pages of your original in the correct sequence to form a booklet when the pages are folded in half. - Pre-Imposed By App lets the application you are printing from determine the correct page sequence to form a booklet when the pages are folded in half.
WorkCentre® 5945/5955 Print If Accounting has been enabled you may have to enter login details at the print driver before you can send your job. The Special Pages options are used to give a more professional appearance to your document, for example by adding covers or pages printed on different paper. Use the Covers option to add blank or printed pages to the front, back or front and back of your set. This option is also used to add a cover to a booklet.
WorkCentre® 5945/5955 Print 20. Press the Job Status button on the device control panel to view the job list and check the status of the job. 21. Print jobs are usually shown in the Active Jobs list, however if your System Administrator has enabled the Hold All Jobs feature, your job will be listed in either the Held Print Jobs or the Unidentified Print Jobs list. To release a held job select the job in the required list and then select the Release button. 22.
WorkCentre® 5945/5955 Print • Front & Back Different adds a blank or printed cover to the front and back of the document. The printing and paper supply options can be programmed individually for each cover. 9. If required, select the Front Cover Paper options required. • You can select a specific paper size, color and type. Use the Blank or Pre-Printed menu to choose any print settings for the cover. 10. If required, select the Back Cover Paper options required.
WorkCentre® 5945/5955 Print Use the Inserts option to add blank pages on a different media into your document, or to specify pages to be printed on a different media. Up to two sources of media can be used for the inserts. If inserting blank pages, a blank sheet must be inserted in the appropriate place in your original document. 1. Open the document to be printed. From most applications select the Office button or select File, then select Print from the file menu. 2.
WorkCentre® 5945/5955 Print Using Internet Services to find System Administrator Contact Details Viewing the Progress and Details of a Job using the Job Status Menu Loading Tray 2 and Changing the Tray Settings Loading Tray 3 Loading Tray 4 Loading the Bypass Tray and Changing the Tray Settings Loading Tray 1 and Changing the Tray Settings Setting Exceptions using the PCL Print Driver You can print to the device from your computer through a print driver.
WorkCentre® 5945/5955 Print 13. Select the confirmation button, the name will vary depending on the application you are printing from. From most applications select the OK or Print button. 14. Collect your job from the device. 15. Press the Job Status button on the device control panel to view the job list and check the status of the job. 16.
WorkCentre® 5945/5955 Print • Copy produces a watermark that identifies the document as a copy. This watermark can be customized. 8. Select the option required. • • • Text activates a text entry box where you can type in your text. There are options to select a font, color, orientation and position for your text. Time Stamp creates a time specific watermark. There are options to select the format, a font, color, orientation and position for your timestamp watermark.
WorkCentre® 5945/5955 Print Use the Orientation option to set your job to portrait or landscape orientation. 1. Open the document to be printed. From most applications select the Office button or select File, then select Print from the file menu. 2. Enter the number of copies you want to produce. Depending on the application you are using you may also be able to select a page range and make other print selections. 3. Select the Xerox PCL driver from the list of print drivers available. 4.
WorkCentre® 5945/5955 Print More Information Accessing the PCL Print Driver Help Pages System Administrator Guide www.xerox.com/support. Using Internet Services to find System Administrator Contact Details Adding a Job ID using the PCL Driver Removing a Job ID using the PCL Print Driver Adding a Job ID using the PCL Driver You can print to the device from your computer through a print driver. There are a variety of Xerox print drivers available for the device to support all the popular operating systems.
Print WorkCentre® 5945/5955 11. Press the Job Status button on the device control panel to view the job list and check the status of the job. 12. Print jobs are usually shown in the Active Jobs list, however if your System Administrator has enabled the Hold All Jobs feature, your job will be listed in either the Held Print Jobs or the Unidentified Print Jobs list. To release a held job select the job in the required list and then select the Release button. 13.
WorkCentre® 5945/5955 Print 9. Select the confirmation button, the name will vary depending on the application you are printing from. From most applications select the OK or Print button. 10. Collect your job from the device. 11. Press the Job Status button on the device control panel to view the job list and check the status of the job. 12.
WorkCentre® 5945/5955 Print • • • Save As *Application Name* Default saves the current settings and makes them the default settings for the named application. This option is useful if, for example, you always want to print Word documents 2-sided but Excel spreadsheets 1-sided. Rename makes it possible to change the name for the custom print settings you have currently selected. This is not available if the driver or application default print settings are selected.
Print WorkCentre® 5945/5955 Use the Saved Settings option if you often use the same settings in your print driver. The Saved Settings option stores your print driver selections in the Saved Settings list. This list is saved on your computer and will not be available to you if you print from a different computer. 1. Open the document to be printed. From most applications select the Office button or select File, then select Print from the file menu. 2. Enter the number of copies you want to produce.
Print WorkCentre® 5945/5955 Saving Print Settings as Application Defaults using the PCL Print Driver You can print to the device from your computer through a print driver. There are a variety of Xerox print drivers available for the device to support all the popular operating systems. The Xerox print drivers allow you to use the specific features available on your device. If Authentication has been enabled on your device you may have to login at the device to see or release your jobs.
Print WorkCentre® 5945/5955 Applying Saved Print Settings using the PCL Print Driver You can print to the device from your computer through a print driver. There are a variety of Xerox print drivers available for the device to support all the popular operating systems. The Xerox print drivers allow you to use the specific features available on your device. If Authentication has been enabled on your device you may have to login at the device to see or release your jobs.
Print WorkCentre® 5945/5955 Renaming Saved Print Settings using the PCL Print Driver You can print to the device from your computer through a print driver. There are a variety of Xerox print drivers available for the device to support all the popular operating systems. The Xerox print drivers allow you to use the specific features available on your device. If Authentication has been enabled on your device you may have to login at the device to see or release your jobs.
Print WorkCentre® 5945/5955 Deleting Saved Print Settings using the PCL Print Driver Saving Print Settings using the PCL Print Driver Deleting Saved Print Settings using the PCL Print Driver You can print to the device from your computer through a print driver. There are a variety of Xerox print drivers available for the device to support all the popular operating systems. The Xerox print drivers allow you to use the specific features available on your device.
Print WorkCentre® 5945/5955 Use the help button to open the Xerox online help. You will need to be connected to the internet to use this help feature. 1. Open the document to be printed. From most applications select the Office button or select File, then select Print from the file menu. 2. Select the Xerox PCL driver from the list of print drivers available. 3. Open the print driver Properties window - the method will vary depending on the application you are printing from.
WorkCentre® 5945/5955 Print If Authentication has been enabled on your device you may have to login at the device to see or release your jobs. If Accounting has been enabled you may have to enter login details at the print driver before you can send your job. Use the Earth Smart option to quickly set controls that will reduce the number of pages printed for your job by removing banner sheets, turning on 2-sided printing, and printing 2 images on each page instead of a single image per page. 1.
WorkCentre® 5945/5955 Print Viewing the Device Status using the PCL Print Driver You can print to the device from your computer through a print driver. There are a variety of Xerox print drivers available for the device to support all the popular operating systems. The Xerox print drivers allow you to use the specific features available on your device. If Authentication has been enabled on your device you may have to login at the device to see or release your jobs.
WorkCentre® 5945/5955 Print PostScript Driver Printing a Document using the PostScript Print Driver You can print to the device from your computer through a print driver. There are a variety of Xerox print drivers available for the device to support all the popular operating systems. The Xerox print drivers allow you to use the specific features available on your device. Note: The device is enabled for AirPrint.
Print WorkCentre® 5945/5955 Refer to the System Administrator Guide for further information. 1. Open the document to be printed. From most applications select the Office button or select File, then select Print from the file menu. 2. Enter the number of copies you want to produce. Depending on the application you are using you may also be able to select a page range and make other print selections. 3. Select the Xerox PS driver from the list of print drivers available. 4.
Print WorkCentre® 5945/5955 If Authentication has been enabled on your device you may have to login at the device to see or release your jobs. If Accounting has been enabled you may have to enter login details at the print driver before you can send your job. Use the Job Type option to specify how your job should be treated by the device, for example whether it should be treated as a confidential document (Secure Print) or a proof print (Sample Set).
Print WorkCentre® 5945/5955 6. Select the option required from the Job Type menu. 7. Select the option(s) required. 8. Click the OK button to save your settings. 9. Select the confirmation button, the name will vary depending on the application you are printing from. From most applications select the OK or Print button. 10. Collect your job from the device. 11. Press the Job Status button on the device control panel to view the job list and check the status of the job. 12.
Print WorkCentre® 5945/5955 4. Open the print driver Properties window - the method will vary depending on the application you are printing from. From most Microsoft applications select the Properties or Preferences button to open the window. 5. If required, click the Printing Options tab. This is usually the active tab when the print driver opens. 6. Select Normal Print from the Job Type dropdown menu. 7. Select the option(s) required. 8. Click the OK button. 9.
WorkCentre® 5945/5955 Print Note: If you send more than one Secure Print job using the same passcode, when you go to the device you will only need to enter the code once to release all the jobs for printing. 1. Open the document to be printed. From most applications select the Office button or select File, then select Print from the file menu. 2. Enter the number of copies you want to produce.
WorkCentre® 5945/5955 Print If Accounting has been enabled you may have to enter login details at the print driver before you can send your job. Use the Sample Set option to print one copy of a multiple-copy print job. When you collect the print you can check it has printed as you expected before approving the rest of the job for printing. If the first copy is not correct you can cancel the rest of the copies and resubmit the job with different print settings. 1. Open the document to be printed.
Print WorkCentre® 5945/5955 Printing a Delay Print Job using the PostScript Driver You can print to the device from your computer through a print driver. There are a variety of Xerox print drivers available for the device to support all the popular operating systems. The Xerox print drivers allow you to use the specific features available on your device. If Authentication has been enabled on your device you may have to login at the device to see or release your jobs.
WorkCentre® 5945/5955 Print Using Internet Services to find System Administrator Contact Details Viewing the Progress and Details of a Job using the Job Status Menu Saving Jobs using the PostScript Print Driver You can print to the device from your computer through a print driver. There are a variety of Xerox print drivers available for the device to support all the popular operating systems. The Xerox print drivers allow you to use the specific features available on your device.
WorkCentre® 5945/5955 Print 10. If required, select the Private radio button to passcode protect your document. • Click in the Passcode entry box and use your keyboard to enter a 4 to 10 digit passcode. Note: To release your job you will enter this passcode using the numeric keypad on the device control panel. Only use numbers, and choose a passcode you will remember but that is not easy for other people to guess.
WorkCentre® 5945/5955 Print 5. If required, click the Printing Options tab. This is usually the active tab when the print driver opens. 6. Select Fax from the Job Type dropdown menu. Either • Click the Add Recipient button to add a new recipient manually. - Select the Name entry box and use your keyboard to enter the name of the recipient. - Select the Fax Number entry box and use your keyboard to enter the recipient’s fax number.
WorkCentre® 5945/5955 Print If required, select the Sender Telephone Number entry box and use your keyboard to enter your telephone number. - If required, select the Sender E-mail Address entry box and use your keyboard to enter your e-mail address. - If required, select the Sender Fax Number entry box and use your keyboard to enter the fax number you would like any replies faxed to. - If required, select a Recipients option.
WorkCentre® 5945/5955 Print 13. Depending on how your device has been set up, the Fax Confirmation screen may display with the fax recipients for your job. If required, click the OK button to confirm. More Information Printing a Document using the PostScript Print Driver Using the Job Type Feature with the PostScript Print Driver System Administrator Guide www.xerox.com/support.
WorkCentre® 5945/5955 Print • Transparency Separators interleaves each printed transparency with a blank or printed sheet of paper from a specified paper tray. 7. Click the OK button to save your settings. 8. Select the confirmation button, the name will vary depending on the application you are printing from. From most applications select the OK or Print button. 9. Collect your job from the device. 10.
WorkCentre® 5945/5955 Print 4. Open the print driver Properties window - the method will vary depending on the application you are printing from. From most Microsoft applications select the Properties or Preferences button to open the window. 5. If required, click the Printing Options tab. This is usually the active tab when the print driver opens. 6. Select the 2-Sided Printing option required. • • • 1-Sided Print prints on 1 side of the paper or transparency.
Print WorkCentre® 5945/5955 The options available from your print driver depend on how your System Administrator has configured the print driver on your computer. Use the No Finishing option if no finishing is required for the output. Use the stapling options to staple your document. The options available are dependent on the finishing device installed. The basic stapling options are Off, 1 Staple, 2 Staples and Multi-Staple.
WorkCentre® 5945/5955 Print If Accounting has been enabled you may have to enter login details at the print driver before you can send your job. Depending on the optional finishing device and kits installed you will have the choice of different output options such as stapling, folding and collating. Note: This option must be made available by your System Administrator. The options available from your print driver depend on how your System Administrator has configured the print driver on your computer.
Print WorkCentre® 5945/5955 Hole Punching using the PostScript Print Driver You can print to the device from your computer through a print driver. There are a variety of Xerox print drivers available for the device to support all the popular operating systems. The Xerox print drivers allow you to use the specific features available on your device. If Authentication has been enabled on your device you may have to login at the device to see or release your jobs.
Print WorkCentre® 5945/5955 12. If your job remains held in the Active Jobs list, the device needs you to supply additional resources, such as paper or staples before it can complete the job. To find out what resources are needed, select the job and then select the Details button. Once the resources are available the job will print. More Information Printing a Document using the PostScript Print Driver Choosing a Finishing Option when using the PostScript Print Driver System Administrator Guide www.xerox.
WorkCentre® 5945/5955 Print 7. Select the Folding option required. • • • • • • • • Bi Fold Single Sheets Print Inside folds the output in the middle of the page. If the page is single sided the printed content will be on the inside of the fold. If the page is double sided, page 1 will be on the inside. Bi Fold Single Sheets Print Outside folds the output in the middle of the page. If the page is single sided the printed content will be on the outside of the fold.
WorkCentre® 5945/5955 Print Stapling and Hole Punching using the PostScript Print Driver You can print to the device from your computer through a print driver. There are a variety of Xerox print drivers available for the device to support all the popular operating systems. The Xerox print drivers allow you to use the specific features available on your device. If Authentication has been enabled on your device you may have to login at the device to see or release your jobs.
WorkCentre® 5945/5955 Print Note: For some staple selections the device will rotate the image. If you are unable to staple, ensure that Image Rotation is set to Auto Rotate in Tools. Your System Administrator sets the Image Rotation options when the device is installed. 8. Select Hole Punch from the Hole Punching menu. • If required, select No Hole Punching to cancel any programming you have entered. 9. Click the OK button to save your settings. 10.
WorkCentre® 5945/5955 Print If your device is fitted with a Booklet Maker you can use the Booklet Finishing feature to automatically produce folded and stapled booklets. 1. Open the document to be printed. From most applications select the Office button or select File, then select Print from the file menu. 2. Enter the number of copies you want to produce. Depending on the application you are using you may also be able to select a page range and make other print selections. 3.
Print WorkCentre® 5945/5955 16. If your job remains held in the Active Jobs list, the device needs you to supply additional resources, such as paper or staples before it can complete the job. To find out what resources are needed, select the job and then select the Details button. Once the resources are available the job will print. More Information Printing a Document using the PostScript Print Driver Choosing a Finishing Option when using the PostScript Print Driver System Administrator Guide www.xerox.
WorkCentre® 5945/5955 Print 8. If required, click the Booklet Adjustments button to specify precise layout options. • • • • • • • • Select the Imposition Source option required. - Imposed By Driver automatically arranges the pages of your original in the correct sequence to form a booklet when the pages are folded in half. - Pre-Imposed By App lets the application you are printing from determine the correct page sequence to form a booklet when the pages are folded in half.
WorkCentre® 5945/5955 Print Folding and Stapling Booklets using the PostScript Print Driver You can print to the device from your computer through a print driver. There are a variety of Xerox print drivers available for the device to support all the popular operating systems. The Xerox print drivers allow you to use the specific features available on your device. If Authentication has been enabled on your device you may have to login at the device to see or release your jobs.
WorkCentre® 5945/5955 Print • • • Select the Creep entry box and use your keyboard to enter an amount to shift the page images outwards by. This feature compensates for the fact that the outer pages in a large booklet have to fold around all the inner pages, this makes the outer pages slightly shorter than the inner pages in the final booklet. Select the Reading Order option required.
WorkCentre® 5945/5955 Print Use the Print Quality options to adjust the amount of toner used to print your documents. Using very little toner produces a slightly more grainy appearance, particularly when printing graphics or solid color objects, but is the most environmentally friendly option. 1. Open the document to be printed. From most applications select the Office button or select File, then select Print from the file menu. 2. Enter the number of copies you want to produce.
WorkCentre® 5945/5955 Print If Accounting has been enabled you may have to enter login details at the print driver before you can send your job. Use the Output Destination options to specify a destination for your output. The destinations depend on the type of finisher attached to your device. Note: If a destination is listed, but is shown in gray text, it may not be available due to a finishing option that you have selected. Note: This option must be made available by your System Administrator. 1.
WorkCentre® 5945/5955 Print Image Options Adjusting the Lightness of your Print using the PostScript Driver You can print to the device from your computer through a print driver. There are a variety of Xerox print drivers available for the device to support all the popular operating systems. The Xerox print drivers allow you to use the specific features available on your device. If Authentication has been enabled on your device you may have to login at the device to see or release your jobs.
WorkCentre® 5945/5955 Print Adjusting the Contrast of your Print using the PostScript Driver You can print to the device from your computer through a print driver. There are a variety of Xerox print drivers available for the device to support all the popular operating systems. The Xerox print drivers allow you to use the specific features available on your device. If Authentication has been enabled on your device you may have to login at the device to see or release your jobs.
WorkCentre® 5945/5955 Print Document Options Page Layout Printing more than one Page on a Sheet using the PostScript Print Driver You can print to the device from your computer through a print driver. There are a variety of Xerox print drivers available for the device to support all the popular operating systems. The Xerox print drivers allow you to use the specific features available on your device.
WorkCentre® 5945/5955 Print 14. Print jobs are usually shown in the Active Jobs list, however if your System Administrator has enabled the Hold All Jobs feature, your job will be listed in either the Held Print Jobs or the Unidentified Print Jobs list. To release a held job select the job in the required list and then select the Release button. 15. If your job remains held in the Active Jobs list, the device needs you to supply additional resources, such as paper or staples before it can complete the job.
WorkCentre® 5945/5955 Print • • • • • • Select Standard from the Booklet Margins menu to create a margin between each image on your booklet. If required, select None to cancel any programming you have made. Select the Gutter entry box and use your keyboard to enter a width for the center margin of your booklet. Select the Creep entry box and use your keyboard to enter an amount to shift the page images outwards by.
WorkCentre® 5945/5955 Print Note: This option must be made available by your System Administrator. The options available from your print driver depend on how your System Administrator has configured the print driver on your computer. Use the Booklet Fold option to have the device automatically reduce and arrange the pages of your original in the correct sequence to form a booklet when the pages are folded in half - and to fold the pages automatically when they are printed. 1.
Print WorkCentre® 5945/5955 12. Click the OK button to save your settings. 13. Select the confirmation button, the name will vary depending on the application you are printing from. From most applications select the OK or Print button. 14. Collect your job from the device. 15. Press the Job Status button on the device control panel to view the job list and check the status of the job. 16.
WorkCentre® 5945/5955 Print 4. Open the print driver Properties window - the method will vary depending on the application you are printing from. From most Microsoft applications select the Properties or Preferences button to open the window. 5. Click the Document Options tab. 6. Click the Page Layout tab. 7. Check the Booklet Creation radio button to open the Booklet Creation window. If the window does not open click the Setup... button. 8. Check the Booklet Fold and Staple radio button. 9.
Print WorkCentre® 5945/5955 17. If your job remains held in the Active Jobs list, the device needs you to supply additional resources, such as paper or staples before it can complete the job. To find out what resources are needed, select the job and then select the Details button. Once the resources are available the job will print. More Information Printing a Document using the PostScript Print Driver Choosing a Finishing Option when using the PostScript Print Driver System Administrator Guide www.xerox.
WorkCentre® 5945/5955 Print 9. Click the OK button. 10. Click the Add Inserts button. Note: If the Add Inserts button is greyed out it is because you have selected a finishing option that is incompatible with inserts or your job only has 1 page. 11. Select the option(s) required. 12. Click the OK button. 13. Click the Add Exceptions button. Note: If the Add Exceptions button is greyed out it is because you have selected a finishing option that is incompatible with inserts or your job only has 1 page. 14.
WorkCentre® 5945/5955 Print Use the Covers option to add blank or printed pages to the front, back or front and back of your set. This option is also used to add a cover to a booklet. The covers can be a different media to the rest of your job. 1. Open the document to be printed. From most applications select the Office button or select File, then select Print from the file menu. 2. Enter the number of copies you want to produce.
WorkCentre® 5945/5955 Print System Administrator Guide www.xerox.com/support.
Print WorkCentre® 5945/5955 11. Click the OK button. 12. Click the OK button to save your settings. 13. Select the confirmation button, the name will vary depending on the application you are printing from. From most applications select the OK or Print button. 14. Collect your job from the device. 15. Press the Job Status button on the device control panel to view the job list and check the status of the job. 16.
WorkCentre® 5945/5955 Print 6. Select the Special Pages tab. 7. Click the Add Exceptions button. Note: If the Add Exceptions button is greyed out it is because you have selected a finishing option that is incompatible with inserts or your job only has 1 page. 8. Click the Pages entry box and use your keyboard to enter the pages in your source document that are exceptions. 9. Select the Paper option(s) required. You can select a specific paper size, color and type.
WorkCentre® 5945/5955 Print Use the Watermark option to add a picture or some text to your document from within the print driver. You can set the watermark image to appear behind or on top of your main document text. 1. Open the document to be printed. From most applications select the Office button or select File, then select Print from the file menu. 2. Enter the number of copies you want to produce.
WorkCentre® 5945/5955 Print 16. If your job remains held in the Active Jobs list, the device needs you to supply additional resources, such as paper or staples before it can complete the job. To find out what resources are needed, select the job and then select the Details button. Once the resources are available the job will print. More Information Printing a Document using the PostScript Print Driver System Administrator Guide www.xerox.com/support.
Print WorkCentre® 5945/5955 12. Print jobs are usually shown in the Active Jobs list, however if your System Administrator has enabled the Hold All Jobs feature, your job will be listed in either the Held Print Jobs or the Unidentified Print Jobs list. To release a held job select the job in the required list and then select the Release button. 13. If your job remains held in the Active Jobs list, the device needs you to supply additional resources, such as paper or staples before it can complete the job.
WorkCentre® 5945/5955 Print 7. Select the Job ID option required. • • • Print ID on a Banner Page adds a covering page to your job. Your ID will be printed on the cover page. If you select any finishing options such as stapling, the ID page will not be stapled to the rest of your job. Print ID in Margins - First Page Only prints your ID in the top margin, on the first page of your document. Print ID in Margins - All Pages prints your ID in the top margin, on all the pages in your document.
Print WorkCentre® 5945/5955 Refer to the System Administrator Guide for further information. 1. Open the document to be printed. From most applications select the Office button or select File, then select Print from the file menu. 2. Enter the number of copies you want to produce. Depending on the application you are using you may also be able to select a page range and make other print selections. 3. Select the Xerox PS driver from the list of print drivers available. 4.
WorkCentre® 5945/5955 Print Menu at the bottom of the Tabs Using Saved Print Settings using the PostScript Print Driver You can print to the device from your computer through a print driver. There are a variety of Xerox print drivers available for the device to support all the popular operating systems. The Xerox print drivers allow you to use the specific features available on your device. If Authentication has been enabled on your device you may have to login at the device to see or release your jobs.
Print WorkCentre® 5945/5955 11. Print jobs are usually shown in the Active Jobs list, however if your System Administrator has enabled the Hold All Jobs feature, your job will be listed in either the Held Print Jobs or the Unidentified Print Jobs list. To release a held job select the job in the required list and then select the Release button. 12. If your job remains held in the Active Jobs list, the device needs you to supply additional resources, such as paper or staples before it can complete the job.
Print WorkCentre® 5945/5955 12. If your job remains held in the Active Jobs list, the device needs you to supply additional resources, such as paper or staples before it can complete the job. To find out what resources are needed, select the job and then select the Details button. Once the resources are available the job will print. 13.
Print WorkCentre® 5945/5955 More Information Printing a Document using the PostScript Print Driver System Administrator Guide www.xerox.com/support.
Print WorkCentre® 5945/5955 Saving Print Settings using the PostScript Print Driver Saving Print Settings as Application Defaults using the PostScript Print Driver Renaming Saved Print Settings using the PostScript Print Driver Deleting Saved Print Settings using the PostScript Print Driver Viewing the Progress and Details of a Job using the Job Status Menu Renaming Saved Print Settings using the PostScript Print Driver You can print to the device from your computer through a print driver.
Print WorkCentre® 5945/5955 More Information Printing a Document using the PostScript Print Driver System Administrator Guide www.xerox.com/support.
Print WorkCentre® 5945/5955 If Authentication has been enabled on your device you may have to login at the device to see or release your jobs. If Accounting has been enabled you may have to enter login details at the print driver before you can send your job. Use the help button to open the Xerox online help. You will need to be connected to the internet to use this help feature. 1. Open the document to be printed.
WorkCentre® 5945/5955 Print Setting Earth Smart Print Settings using the PostScript Print Driver You can print to the device from your computer through a print driver. There are a variety of Xerox print drivers available for the device to support all the popular operating systems. The Xerox print drivers allow you to use the specific features available on your device. If Authentication has been enabled on your device you may have to login at the device to see or release your jobs.
WorkCentre® 5945/5955 Print More Information Printing a Document using the PostScript Print Driver System Administrator Guide www.xerox.com/support. Using Internet Services to find System Administrator Contact Details Printing a Sample Set Job using the PostScript Driver Viewing the Progress and Details of a Job using the Job Status Menu Viewing the Device Status using the PostScript Print Driver You can print to the device from your computer through a print driver.
WorkCentre® 5945/5955 Print 5. If required, click on the More Status [...] button next to the status display. More Information Printing a Document using the PostScript Print Driver System Administrator Guide www.xerox.com/support. Using Internet Services to find System Administrator Contact Details XPS Driver Printing a Document using the XPS Print Driver You can print to the device from your computer through a print driver.
WorkCentre® 5945/5955 Print • Setting specific print settings for applications, for example, setting all Microsoft Word documents to print single sided. • Limiting print jobs to secure print jobs. Your System Administrator may also configure your print driver to prompt you to enter login details when you print a document. Refer to the System Administrator Guide for further information. 1. Open the document to be printed.
Print WorkCentre® 5945/5955 Tab menu Printing Options Job Type Using the Job Type Feature with the XPS Print Driver You can print to the device from your computer through a print driver. There are a variety of Xerox print drivers available for the device to support all the popular operating systems. The Xerox print drivers allow you to use the specific features available on your device. If Authentication has been enabled on your device you may have to login at the device to see or release your jobs.
Print WorkCentre® 5945/5955 Note: To use this feature, your System Administrator must install and enable the fax option on your device. 1. Open the document to be printed. From most applications select the Office button or select File, then select Print from the file menu. 2. Enter the number of copies you want to produce. Depending on the application you are using you may also be able to select a page range and make other print selections. 3.
Print WorkCentre® 5945/5955 If Accounting has been enabled you may have to enter login details at the print driver before you can send your job. Note: To print an XPS document, your device needs to have the optional XPS feature installed. Use the Normal Print job type to tell the device to print your job as soon as it arrives at the top of the print queue. 1. Open the document to be printed. From most applications select the Office button or select File, then select Print from the file menu. 2.
WorkCentre® 5945/5955 Print If Accounting has been enabled you may have to enter login details at the print driver before you can send your job. Note: To print an XPS document, your device needs to have the optional XPS feature installed. Use the Secure Print option to have your job held at the device until you enter a passcode to release it. This feature prevents confidential documents printing to the output tray until you are ready to release and collect them.
WorkCentre® 5945/5955 Print Printing a Sample Set Job using the XPS Print Driver You can print to the device from your computer through a print driver. There are a variety of Xerox print drivers available for the device to support all the popular operating systems. The Xerox print drivers allow you to use the specific features available on your device. If Authentication has been enabled on your device you may have to login at the device to see or release your jobs.
Print WorkCentre® 5945/5955 More Information Printing a Document using the XPS Print Driver Using the Job Type Feature with the XPS Print Driver Releasing a Held Job using the Job Status Menu System Administrator Guide www.xerox.com/support. Using Internet Services to find System Administrator Contact Details Viewing the Progress and Details of a Job using the Job Status Menu Printing a Delay Print Job using the XPS Print Driver You can print to the device from your computer through a print driver.
Print WorkCentre® 5945/5955 14. Print jobs are usually shown in the Active Jobs list, however if your System Administrator has enabled the Hold All Jobs feature, your job will be listed in either the Held Print Jobs or the Unidentified Print Jobs list. To release a held job select the job in the required list and then select the Release button. 15. If your job remains held in the Active Jobs list, the device needs you to supply additional resources, such as paper or staples before it can complete the job.
WorkCentre® 5945/5955 Print • Select Use Document Name from the Job Name dropdown menu to save your job with the same name as the original document. 8. Select the folder where your job should be saved from the Save To menu. • If your required folder does not display, you can use your keyboard to enter the name of the folder where your job should be saved. The Default Public Folder is available for all users to save their jobs to. 9.
WorkCentre® 5945/5955 Print Note: To use this feature, your System Administrator must install and enable the fax option on your device. 1. Open the document to be printed. From most applications select the Office button or select File, then select Print from the file menu. 2. Enter the number of copies you want to send. Note: You only need to select 1 copy even if you are sending the fax to more than one address.
WorkCentre® 5945/5955 Print • Click the OK button to see the search results. - Select the Add button. - Click the OK button. 7. If required, select more than one recipient from the Recipients list by clicking the first recipient, pressing and holding the Ctrl button on a PC or the Command button on a Mac and then clicking each additional recipient. Release the Ctrl or Command button once all recipients have been selected. 8. If you want to add a cover sheet to your fax job, click the Cover Sheet tab. 9.
WorkCentre® 5945/5955 Print 10. If you want the device to print a confirmation sheet, use a specific send speed or resolution, send at a specific time, use a dialing prefix or include credit card details, click the Options tab. • • • • • • • • If required, select Send to Printer from the Confirmation menu to have the device print a page stating that your job has successfully faxed. Depending on how your System Administrator has configured the device an error sheet may print if the job fails.
WorkCentre® 5945/5955 Print 1. Open the document to be printed. From most applications select the Office button or select File, then select Print from the file menu. 2. Enter the number of copies you want to produce. Depending on the application you are using you may also be able to select a page range and make other print selections. 3. Open the print driver Properties window - the method will vary depending on the application you are printing from.
WorkCentre® 5945/5955 Print Printing 2-Sided using the XPS Print Driver You can print to the device from your computer through a print driver. There are a variety of Xerox print drivers available for the device to support all the popular operating systems. The Xerox print drivers allow you to use the specific features available on your device. If Authentication has been enabled on your device you may have to login at the device to see or release your jobs.
Print WorkCentre® 5945/5955 More Information Printing a Document using the XPS Print Driver System Administrator Guide www.xerox.com/support. Using Internet Services to find System Administrator Contact Details Viewing the Progress and Details of a Job using the Job Status Menu Finishing Choosing a Finishing Option when using the XPS Print Driver You can print to the device from your computer through a print driver.
Print WorkCentre® 5945/5955 4. Open the print driver Properties window - the method will vary depending on the application you are printing from. From most Microsoft applications select the Properties or Preferences button to open the window. 5. If required, click the Printing Options tab. This is usually the active tab when the print driver opens. 6. Select the Finishing option required. 7. Click the OK button to save your settings. 8.
WorkCentre® 5945/5955 Print 5. If required, click the Printing Options tab. This is usually the active tab when the print driver opens. 6. Select the stapling option required from the Finishing menu. • • 1 Staple positions a single staple the top left corner of your document. 2 Staples positions 2 staples along the trail edge of your document. 7. Click the OK button to save your settings. 8. Select the confirmation button, the name will vary depending on the application you are printing from.
Print WorkCentre® 5945/5955 Note: SEF is Short Edge Feed (where the short edge of the paper is the leading edge when the paper is fed into the device). LEF is Long Edge Feed (where the paper is oriented so that the long edge is fed into the device first). 1. Open the document to be printed. From most applications select the Office button or select File, then select Print from the file menu. 2. Enter the number of copies you want to produce.
WorkCentre® 5945/5955 Print Depending on the optional finishing device and kits installed you will have the choice of different output options such as stapling, folding and collating. Note: This option must be made available by your System Administrator. The options available from your print driver depend on how your System Administrator has configured the print driver on your computer. The folding options vary depending on the type of finisher attached to your device.
Print WorkCentre® 5945/5955 13. If your job remains held in the Active Jobs list, the device needs you to supply additional resources, such as paper or staples before it can complete the job. To find out what resources are needed, select the job and then select the Details button. Once the resources are available the job will print. More Information Printing a Document using the XPS Print Driver Choosing a Finishing Option when using the XPS Print Driver System Administrator Guide www.xerox.com/support.
WorkCentre® 5945/5955 Print 5. If required, click the Printing Options tab. This is usually the active tab when the print driver opens. 6. Select the Multiple Finishing... option from the Finishing menu. 7. Select the Stapling option required. • • • No Stapling cancels any stapling programming you have entered. 1 Staple positions a single staple the top left corner of your document. 2 Staples positions 2 staples along the trail edge of your document.
WorkCentre® 5945/5955 Print Depending on the optional finishing device and kits installed you will have the choice of different output options such as stapling, folding and collating. Note: This option must be made available by your System Administrator. The options available from your print driver depend on how your System Administrator has configured the print driver on your computer.
Print WorkCentre® 5945/5955 12. Select the confirmation button, the name will vary depending on the application you are printing from. From most applications select the OK or Print button. 13. Collect your job from the device. 14. Press the Job Status button on the device control panel to view the job list and check the status of the job. 15.
WorkCentre® 5945/5955 Print 4. Open the print driver Properties window - the method will vary depending on the application you are printing from. From most Microsoft applications select the Properties or Preferences button to open the window. 5. If required, click the Printing Options tab. This is usually the active tab when the print driver opens. 6. Select Booklet Creation... from the Finishing menu. 7. Check the Booklet Fold radio button. 8.
WorkCentre® 5945/5955 Print More Information Printing a Document using the XPS Print Driver Choosing a Finishing Option when using the XPS Print Driver System Administrator Guide www.xerox.com/support. Using Internet Services to find System Administrator Contact Details Viewing the Progress and Details of a Job using the Job Status Menu Folding and Stapling Booklets using the XPS Print Driver You can print to the device from your computer through a print driver.
WorkCentre® 5945/5955 Print • • • • • • • Select the Booklet Paper Size option required. - Use Job Setting creates the booklet using the paper size selected in your source document. - Manual activates a dropdown menu where you can select the paper size required. Select Standard from the Booklet Margins menu to create a margin between each image on your booklet. If required, select None to cancel any programming you have made.
WorkCentre® 5945/5955 Print If Accounting has been enabled you may have to enter login details at the print driver before you can send your job. Note: To print an XPS document, your device needs to have the optional XPS feature installed. Use the Print Quality options to adjust the amount of toner used to print your documents. Using very little toner produces a slightly more grainy appearance, particularly when printing graphics or solid color objects, but is the most environmentally friendly option. 1.
WorkCentre® 5945/5955 Print If Authentication has been enabled on your device you may have to login at the device to see or release your jobs. If Accounting has been enabled you may have to enter login details at the print driver before you can send your job. Note: To print an XPS document, your device needs to have the optional XPS feature installed. Use the Output Destination options to specify a destination for your output. The destinations depend on the type of finisher attached to your device.
WorkCentre® 5945/5955 Print Document Options Page Layout Printing more than one Page on a Sheet using the XPS Print Driver You can print to the device from your computer through a print driver. There are a variety of Xerox print drivers available for the device to support all the popular operating systems. The Xerox print drivers allow you to use the specific features available on your device.
Print WorkCentre® 5945/5955 13. Press the Job Status button on the device control panel to view the job list and check the status of the job. 14. Print jobs are usually shown in the Active Jobs list, however if your System Administrator has enabled the Hold All Jobs feature, your job will be listed in either the Held Print Jobs or the Unidentified Print Jobs list. To release a held job select the job in the required list and then select the Release button. 15.
WorkCentre® 5945/5955 Print 8. If required, click the Booklet Adjustments button to specify precise layout options. • • • • • • • Select the Booklet Paper Size option required. - Use Job Setting creates the booklet using the paper size selected in your source document. - Manual activates a dropdown menu where you can select the paper size required. Select Standard from the Booklet Margins menu to create a margin between each image on your booklet.
WorkCentre® 5945/5955 Print If Accounting has been enabled you may have to enter login details at the print driver before you can send your job. Note: To print an XPS document, your device needs to have the optional XPS feature installed. Depending on the optional finishing device and kits installed you will have the choice of different output options such as stapling, folding and collating. Note: This option must be made available by your System Administrator.
WorkCentre® 5945/5955 Print • • Select the Reading Order option required. - Left to Right places page 1 of your document on the front of your booklet when the fold is to the left or top of the booklet. - Right to Left places page 1 of your document on the front of your booklet when the fold is to the right or bottom of the booklet. Click the OK button. 9. If required, check the Page Borders checkbox to print a border around each image. 10. Click the OK button. 11.
WorkCentre® 5945/5955 Print Use the Booklet Fold and Staple option to have the device automatically reduce and arrange the pages of your original in the correct sequence to form a booklet when the pages are folded in half - and to fold and staple the pages automatically when they are printed. 1. Open the document to be printed. From most applications select the Office button or select File, then select Print from the file menu. 2. Enter the number of copies you want to produce.
Print WorkCentre® 5945/5955 14. Press the Job Status button on the device control panel to view the job list and check the status of the job. 15. Print jobs are usually shown in the Active Jobs list, however if your System Administrator has enabled the Hold All Jobs feature, your job will be listed in either the Held Print Jobs or the Unidentified Print Jobs list. To release a held job select the job in the required list and then select the Release button. 16.
WorkCentre® 5945/5955 Print 4. Open the print driver Properties window - the method will vary depending on the application you are printing from. From most Microsoft applications select the Properties or Preferences button to open the window. 5. Click the Document Options tab. 6. Select the Special Pages tab. 7. Click the Add Covers button. 8. Select the option(s) required. 9. Click the OK button. 10. Click the Add Inserts button.
WorkCentre® 5945/5955 Print Adding Covers using the XPS Print Driver You can print to the device from your computer through a print driver. There are a variety of Xerox print drivers available for the device to support all the popular operating systems. The Xerox print drivers allow you to use the specific features available on your device. If Authentication has been enabled on your device you may have to login at the device to see or release your jobs.
Print WorkCentre® 5945/5955 15. Press the Job Status button on the device control panel to view the job list and check the status of the job. 16. Print jobs are usually shown in the Active Jobs list, however if your System Administrator has enabled the Hold All Jobs feature, your job will be listed in either the Held Print Jobs or the Unidentified Print Jobs list. To release a held job select the job in the required list and then select the Release button. 17.
WorkCentre® 5945/5955 Print Note: If the Add Inserts button is greyed out it is because you have selected a finishing option that is incompatible with inserts or your job only has 1 page. 8. Select the Insert Options option you require. • • Before Page 1 adds the insert pages at the beginning of the document. After Pages activates the Pages entry box. Select the Pages entry box and use your keyboard to enter the page number required.
WorkCentre® 5945/5955 Print If Accounting has been enabled you may have to enter login details at the print driver before you can send your job. Note: To print an XPS document, your device needs to have the optional XPS feature installed. Use the Exceptions feature to use a different paper source for a range of pages. For example, you could print the self test pages in a training guide on different colored paper. 1. Open the document to be printed.
WorkCentre® 5945/5955 Print More Information Printing a Document using the XPS Print Driver System Administrator Guide www.xerox.com/support. Using Internet Services to find System Administrator Contact Details Viewing the Progress and Details of a Job using the Job Status Menu Designing and Applying a Watermark to Prints using the XPS Print Driver You can print to the device from your computer through a print driver.
WorkCentre® 5945/5955 Print • Print in Foreground prints your cover sheet text under your watermark, so some of the cover sheet text may be covered. 10. Select the Pages option required. • • Print on Page 1 Only adds the image to the first page of the document. Print on All Pages adds the image to every page of the document. 11. Click the OK button to save your settings. 12. Select the confirmation button, the name will vary depending on the application you are printing from.
WorkCentre® 5945/5955 Print 6. Click the Orientation tab. 7. Select the option required. • • Portrait orients the paper so that the text and images print across the short dimension of the paper. Landscape orients the paper so that the text and images print across the long dimension of the paper. 8. Click the OK button to save your settings. 9. Select the confirmation button, the name will vary depending on the application you are printing from. From most applications select the OK or Print button. 10.
WorkCentre® 5945/5955 Print Adding a Job ID using the XPS Print Driver You can print to the device from your computer through a print driver. There are a variety of Xerox print drivers available for the device to support all the popular operating systems. The Xerox print drivers allow you to use the specific features available on your device. If Authentication has been enabled on your device you may have to login at the device to see or release your jobs.
Print WorkCentre® 5945/5955 13. If your job remains held in the Active Jobs list, the device needs you to supply additional resources, such as paper or staples before it can complete the job. To find out what resources are needed, select the job and then select the Details button. Once the resources are available the job will print. More Information Printing a Document using the XPS Print Driver System Administrator Guide www.xerox.com/support.
WorkCentre® 5945/5955 Print 12. Print jobs are usually shown in the Active Jobs list, however if your System Administrator has enabled the Hold All Jobs feature, your job will be listed in either the Held Print Jobs or the Unidentified Print Jobs list. To release a held job select the job in the required list and then select the Release button. 13. If your job remains held in the Active Jobs list, the device needs you to supply additional resources, such as paper or staples before it can complete the job.
WorkCentre® 5945/5955 Print • • Rename makes it possible to change the name for the custom print settings you have currently selected. This is not available if the driver or application default print settings are selected. Delete permanently erases the custom print settings you currently have selected. This is not available if the driver default print settings are selected. 6. Click the option you require. 7. Click the OK button to save your settings. 8.
Print WorkCentre® 5945/5955 3. Select the Xerox XPS driver from the list of print drivers available. 4. Open the print driver Properties window - the method will vary depending on the application you are printing from. From most Microsoft applications select the Properties or Preferences button to open the window. 5. Select the option(s) required. 6. Select the Saved Settings option required. 7. Select Save As from the Saved Settings menu. 8.
Print WorkCentre® 5945/5955 Use the Save Print Settings as Application Defaults option to store custom printing settings as the defaults for the current application. 1. Open the document to be printed. From most applications select the Office button or select File, then select Print from the file menu. 2. Enter the number of copies you want to produce. Depending on the application you are using you may also be able to select a page range and make other print selections. 3.
Print WorkCentre® 5945/5955 4. Open the print driver Properties window - the method will vary depending on the application you are printing from. From most Microsoft applications select the Properties or Preferences button to open the window. 5. Select the saved setting required from the Saved Settings menu. 6. Click the OK button. 7. Select the confirmation button, the name will vary depending on the application you are printing from. From most applications select the OK or Print button. 8.
Print WorkCentre® 5945/5955 4. Open the print driver Properties window - the method will vary depending on the application you are printing from. From most Microsoft applications select the Properties or Preferences button to open the window. 5. Select the saved settings required from the list. 6. Select the Saved Settings option required. 7. Select Rename... from the Saved Settings menu. 8. Select the Saved Setting Name entry box and use your keyboard to enter a name for your custom setting. 9.
Print WorkCentre® 5945/5955 Use the Delete option to erase a specific set of custom print settings you have saved. 1. Open the document to be printed. From most applications select the Office button or select File, then select Print from the file menu. 2. Enter the number of copies you want to produce. Depending on the application you are using you may also be able to select a page range and make other print selections. 3. Select the Xerox XPS driver from the list of print drivers available. 4.
Print WorkCentre® 5945/5955 Resetting Defaults using the XPS Print Driver You can print to the device from your computer through a print driver. There are a variety of Xerox print drivers available for the device to support all the popular operating systems. The Xerox print drivers allow you to use the specific features available on your device. If Authentication has been enabled on your device you may have to login at the device to see or release your jobs.
WorkCentre® 5945/5955 Print 3. Select the Xerox XPS driver from the list of print drivers available. 4. Open the print driver Properties window - the method will vary depending on the application you are printing from. From most Microsoft applications select the Properties or Preferences button to open the window. 5. Click the Earth Smart Settings button. 6. Select the option(s) required. • • • • 2-Sided Print prints on both sides of a sheet to save paper.
WorkCentre® 5945/5955 Print Use the Status section to view the basic status of your device, such as the content of the paper trays. Use the More Status option to see more detailed information including any alerts or warnings, an active jobs list, a completed jobs list and the permissions your System Administrator has set for the device. Note: Your System Administrator must enable Bi-Directional Communication between your device and your print driver before you can use this feature.
WorkCentre® 5945/5955 Print Mac Driver Printing a Document using the Mac Print Driver You can print to the device from your computer through a print driver. There are a variety of Xerox print drivers available for the device to support all the popular operating systems. The Xerox print drivers allow you to use the specific features available on your device. Note: The device is enabled for AirPrint.
Print WorkCentre® 5945/5955 Refer to the System Administrator Guide for further information. 1. Open the document to be printed. From most applications select File, then select Print from the file menu. 2. Enter the number of copies you want to produce. Depending on the application you are using you may also be able to select a page range and make other print selections. 3. Select the Xerox driver from the list of print drivers available. 4.
Print WorkCentre® 5945/5955 If Authentication has been enabled on your device you may have to login at the device to see or release your jobs. If Accounting has been enabled you may have to enter login details at the print driver before you can send your job. Use the Job Type option to specify how your job should be treated by the device, for example whether it should be treated as a confidential document (Secure Print) or a proof print (Sample Set).
Print WorkCentre® 5945/5955 6. Select the option required from the Job Type menu. 7. Select the option(s) required. 8. Select the confirmation button, the name will vary depending on the application you are printing from. From most applications select the OK or Print button. 9. Collect your job from the device. 10. Press the Job Status button on the device control panel to view the job list and check the status of the job. 11.
Print WorkCentre® 5945/5955 3. Select the Xerox driver from the list of print drivers available. 4. Select Xerox Features from the print driver properties menu - the name of the menu will vary depending on the application you are printing from. From most applications select the dropdown menu that states Copies and Pages, or that states the application name. 5. Select Paper / Output from the Xerox Features group selection menu. This is usually the active area when the print driver opens. 6.
WorkCentre® 5945/5955 Print Note: If you send more than one Secure Print job using the same passcode, when you go to the device you will only need to enter the code once to release all the jobs for printing. 1. Open the document to be printed. From most applications select File, then select Print from the file menu. 2. Enter the number of copies you want to produce. Depending on the application you are using you may also be able to select a page range and make other print selections. 3.
Print WorkCentre® 5945/5955 If Accounting has been enabled you may have to enter login details at the print driver before you can send your job. Use the Delay Print option to print your document at a specified time, up to 24 hours after the original job submission. This is useful if you want to print large jobs during quiet times in your office, or if you want all your jobs to print at the same time. 1. Open the document to be printed.
WorkCentre® 5945/5955 Print If Authentication has been enabled on your device you may have to login at the device to see or release your jobs. If Accounting has been enabled you may have to enter login details at the print driver before you can send your job. Use the Sample Set option to print one copy of a multiple-copy print job. When you collect the print you can check it has printed as you expected before approving the rest of the job for printing.
WorkCentre® 5945/5955 Print Saving Jobs using the Mac Print Driver You can print to the device from your computer through a print driver. There are a variety of Xerox print drivers available for the device to support all the popular operating systems. The Xerox print drivers allow you to use the specific features available on your device. If Authentication has been enabled on your device you may have to login at the device to see or release your jobs.
WorkCentre® 5945/5955 Print 13. Select the confirmation button, the name will vary depending on the application you are printing from. From most applications select the OK or Print button. More Information Printing a Document using the Mac Print Driver Printing a Saved Job using the Print From Feature Printing Saved Jobs from Internet Services Creating a New Folder for Saved Jobs in Internet Services System Administrator Guide www.xerox.com/support.
WorkCentre® 5945/5955 Print - If required, select the Telephone Number entry box and use your keyboard to enter the recipient’s telephone number. If required, select the E-mail Address entry box and use your keyboard to enter the recipient’s e-mail address. If required, select the Mailbox entry box and use your keyboard to enter the recipient’s mailbox number. If required, click the Save to Address Book checkbox.
WorkCentre® 5945/5955 Print 9. If required, select the Cover Sheet Image option required. • • • • New adds a new image. Text adds a text cover page. Picture adds an image to the cover page. Click the OK button. 10. Select the paper size required from the Cover Sheet Paper Size menu. 11. If you want the device to print a confirmation sheet, use a specific send speed or resolution, send at a specific time, use a dialing prefix or include credit card details, click the Options tab.
WorkCentre® 5945/5955 Print The paper types loaded in the device are listed. You can select other paper types - but you will need to load them into the appropriate tray before your job will print correctly. It is usually easier to load the paper required into the device before programming your job as this helps to ensure you select both the correct paper type and the correct tray when sending your job. 1. Open the document to be printed.
WorkCentre® 5945/5955 Print Printing 2-Sided using the Mac Print Driver You can print to the device from your computer through a print driver. There are a variety of Xerox print drivers available for the device to support all the popular operating systems. The Xerox print drivers allow you to use the specific features available on your device. If Authentication has been enabled on your device you may have to login at the device to see or release your jobs.
WorkCentre® 5945/5955 Print Using Internet Services to find System Administrator Contact Details Viewing the Progress and Details of a Job using the Job Status Menu Setting the Print Quality using the Mac Print Driver You can print to the device from your computer through a print driver. There are a variety of Xerox print drivers available for the device to support all the popular operating systems. The Xerox print drivers allow you to use the specific features available on your device.
Print WorkCentre® 5945/5955 More Information Printing a Document using the Mac Print Driver System Administrator Guide www.xerox.com/support. Using Internet Services to find System Administrator Contact Details Viewing the Progress and Details of a Job using the Job Status Menu Finishing Choosing a Finishing Option when using the Mac Print Driver You can print to the device from your computer through a print driver.
WorkCentre® 5945/5955 Print 7. Click the OK button to save your settings. 8. Select the confirmation button, the name will vary depending on the application you are printing from. From most applications select the OK or Print button. 9. Collect your job from the device. 10. Press the Job Status button on the device control panel to view the job list and check the status of the job. More Information Printing a Document using the Mac Print Driver System Administrator Guide www.xerox.com/support.
Print WorkCentre® 5945/5955 9. Press the Job Status button on the device control panel to view the job list and check the status of the job. 10. Print jobs are usually shown in the Active Jobs list, however if your System Administrator has enabled the Hold All Jobs feature, your job will be listed in either the Held Print Jobs or the Unidentified Print Jobs list. To release a held job select the job in the required list and then select the Release button. 11.
Print WorkCentre® 5945/5955 5. Select Paper / Output from the Xerox Features group selection menu. This is usually the active area when the print driver opens. 6. Select Hole Punch from the Finishing menu. 7. Select the confirmation button, the name will vary depending on the application you are printing from. From most applications select the OK or Print button. 8. Collect your job from the device. 9.
WorkCentre® 5945/5955 Print Note: SEF is Short Edge Feed (where the short edge of the paper is the leading edge when the paper is fed into the device). LEF is Long Edge Feed (where the paper is oriented so that the long edge is fed into the device first). 1. Open the document to be printed. From most applications select File, then select Print from the file menu. 2. Enter the number of copies you want to produce.
WorkCentre® 5945/5955 Print Booklet Creation Folding Booklets using the Mac Print Driver You can print to the device from your computer through a print driver. There are a variety of Xerox print drivers available for the device to support all the popular operating systems. The Xerox print drivers allow you to use the specific features available on your device. If Authentication has been enabled on your device you may have to login at the device to see or release your jobs.
Print WorkCentre® 5945/5955 10. Press the Job Status button on the device control panel to view the job list and check the status of the job. 11. Print jobs are usually shown in the Active Jobs list, however if your System Administrator has enabled the Hold All Jobs feature, your job will be listed in either the Held Print Jobs or the Unidentified Print Jobs list. To release a held job select the job in the required list and then select the Release button. 12.
WorkCentre® 5945/5955 Print 7. Select Booklet Fold from the Booklet Finishing menu. • • • • • • Select the Booklet Paper Size option required from the Scale to New Paper Size menu. Select Standard from the Booklet Margins menu to create a margin between each image on your booklet. If required, select None to cancel any programming you have made. Select the Gutter entry box and use your keyboard to enter a width for the center margin of your booklet.
WorkCentre® 5945/5955 Print Note: This option must be made available by your System Administrator. 1. Open the document to be printed. From most applications select File, then select Print from the file menu. 2. Enter the number of copies you want to produce. Depending on the application you are using you may also be able to select a page range and make other print selections. 3. Select the Xerox driver from the list of print drivers available. 4.
WorkCentre® 5945/5955 Print If Accounting has been enabled you may have to enter login details at the print driver before you can send your job. The Special Pages options are used to give a more professional appearance to your document, for example by adding covers or pages printed on different paper. Use the Covers option to add blank or printed pages to the front, back or front and back of your set. This option is also used to add a cover to a booklet.
WorkCentre® 5945/5955 Print 19. Print jobs are usually shown in the Active Jobs list, however if your System Administrator has enabled the Hold All Jobs feature, your job will be listed in either the Held Print Jobs or the Unidentified Print Jobs list. To release a held job select the job in the required list and then select the Release button. 20. If your job remains held in the Active Jobs list, the device needs you to supply additional resources, such as paper or staples before it can complete the job.
WorkCentre® 5945/5955 Print • You can select a specific paper size, color and type. Use the Blank or Pre-Printed menu to choose any print settings for the cover. 9. If required, select the Back Cover Paper options required. • You can select a specific paper size, color and type. Use the Blank or Pre-Printed menu to choose any print settings for the cover. 10. Click the OK button to save your settings. 11.
WorkCentre® 5945/5955 Print 3. Select the Xerox driver from the list of print drivers available. 4. Select Xerox Features from the print driver properties menu - the name of the menu will vary depending on the application you are printing from. From most applications select the dropdown menu that states Copies and Pages, or that states the application name. 5. Select Special Pages from the Xerox features group selection menu. 6. Click the Add Inserts button.
WorkCentre® 5945/5955 Print Setting Exceptions using the Mac Print Driver You can print to the device from your computer through a print driver. There are a variety of Xerox print drivers available for the device to support all the popular operating systems. The Xerox print drivers allow you to use the specific features available on your device. If Authentication has been enabled on your device you may have to login at the device to see or release your jobs.
WorkCentre® 5945/5955 Print 15. If your job remains held in the Active Jobs list, the device needs you to supply additional resources, such as paper or staples before it can complete the job. To find out what resources are needed, select the job and then select the Details button. Once the resources are available the job will print. More Information Printing a Document using the Mac Print Driver System Administrator Guide www.xerox.com/support.
WorkCentre® 5945/5955 Print 11. If your job remains held in the Active Jobs list, the device needs you to supply additional resources, such as paper or staples before it can complete the job. To find out what resources are needed, select the job and then select the Details button. Once the resources are available the job will print. More Information Printing a Document using the Mac Print Driver System Administrator Guide www.xerox.com/support.
WorkCentre® 5945/5955 Print 11. If your job remains held in the Active Jobs list, the device needs you to supply additional resources, such as paper or staples before it can complete the job. To find out what resources are needed, select the job and then select the Details button. Once the resources are available the job will print. More Information Printing a Document using the Mac Print Driver System Administrator Guide www.xerox.com/support.
WorkCentre® 5945/5955 Print • Select the Creep entry box and use your keyboard to enter an amount to shift the page images outwards by. This feature compensates for the fact that the outer pages in a large booklet have to fold around all the inner pages, this makes the outer pages slightly shorter than the inner pages in the final booklet. 8. Click the OK button. 9. If required, check the Draw Page Borders checkbox to print a border around each image. 10.
WorkCentre® 5945/5955 Print 5. Select Booklet / Watermark from the Xerox features group selection menu. 6. Select Enabled from the Booklet Layout menu. 7. Click the Booklet Options button. 8. Select Booklet Finishing option required. The folding options vary depending on the type of finisher attached to your device. If there is no finisher attached to your device you will not be able to choose any folding options.
WorkCentre® 5945/5955 Print If Authentication has been enabled on your device you may have to login at the device to see or release your jobs. If Accounting has been enabled you may have to enter login details at the print driver before you can send your job. Use the Watermark option to add a picture or some text to your document from within the print driver. You can set the watermark image to appear behind or on top of your main document text. 1. Open the document to be printed.
WorkCentre® 5945/5955 Print 13. Print jobs are usually shown in the Active Jobs list, however if your System Administrator has enabled the Hold All Jobs feature, your job will be listed in either the Held Print Jobs or the Unidentified Print Jobs list. To release a held job select the job in the required list and then select the Release button. 14. If your job remains held in the Active Jobs list, the device needs you to supply additional resources, such as paper or staples before it can complete the job.
WorkCentre® 5945/5955 Print • Print ID in Margins - All Pages prints your ID in the top margin, on all the pages in your document. If your document is 2-sided the ID will print on both sides. 7. Select the confirmation button, the name will vary depending on the application you are printing from. From most applications select the OK or Print button. 8. Collect your job from the device. 9. Press the Job Status button on the device control panel to view the job list and check the status of the job. 10.
Print WorkCentre® 5945/5955 7. Select the confirmation button, the name will vary depending on the application you are printing from. From most applications select the OK or Print button. 8. Collect your job from the device. 9. Press the Job Status button on the device control panel to view the job list and check the status of the job. 10.
WorkCentre® 5945/5955 Print 6. Select the Booklet Image Order option required. • • Left to Right places page 1 of your document on the front of your booklet when the fold is to the left or top of the booklet. Right to Left places page 1 of your document on the front of your booklet when the fold is to the right or bottom of the booklet. 7. Select the confirmation button, the name will vary depending on the application you are printing from. From most applications select the OK or Print button.
WorkCentre® 5945/5955 Print 3. Select Xerox Features from the print driver properties menu - the name of the menu will vary depending on the application you are printing from. From most applications select the dropdown menu that states Copies and Pages, or that states the application name. 4. Click the ? button. You will be directed to the Xerox online help in your default internet browser. More Information Printing a Document using the Mac Print Driver System Administrator Guide www.xerox.com/support.
WorkCentre® 5945/5955 Print 4. Move your mouse over the paper tray status information at the bottom of the print driver screen to see the full status of each tray. More Information Printing a Document using the Mac Print Driver System Administrator Guide www.xerox.com/support. Using Internet Services to find System Administrator Contact Details Setting Earth Smart Print Settings using the Mac Print Driver You can print to the device from your computer through a print driver.
WorkCentre® 5945/5955 Print 12. Print jobs are usually shown in the Active Jobs list, however if your System Administrator has enabled the Hold All Jobs feature, your job will be listed in either the Held Print Jobs or the Unidentified Print Jobs list. To release a held job select the job in the required list and then select the Release button. 13. If your job remains held in the Active Jobs list, the device needs you to supply additional resources, such as paper or staples before it can complete the job.
WorkCentre® 5945/5955 Print 12. Select the 2-Sided Scanning option required. • • • 1-Sided use this option if your originals are printed on 1 side. 2-Sided use this option if your originals are 2-sided. The document feeder must be used to scan your originals with this option. 2-Sided, Rotate Side 2 use this option if your originals are 2-sided and open up like a calendar. The document feeder must be used to scan your originals with this option. 13.
WorkCentre® 5945/5955 Print 8. Select any options required. 9. Select the Paper Supply button. 10. Select the Paper Supply option required. • • Automatically Select lets the device select the appropriate paper size for each original based on the size of the original and reduce or enlarge programming. Select a paper tray that contains the size and type of paper you require. The size and media loaded in each tray is displayed. 11. Select the OK button. 12. Select the 2-Sided Printing button. 13.
WorkCentre® 5945/5955 Print 4. Select the Print from USB button. 5. Select the saved job required. 6. Select any options required. 7. Select the Paper Supply button. 8. Select the Paper Supply option required. • • Automatically Select lets the device select the appropriate paper size for each original based on the size of the original and reduce or enlarge programming. Select a paper tray that contains the size and type of paper you require. The size and media loaded in each tray is displayed. 9.
E-Mail 7 Sending an E-mail Use the E-mail feature to scan images and send them to a recipient as an attachment to an e-mail. Note: This option must be made available by your System Administrator. If Authentication or Accounting has been enabled on your device you may have to enter login details to access the E-mail features. 1. Load your documents face up in the document feeder input tray. Adjust the guide to just touch the documents. Or Lift up the document feeder.
WorkCentre® 5945/5955 E-Mail 11. If required, select the From... button and use the touch screen keyboard to enter or edit the From address for the e-mail. Note: Your System Administrator may choose to lock the From button to prevent the preset From address being altered. • Select the OK button. 12. If required, select the Subject... button and use the touch screen keyboard to enter or edit the subject title for the e-mail. • Select the OK button. 13.
WorkCentre® 5945/5955 E-Mail 6. Select the Address Book button. The name of the button will vary depending on the type of address book your System Administrator has installed or set as the default address book, for example the button may be labelled Device Address Book or Network Address Book. 7. Select the Address Book type from the dropdown menu to the left of the Enter name entry box. • If required, select the Search button to search the device address book.
E-Mail WorkCentre® 5945/5955 Sending an E-mail to a Recipient Saved as a Favorite Use the E-mail feature to scan images and send them to a recipient as an attachment to an e-mail. Note: This option must be made available by your System Administrator. If Authentication or Accounting has been enabled on your device you may have to enter login details to access the E-mail features. Use the Favorites option to quickly access regularly used e-mail addresses. The Favorites are saved in the Address Book.
WorkCentre® 5945/5955 E-Mail Use the Output Color option to control whether the device replicates the original colors on your document or changes the output, for example by scanning color originals but converting them into black and white output. 1. Load your documents face up in the document feeder input tray. Adjust the guide to just touch the documents. Or Lift up the document feeder. Place the document face down onto the document glass and register it to the arrow at the top left corner.
WorkCentre® 5945/5955 E-Mail • Select the OK button. 14. Select the Output Color option required. • • • • Auto Detect allows the device to select the most appropriate color setting. Black and White produces black and white output even if the originals were color. Grayscale produces output using various shades of gray. Color produces full color output. 15. Select any options required. 16. Press the Start button on the control panel to scan the original. 17.
WorkCentre® 5945/5955 E-Mail • Buttons with an icon in the lower right corner have accented or additional characters available. Select and hold the button to view related characters in a pop-up menu. Select the desired character from the pop-up menu. Note: If e-mail encryption is enabled, e-mails may only be sent to recipients with a valid encryption certificate. Encryption ensures that the message cannot be read by anybody except the intended recipient.
WorkCentre® 5945/5955 E-Mail Setting the Original Type for E-mails Use the E-mail feature to scan images and send them to a recipient as an attachment to an e-mail. Note: This option must be made available by your System Administrator. If Authentication or Accounting has been enabled on your device you may have to enter login details to access the E-mail features. Use the Original Type options to enhance the quality of your output based on the type of original images and how they were produced.
WorkCentre® 5945/5955 E-Mail Note: Your System Administrator may choose to lock the From button to prevent the preset From address being altered. • Select the OK button. 12. If required, select the Subject... button and use the touch screen keyboard to enter or edit the subject title for the e-mail. • Select the OK button. 13. If required, select the File Name button and use the touch screen keyboard to enter a name for the file created from your scanned document.
WorkCentre® 5945/5955 E-Mail 18. Remove the original from the document feeder or document glass when scanning has completed. The job enters the job list ready for processing. 19. Press the Job Status button on the device control panel to view the job list and check the status of the job. More Information Using a User ID to Log In at the Device Using Internet Services to find System Administrator Contact Details System Administrator Guide www.xerox.com/support.
WorkCentre® 5945/5955 E-Mail 9. If required, select Cc from the To: dropdown menu to copy a recipient on the e-mail. Use the touch screen keyboard to enter the recipient details and then select the Add button. Note: At least one To address must be selected, documents cannot be sent to a Cc address alone. 10. Select the Close button to save the information you entered. 11. If required, select the From... button and use the touch screen keyboard to enter or edit the From address for the e-mail.
WorkCentre® 5945/5955 E-Mail Advanced Settings Image Options Choosing the Image Options for E-mails Use the E-mail feature to scan images and send them to a recipient as an attachment to an e-mail. Note: This option must be made available by your System Administrator. If Authentication or Accounting has been enabled on your device you may have to enter login details to access the E-mail features. The Image Options features give you choices for changing the appearance of the output.
WorkCentre® 5945/5955 E-Mail 8. Select the Add button. • If you want to send the document to more than one recipient enter the additional details, one recipient at a time, and select the Add button again until all the recipients have been added. 9. If required, select Cc from the To: dropdown menu to copy a recipient on the e-mail. Use the touch screen keyboard to enter the recipient details and then select the Add button.
WorkCentre® 5945/5955 E-Mail Use the Lighten / Darken options to manually adjust the lightness or darkness of the image. Light originals containing pencil images may produce better output if the darkness is increased. Dark originals such as halftones or documents with colored backgrounds may need to be lightened. 1. Load your documents face up in the document feeder input tray. Adjust the guide to just touch the documents. Or Lift up the document feeder.
WorkCentre® 5945/5955 E-Mail • Select the OK button. 14. Select the Advanced Settings tab. 15. Select the Image Options button. 16. Select the Lighten / Darken option required. • • Move the indicator down to darken the scanned image. If this creates an output with too dark a background, use the Background Suppression feature to remove the background. Move the indicator up to lighten the scanned image. 17. Select the OK button. 18. Press the Start button on the control panel to scan the original. 19.
WorkCentre® 5945/5955 E-Mail 7. Use the touch screen keyboard to enter the e-mail address of the recipient. • • • • The number of alphanumeric characters that can be entered depends on the size of the characters chosen. Once the end of the entry box has been reached no more characters can be added. To delete a character use the backspace X button. Use the special characters button to access special characters such as $ and %.
WorkCentre® 5945/5955 E-Mail More Information Choosing the Image Options for E-mails Lightening or Darkening E-mails Changing the Saturation of E-mail Attachments Using a User ID to Log In at the Device Using Internet Services to find System Administrator Contact Details System Administrator Guide www.xerox.com/support. Changing the Saturation of E-mail Attachments Use the E-mail feature to scan images and send them to a recipient as an attachment to an e-mail.
WorkCentre® 5945/5955 E-Mail 9. If required, select Cc from the To: dropdown menu to copy a recipient on the e-mail. Use the touch screen keyboard to enter the recipient details and then select the Add button. Note: At least one To address must be selected, documents cannot be sent to a Cc address alone. 10. Select the Close button to save the information you entered. 11. If required, select the From... button and use the touch screen keyboard to enter or edit the From address for the e-mail.
WorkCentre® 5945/5955 E-Mail The Image Enhancement options improve the quality of your output by reducing the background or adjusting the contrast. Use the Background Suppression option to enhance originals that have colored backgrounds, by reducing or eliminating the background on the output. This option is useful when your original is on colored paper. Use the Contrast option to control the image density on the output and compensate for an original that has too much or too little contrast on the image.
WorkCentre® 5945/5955 E-Mail 12. If required, select the Subject... button and use the touch screen keyboard to enter or edit the subject title for the e-mail. • Select the OK button. 13. If required, select the File Name button and use the touch screen keyboard to enter a name for the file created from your scanned document. If you choose not to enter a file name a default name entered by your System Administrator will be used. • Select the OK button. 14. Select the Advanced Settings tab. 15.
WorkCentre® 5945/5955 E-Mail 7. Use the touch screen keyboard to enter the e-mail address of the recipient. • • • • The number of alphanumeric characters that can be entered depends on the size of the characters chosen. Once the end of the entry box has been reached no more characters can be added. To delete a character use the backspace X button. Use the special characters button to access special characters such as $ and %.
WorkCentre® 5945/5955 E-Mail 20. Press the Job Status button on the device control panel to view the job list and check the status of the job. More Information Choosing an Image Enhancement Option for E-mails Setting the E-mail Contrast Using a User ID to Log In at the Device Lightening or Darkening E-mails Using Internet Services to find System Administrator Contact Details System Administrator Guide www.xerox.com/support.
WorkCentre® 5945/5955 E-Mail 9. If required, select Cc from the To: dropdown menu to copy a recipient on the e-mail. Use the touch screen keyboard to enter the recipient details and then select the Add button. Note: At least one To address must be selected, documents cannot be sent to a Cc address alone. 10. Select the Close button to save the information you entered. 11. If required, select the From... button and use the touch screen keyboard to enter or edit the From address for the e-mail.
WorkCentre® 5945/5955 E-Mail Use the Scan Presets options to select a group of commonly used scan settings. These options are useful if you aren’t sure exactly what settings you need, but do know what your scanned images will be used for. 1. Load your documents face up in the document feeder input tray. Adjust the guide to just touch the documents. Or Lift up the document feeder. Place the document face down onto the document glass and register it to the arrow at the top left corner.
WorkCentre® 5945/5955 E-Mail • Select the OK button. 14. Select the Advanced Settings tab. 15. Select the Scan Presets button. 16. Select the Scan Presets option required. • • • • • Sharing and Printing produces a medium sized file, small enough to share but high enough quality to print. High Quality Printing produces a large, high quality file. Archival - Small File Size produces a small, lower quality file suitable for viewing on a screen, but the print quality will be poor.
WorkCentre® 5945/5955 E-Mail 7. Use the touch screen keyboard to enter the e-mail address of the recipient. • • • • The number of alphanumeric characters that can be entered depends on the size of the characters chosen. Once the end of the entry box has been reached no more characters can be added. To delete a character use the backspace X button. Use the special characters button to access special characters such as $ and %.
E-Mail WorkCentre® 5945/5955 • 300 dpi produces higher quality output. This setting is recommended for high quality text documents that are to pass through OCR (Optical Character Recognition) applications. It is also recommended for high quality line art or medium quality photos and graphics. This is the best default resolution choice in most cases. 400 dpi produces average image quality for photos and graphics and is recommended for photos and graphics.
WorkCentre® 5945/5955 E-Mail 7. Use the touch screen keyboard to enter the e-mail address of the recipient. • • • • The number of alphanumeric characters that can be entered depends on the size of the characters chosen. Once the end of the entry box has been reached no more characters can be added. To delete a character use the backspace X button. Use the special characters button to access special characters such as $ and %.
WorkCentre® 5945/5955 E-Mail 19. Remove the original from the document feeder or document glass when scanning has completed. The job enters the job list ready for processing. 20. Press the Job Status button on the device control panel to view the job list and check the status of the job. More Information Using a User ID to Log In at the Device Using Internet Services to find System Administrator Contact Details System Administrator Guide www.xerox.com/support.
WorkCentre® 5945/5955 E-Mail Note: If e-mail encryption is enabled, e-mails may only be sent to recipients with a valid encryption certificate. Encryption ensures that the message cannot be read by anybody except the intended recipient. In addition, with e-mail signing enabled, the recipient can be sure that the message has actually come from the person marked as the sender. 8. Select the Add button.
WorkCentre® 5945/5955 E-Mail Specifying the Size of the Original to be E-mailed Use the E-mail feature to scan images and send them to a recipient as an attachment to an e-mail. Note: This option must be made available by your System Administrator. If Authentication or Accounting has been enabled on your device you may have to enter login details to access the E-mail features.
WorkCentre® 5945/5955 E-Mail • Select the OK button. 12. If required, select the Subject... button and use the touch screen keyboard to enter or edit the subject title for the e-mail. • Select the OK button. 13. If required, select the File Name button and use the touch screen keyboard to enter a name for the file created from your scanned document. If you choose not to enter a file name a default name entered by your System Administrator will be used. • Select the OK button. 14.
WorkCentre® 5945/5955 E-Mail Use the Edge Erase options to specify the scan area so that only a specific section of your document is scanned. This is useful if you want to remove the marks caused by punched holes or staples in your original. 1. Load your documents face up in the document feeder input tray. Adjust the guide to just touch the documents. Or Lift up the document feeder. Place the document face down onto the document glass and register it to the arrow at the top left corner.
WorkCentre® 5945/5955 E-Mail • Select the OK button. 14. Select the Layout Adjustment tab. 15. Select the Edge Erase button. 16. Select the Edge Erase option required. • • All Edges erases an equal amount from all the edges. Use the arrow buttons to adjust the amount to be erased from 3 mm (0.1”) to 50 mm (2.0”) or select the entry field and use the numeric keypad to enter the amount required.
WorkCentre® 5945/5955 E-Mail 7. Use the touch screen keyboard to enter the e-mail address of the recipient. • • • • The number of alphanumeric characters that can be entered depends on the size of the characters chosen. Once the end of the entry box has been reached no more characters can be added. To delete a character use the backspace X button. Use the special characters button to access special characters such as $ and %.
WorkCentre® 5945/5955 E-Mail More Information Setting the Background Suppression for E-mails Erasing Edges from E-mail Attachments Using a User ID to Log In at the Device Using Internet Services to find System Administrator Contact Details System Administrator Guide www.xerox.com/support. E-mail Options Setting a File Format for E-mail Attachments Use the E-mail feature to scan images and send them to a recipient as an attachment to an e-mail.
E-Mail WorkCentre® 5945/5955 • If you want to send the document to more than one recipient enter the additional details, one recipient at a time, and select the Add button again until all the recipients have been added. 9. If required, select Cc from the To: dropdown menu to copy a recipient on the e-mail. Use the touch screen keyboard to enter the recipient details and then select the Add button. Note: At least one To address must be selected, documents cannot be sent to a Cc address alone. 10.
WorkCentre® 5945/5955 E-Mail 22. Press the Job Status button on the device control panel to view the job list and check the status of the job. More Information Using a User ID to Log In at the Device Specifying a File Name for E-mail Attachments Using Internet Services to find System Administrator Contact Details System Administrator Guide www.xerox.com/support. Adding a Message to an E-mail Use the E-mail feature to scan images and send them to a recipient as an attachment to an e-mail.
WorkCentre® 5945/5955 E-Mail Note: At least one To address must be selected, documents cannot be sent to a Cc address alone. 10. Select the Close button to save the information you entered. 11. If required, select the From... button and use the touch screen keyboard to enter or edit the From address for the e-mail. Note: Your System Administrator may choose to lock the From button to prevent the preset From address being altered. • Select the OK button. 12. If required, select the Subject...
WorkCentre® 5945/5955 E-Mail Use the Reply To option to include an e-mail address you want the recipient to reply to. This option is useful if you want the recipient to reply to your e-mail address rather than to the device. 1. Load your documents face up in the document feeder input tray. Adjust the guide to just touch the documents. Or Lift up the document feeder. Place the document face down onto the document glass and register it to the arrow at the top left corner. Close the document feeder. 2.
WorkCentre® 5945/5955 E-Mail 14. Select the E-mail Options tab. 15. Select the Reply To button. 16. Use the touchscreen keyboard to enter the text required. • • • • • The number of alphanumeric characters that can be entered depends on the size of the characters chosen. Once the end of the entry box has been reached no more characters can be added. To delete a character use the backspace X button. Use the special characters button to access special characters such as $ and %.
WorkCentre® 5945/5955 E-Mail 5. Select the E-mail button on the touch screen. 6. If required, select the E-mail tab. This is usually the active tab when the E-mail service opens. 7. Select the New Recipient... button. 8. Use the touch screen keyboard to enter the e-mail address of the recipient. • • • • The number of alphanumeric characters that can be entered depends on the size of the characters chosen. Once the end of the entry box has been reached no more characters can be added.
WorkCentre® 5945/5955 E-Mail 19. Select the OK button. 20. Select the OK button. 21. Select the features required for the first segment of the job. • If using Build Job for a job with tabs, ensure the tabs are loaded correctly and select the tray containing the tabs. Note: If tab media is selected, the image will be shifted 13mm (0.5”) to the right automatically if the tab original is A4 or 8.5x11” size. 22. Load your first segment originals face up in the document feeder input tray.
E-Mail 554 WorkCentre® 5945/5955 User Guide
ID Card Copy 8 Making Copies of ID Cards ID Card Copy enables you to scan each side of an ID card onto one side of a single sheet of paper. The ID card is placed on the document glass and the first side is scanned. When prompted, the card is turned over and the other side is scanned. You can also set different image quality settings for side 1 and side 2. If Authentication or Accounting has been enabled on your device you may have to enter login details to access the ID Card Copy features. 1.
ID Card Copy WorkCentre® 5945/5955 Copy Options Reduce or Enlarge Reducing or Enlarging Copies of ID Cards ID Card Copy enables you to scan each side of an ID card onto one side of a single sheet of paper. The ID card is placed on the document glass and the first side is scanned. When prompted, the card is turned over and the other side is scanned. You can also set different image quality settings for side 1 and side 2.
ID Card Copy WorkCentre® 5945/5955 Reducing or Enlarging Copies of ID Cards by Proportional % ID Card Copy enables you to scan each side of an ID card onto one side of a single sheet of paper. The ID card is placed on the document glass and the first side is scanned. When prompted, the card is turned over and the other side is scanned. You can also set different image quality settings for side 1 and side 2.
ID Card Copy WorkCentre® 5945/5955 Reducing or Enlarging Copies of ID Cards by Independent X-Y% ID Card Copy enables you to scan each side of an ID card onto one side of a single sheet of paper. The ID card is placed on the document glass and the first side is scanned. When prompted, the card is turned over and the other side is scanned. You can also set different image quality settings for side 1 and side 2.
ID Card Copy WorkCentre® 5945/5955 Setting the Paper Supply for ID Card Copying ID Card Copy enables you to scan each side of an ID card onto one side of a single sheet of paper. The ID card is placed on the document glass and the first side is scanned. When prompted, the card is turned over and the other side is scanned. You can also set different image quality settings for side 1 and side 2.
ID Card Copy WorkCentre® 5945/5955 Image Quality Setting the Original Type for ID Card Copying ID Card Copy enables you to scan each side of an ID card onto one side of a single sheet of paper. The ID card is placed on the document glass and the first side is scanned. When prompted, the card is turned over and the other side is scanned. You can also set different image quality settings for side 1 and side 2.
ID Card Copy WorkCentre® 5945/5955 Lightening or Darkening Copies of ID Cards ID Card Copy enables you to scan each side of an ID card onto one side of a single sheet of paper. The ID card is placed on the document glass and the first side is scanned. When prompted, the card is turned over and the other side is scanned. You can also set different image quality settings for side 1 and side 2.
ID Card Copy WorkCentre® 5945/5955 Setting the Background Suppression for ID Card Copying ID Card Copy enables you to scan each side of an ID card onto one side of a single sheet of paper. The ID card is placed on the document glass and the first side is scanned. When prompted, the card is turned over and the other side is scanned. You can also set different image quality settings for side 1 and side 2.
Internet Services 9 Using Internet Services Internet Services uses the embedded web server on the device. This allows you to communicate with the device over the internet or intranet through your web browser. 1. At your computer, open your web browser. 2. In the URL field, use your keyboard to enter http:// followed by the IP Address of the device. For example: If the IP Address is 192.168.100.100, enter http://192.168.100.100.
Internet Services WorkCentre® 5945/5955 Configuring the Device in Internet Services Internet Services uses the embedded web server on the device. This allows you to communicate with the device over the internet or intranet through your web browser. Use the Configure Device button to access the settings you need to configure the device on the network and to enable services. Note: This feature is for System Administrator use only. Refer to the System Administrator Guide for further information.
Internet Services WorkCentre® 5945/5955 Note: This option must be made available by your System Administrator. Your System Administrator may have loaded a specific print driver on your computer. However, if the choice of driver is yours, the following information may help you decide which driver to install. • PS (PostScript) gives you the most options to scale and manipulate images; it offers more precision with high-end graphics.
Internet Services WorkCentre® 5945/5955 Choosing Not to Show the Internet Services Welcome Page Again Internet Services uses the embedded web server on the device. This allows you to communicate with the device over the internet or intranet through your web browser. Use the Status tab on the Welcome page to access to features that are useful when the device is first installed. Once the device has been installed you may want to select the Don’t Show Welcome Page Again box.
Internet Services WorkCentre® 5945/5955 The Alerts area displays any current faults and the suggested skill level required to resolve the problem. • Severity identifies the importance or impact of the problem. • Status Code is used if the problem needs a Service Representative. Let them know this code when you talk to them. • Description describes the problem and how to fix it, or gives a warning. • Skill Level identifies the suggested skill level needed to fix this problem.
Internet Services WorkCentre® 5945/5955 5. Click Billing Information from the Status menu on the left of the page. The billing information will display. • If you leave the page open for a while click the Refresh button to display the latest data. More Information Using Internet Services to find System Administrator Contact Details System Administrator Guide www.xerox.com/support.
Internet Services WorkCentre® 5945/5955 Opening the Configuration Report in Internet Services Internet Services uses the embedded web server on the device. This allows you to communicate with the device over the internet or intranet through your web browser. Use the Configuration Report to view information about your device. Click the links at the top of the screen to go to specific topics, or scroll through the report to the required section.
Internet Services WorkCentre® 5945/5955 Viewing the Supplies Status in Internet Services Internet Services uses the embedded web server on the device. This allows you to communicate with the device over the internet or intranet through your web browser. Use the Supplies section to monitor the status of the components you can replace yourself, without support from a Xerox Support Representative.
Internet Services WorkCentre® 5945/5955 Use the Trays page to display the current paper supply in each tray and the status. A low status warning is given when the tray is nearly empty. The status of the output paper trays is also displayed. 1. At your computer, open your web browser. 2. In the URL field, use your keyboard to enter http:// followed by the IP Address of the device. For example: If the IP Address is 192.168.100.100, enter http://192.168.100.100.
Internet Services WorkCentre® 5945/5955 11. If your job remains held in the Active Jobs list, the device needs you to supply additional resources, such as paper or staples before it can complete the job. To find out what resources are needed, select the job and then select the Details button. Once the resources are available the job will print.
Internet Services WorkCentre® 5945/5955 More Information Using Internet Services to find System Administrator Contact Details System Administrator Guide www.xerox.com/support. Using the Meter Assistant in Internet Services Using the Supplies Assistant in Internet Services Using the Maintenance Assistant in Internet Services Printing the Information Pages from the Machine Status Menu Using the Meter Assistant in Internet Services Internet Services uses the embedded web server on the device.
Internet Services WorkCentre® 5945/5955 SMart eSolutions includes the Meter Assistant®, Supplies Assistant® and Maintenance Assistant features. Note: SMart eSolutions is not available in all countries. Please refer to your Xerox Representative for further information. Use the Supplies Assistant® to automatically order replaceable units for your device. Replaceable units are consumables that you can change without needing the help of a Service Representative.
Internet Services WorkCentre® 5945/5955 Refer to the System Administrator Guide for further information. 1. At your computer, open your web browser. 2. In the URL field, use your keyboard to enter http:// followed by the IP Address of the device. For example: If the IP Address is 192.168.100.100, enter http://192.168.100.100. Note: To find out the IP Address of your device, print a configuration report or ask your System Administrator. 3. Press the Enter button on your keyboard to load the page. 4.
Internet Services WorkCentre® 5945/5955 The job information is shown for each job. • Job Name the title of the print job. • Owner the person submitting the job. • Status the current status of the job. • Type identifies the job category, for example, whether the job is a Sample Set or Secure Print job. • Copy Count displays the number of copies requested for the job. Use the Delete option to remove a job from the list.
Internet Services WorkCentre® 5945/5955 The job information is shown for each job. • Job Name the title of the print job. • Owner the person submitting the job. • Status the current status of the job. • Type identifies the job category, for example, whether the job is a Sample Set or Secure Print job. • Copy Count displays the number of copies requested for the job. Use the Release option when you want to send a Sample Set job to print at the device.
Internet Services WorkCentre® 5945/5955 The job information is shown for each job. • Job Name the title of the print job. • Owner the person submitting the job. • Status the current status of the job. • Type identifies the job category, for example, whether the job is a Sample Set or Secure Print job. • Copy Count displays the number of copies requested for the job. Use the Modify option to change the settings in your print job.
Internet Services WorkCentre® 5945/5955 Note: This option must be made available by your System Administrator. Use the Saved Jobs option as a convenient way to store commonly used documents that you need to print, such as forms. Saved jobs can be stored using your print driver and Internet Services. You can print Saved Jobs from the device Control Panel and Internet Services. 1. At your computer, open your web browser. 2.
Internet Services WorkCentre® 5945/5955 If Authentication or Accounting has been enabled on your device you may have to enter login details to access this feature. Saved Jobs are documents that are sent to the device and stored there for future use. Saved jobs can be accessed and printed at the device and from Internet Services. Note: This option must be made available by your System Administrator. Use the Delete Job option to remove a job from the saved list.
Internet Services WorkCentre® 5945/5955 4. Click the Jobs tab. 5. Click the Saved Jobs tab. The Reprint Saved Jobs page is displayed and any jobs saved in the Default Public Folder are listed. 6. Select the required folder from the Folders list on the left side of the screen. 7. Check the checkbox to left of the job(s) required. To select all the jobs check the checkbox at the top of the heading row. 8. Select the Move Job option from the Print Job dropdown menu. 9. Click the Go button. 10.
Internet Services WorkCentre® 5945/5955 More Information Printing Saved Jobs from Internet Services Saving Jobs using the PostScript Print Driver Logging in to Internet Services Using Internet Services to find System Administrator Contact Details System Administrator Guide www.xerox.com/support. Printing the Information Pages from the Machine Status Menu Creating a New Folder for Saved Jobs in Internet Services Internet Services uses the embedded web server on the device.
Internet Services WorkCentre® 5945/5955 Using Internet Services to find System Administrator Contact Details Logging in to Internet Services System Administrator Guide www.xerox.com/support. Printing the Information Pages from the Machine Status Menu Deleting Saved Jobs Folders using Internet Services Internet Services uses the embedded web server on the device. This allows you to communicate with the device over the internet or intranet through your web browser.
Internet Services WorkCentre® 5945/5955 If Authentication or Accounting has been enabled on your device you may have to enter login details to access this feature. Saved Jobs are documents that are sent to the device and stored there for future use. Saved jobs can be accessed and printed at the device and from Internet Services. Note: This option must be made available by your System Administrator. Use the Rename Folder option to change the name of a folder.
Internet Services WorkCentre® 5945/5955 Note: To find out the IP Address of your device, print a configuration report or ask your System Administrator. 3. Press the Enter button on your keyboard to load the page. 4. Select the Login link at the top right hand side of the screen. 5. Select the User ID entry box and use your keyboard to enter your user name. 6. Select the Password entry box and use the touch screen keyboard to enter your password. 7. Click the Jobs tab. 8. Click the Saved Jobs tab.
Internet Services WorkCentre® 5945/5955 Refer to the System Administrator Guide for further information. 1. At your computer, open your web browser. 2. In the URL field, use your keyboard to enter http:// followed by the IP Address of the device. For example: If the IP Address is 192.168.100.100, enter http://192.168.100.100. Note: To find out the IP Address of your device, print a configuration report or ask your System Administrator. 3. Press the Enter button on your keyboard to load the page. 4.
Internet Services WorkCentre® 5945/5955 Installing Print and Scan Drivers from the Internet Services Print Menu Internet Services uses the embedded web server on the device. This allows you to communicate with the device over the internet or intranet through your web browser. Use the Install Print / Scan Drivers link to access and install the latest print and scan drivers for your device. If you are using a Windows computer, the link will open the drivers in an executable file.
Internet Services WorkCentre® 5945/5955 10. Click the Install button. 11. Click the Install button. 12. The program creates the print queue and installs your print driver. More Information Using Internet Services to find System Administrator Contact Details System Administrator Guide www.xerox.com/support.
Internet Services WorkCentre® 5945/5955 9. Collect your job from the device. 10. Press the Job Status button on the device control panel to view the job list and check the status of the job. 11. Print jobs are usually shown in the Active Jobs list, however if your System Administrator has enabled the Hold All Jobs feature, your job will be listed in either the Held Print Jobs or the Unidentified Print Jobs list. To release a held job select the job in the required list and then select the Release button.
Internet Services WorkCentre® 5945/5955 9. Collect your job from the device. 10. Press the Job Status button on the device control panel to view the job list and check the status of the job. 11. Print jobs are usually shown in the Active Jobs list, however if your System Administrator has enabled the Hold All Jobs feature, your job will be listed in either the Held Print Jobs or the Unidentified Print Jobs list. To release a held job select the job in the required list and then select the Release button.
Internet Services WorkCentre® 5945/5955 7. Select Secure Print from the Job Type dropdown menu. 8. Click in the Passcode entry box and use your keyboard to enter a 4 to 10 digit passcode. Note: To release your job you will enter this passcode using the numeric keypad on the device control panel. Only use numbers, and choose a passcode you will remember but that is not easy for other people to guess. 9. Click in the Confirm Passcode entry box and use your keyboard to re-enter your 4 to 10 digit passcode.
Internet Services WorkCentre® 5945/5955 4. Click the Print tab. 5. Click the Browse... button and navigate to your print-ready file. 6. Select the file you want to print. Either double-click the file to select it, or click on the file once and then click the Open button. The file name and path will be shown in the File Name box. 7. Select the Copies option required. • • Auto prints the number of copies programmed in the print-ready file.
Internet Services WorkCentre® 5945/5955 Saved Jobs are documents that are sent to the device and stored there for future use. Saved jobs can be accessed and printed at the device and from Internet Services. Use the Saved Jobs option as a convenient way to store commonly used documents that you need to print, such as forms. Saved jobs can be stored using your print driver and Internet Services. You can print Saved Jobs from the device Control Panel and Internet Services.
Internet Services WorkCentre® 5945/5955 Printing Saved Jobs from Internet Services Viewing the Progress and Details of a Job using the Job Status Menu Printing the Information Pages from the Machine Status Menu Sending a Job for Delayed Printing using Internet Services Internet Services uses the embedded web server on the device. This allows you to communicate with the device over the internet or intranet through your web browser.
Internet Services WorkCentre® 5945/5955 More Information Viewing Active Jobs using the Job Status Menu Using Internet Services to find System Administrator Contact Details Printing a Delay Print Job using the PostScript Driver Viewing the Progress and Details of a Job using the Job Status Menu Printing the Information Pages from the Machine Status Menu Changing the Paper Selection when Printing using Internet Services Internet Services uses the embedded web server on the device.
Internet Services • WorkCentre® 5945/5955 Tray lists the device trays. If you want to print from a specific tray select the tray number from the list. To let the device choose the most appropriate tray, for example if you haven’t loaded your specific media type yet, select Auto. 8. Click the Submit Job button. 9. Collect your job from the device. 10. Press the Job Status button on the device control panel to view the job list and check the status of the job. 11.
Internet Services WorkCentre® 5945/5955 3. Press the Enter button on your keyboard to load the page. 4. Click the Print tab. 5. Click the Browse... button and navigate to your print-ready file. 6. Select the file you want to print. Either double-click the file to select it, or click on the file once and then click the Open button. The file name and path will be shown in the File Name box. 7. Select the 2-Sided Printing option required. • • • • Auto uses the settings programmed in the print-ready file.
Internet Services WorkCentre® 5945/5955 Use the collation options to sort your copies into sets (1,2,3 1,2,3 1,2,3) or stacks (1,1,1 2,2,2 3,3,3). 1. At your computer, open your web browser. 2. In the URL field, use your keyboard to enter http:// followed by the IP Address of the device. For example: If the IP Address is 192.168.100.100, enter http://192.168.100.100. Note: To find out the IP Address of your device, print a configuration report or ask your System Administrator. 3.
Internet Services WorkCentre® 5945/5955 Note: To print an XPS document, your device needs to have the optional XPS feature installed. Use the Orientation feature to change the direction of the text printed on your page. This feature only works when you submit a text file (.TXT) for printing. Other file types will use the orientation that was selected when the print-ready file was created. 1. At your computer, open your web browser. 2.
Internet Services WorkCentre® 5945/5955 If Authentication or Accounting has been enabled on your device you may have to enter login details to access this feature. Use the Internet Services Job Submission page to send print-ready documents for printing. You can print PDF, PCL, PostScript, TXT, JPEG, TIFF and XPS file formats from the Job Submission page. Note: You can select general print features, such as 2-sided printing and stapling when you submit your job in Internet Services.
Internet Services WorkCentre® 5945/5955 Setting the Hole Punching when Printing Using Internet Services Internet Services uses the embedded web server on the device. This allows you to communicate with the device over the internet or intranet through your web browser. If Authentication or Accounting has been enabled on your device you may have to enter login details to access this feature. Use the Internet Services Job Submission page to send print-ready documents for printing.
Internet Services WorkCentre® 5945/5955 More Information Using Internet Services to find System Administrator Contact Details Viewing Active Jobs using the Job Status Menu Printing the Information Pages from the Machine Status Menu Folding Documents Printed Using Internet Services Internet Services uses the embedded web server on the device. This allows you to communicate with the device over the internet or intranet through your web browser.
Internet Services • • WorkCentre® 5945/5955 Bi Fold Multiple Sheets Print Outside folds the output in the middle of each page. If the pages are single sided the printed content will be on the inside of the fold. If the pages are double sided, page 1 will be on the inside. Bi Fold Multiple Sheets and Staple folds the output in the middle of each page and adds 2 staples to the fold. If the pages are single sided the printed content will be on the inside of the fold.
Internet Services WorkCentre® 5945/5955 5. Click the Browse... button and navigate to your print-ready file. 6. Select the file you want to print. Either double-click the file to select it, or click on the file once and then click the Open button. The file name and path will be shown in the File Name box. 7. Select the Output Destination option required. • • • • Automatically Select sends the job to an output tray based on the job type. Top Tray sends the job to the output tray at the top of the device.
Internet Services WorkCentre® 5945/5955 To create a template you will need to know some technical information about your network. If you are not technically-minded, you will find it easier to copy an existing template and then modify it rather than create a new one. If possible, ask your System Administrator to create a new template for you. Note: Your System Administrator must configure a scan destination (known as a file repository) before you can create a template or add a destination to a template.
Internet Services • WorkCentre® 5945/5955 Netware scans to a computer using the Netware protocol. Select this option if you are using Netware. This option is only available if Netware is enabled on your device. 12. Select the Name or IP Address option required and enter the appropriate details into the IP Address: Port box(es). 13. If required, click the IP Address entry box and use your keyboard to enter the address of your scan destination. 14.
Internet Services WorkCentre® 5945/5955 Templates Deleting a Template in Internet Services Internet Services uses the embedded web server on the device. This allows you to communicate with the device over the internet or intranet through your web browser. If Authentication or Accounting has been enabled on your device you may have to enter login details to access this feature. Use the Templates feature when you want to scan or fax jobs using the Workflow Scanning service on your device.
Internet Services WorkCentre® 5945/5955 All the templates available are displayed on the device in the Workflow Scanning template list. Use the Copy template option to copy an existing template. When you copy a template all the image settings and destinations are copied to create a new template, which saves you time if you want to use the same or similar settings. Note: This option must be made available by your System Administrator. 1. At your computer, open your web browser. 2.
Internet Services WorkCentre® 5945/5955 Note: This option must be made available by your System Administrator. 1. At your computer, open your web browser. 2. In the URL field, use your keyboard to enter http:// followed by the IP Address of the device. For example: If the IP Address is 192.168.100.100, enter http://192.168.100.100. Note: To find out the IP Address of your device, print a configuration report or ask your System Administrator. 3. Press the Enter button on your keyboard to load the page. 4.
Internet Services WorkCentre® 5945/5955 Modifying a Template using Internet Services Internet Services uses the embedded web server on the device. This allows you to communicate with the device over the internet or intranet through your web browser. If Authentication or Accounting has been enabled on your device you may have to enter login details to access this feature. Use the Templates feature when you want to scan or fax jobs using the Workflow Scanning service on your device.
Internet Services WorkCentre® 5945/5955 9. If required, update the Document Management Fields information. The Document Management Fields allow you to enter additional data when you scan a document at the device. The data is filed with your scanned documents in a job log. The job log can be accessed by third party software for various purposes. • • • • • Select the Add button. Select the Field Name entry box and use your keyboard to enter a field name.
Internet Services - WorkCentre® 5945/5955 Photo gives the best quality for photos but reduced quality text and line art. It is the best option for originals containing photos or continuous tones without any text or line art. Note: The Text option requires less transmission time. • • • Select the Scan Presets option required. - Sharing and Printing produces a medium sized file, small enough to share but high enough quality to print.
Internet Services WorkCentre® 5945/5955 300 dpi produces higher quality output. This setting is recommended for high quality text documents that are to pass through OCR (Optical Character Recognition) applications. It is also recommended for high quality line art or medium quality photos and graphics. This is the best default resolution choice in most cases. - 400 dpi produces average image quality for photos and graphics and is recommended for photos and graphics.
Internet Services • WorkCentre® 5945/5955 Click the Apply button. 13. Select the Filing Options required. This area allows you to specify the file format for your scanned images. • • • • • • • • • • • • • • Select the Edit button. Select the type of file required. PDF (Portable Document Format) produces a single file, or an individual file per page.The output is not searchable. Depending on the receiving device, the PDF selection may not be compatible when the resolution is set to 200 dpi.
Internet Services WorkCentre® 5945/5955 17. Select the Workflow Scanning Image Settings options required. This area allows you create compressed image files for faster web viewing and also to select searchable options. • • • • • • • Select the Edit button. Check the Optimized for Fast Web Viewing checkbox if you want to create PDF files for use on the internet. Viewers will be able to see the file more quickly than a PDF that is not optimized for fast viewing.
Internet Services WorkCentre® 5945/5955 The steps below will help you complete the basic version of this process, which is all most people require. If you have more specific requirements you’ll see that the destination settings can be customized in many different ways. Refer to the System Administrator Guide for further information. 1. At your computer, open your web browser. 2. In the URL field, use your keyboard to enter http:// followed by the IP Address of the device.
Internet Services WorkCentre® 5945/5955 Mailboxes Creating a Mailbox using Internet Services Internet Services uses the embedded web server on the device. This allows you to communicate with the device over the internet or intranet through your web browser. Templates and mailboxes cannot be created using the device user interface, they must be created or modified using the Scan page within Internet Services. Use Scan to Mailbox to scan hard copy originals and store them in a folder on the device.
Internet Services WorkCentre® 5945/5955 Downloading Documents from your Mailbox using Internet Services Internet Services uses the embedded web server on the device. This allows you to communicate with the device over the internet or intranet through your web browser. Use Scan to Mailbox to scan hard copy originals and store them in a folder on the device. You can retrieve your stored documents at the device using the Print From feature, or at your computer using Internet Services.
Internet Services WorkCentre® 5945/5955 Use Scan to Mailbox to scan hard copy originals and store them in a folder on the device. You can retrieve your stored documents at the device using the Print From feature, or at your computer using Internet Services. Scan to Mailbox provides you with a scanning method that is very easy to set up and use. You can store your documents in the Default Public Folder or create a private folder.
Internet Services WorkCentre® 5945/5955 You can store your documents in the Default Public Folder or create a private folder. If you create a private folder, you must enter a name and password to access the folder. All users can create private folders. Your System Administrator can choose to set up the Scan to Mailbox option so that you have to enter a password to access a folder.
Internet Services WorkCentre® 5945/5955 You can store your documents in the Default Public Folder or create a private folder. If you create a private folder, you must enter a name and password to access the folder. All users can create private folders. Your System Administrator can choose to set up the Scan to Mailbox option so that you have to enter a password to access a folder.
Internet Services • WorkCentre® 5945/5955 Select the Original Type option required. - Photo and Text produces high quality pictures but slightly reduces the sharpness of text and line art. This setting is recommended for originals containing high quality photographs or line art and text. - Photo gives the best quality for photos but reduced quality text and line art. It is the best option for originals containing photos or continuous tones without any text or line art.
Internet Services • • • WorkCentre® 5945/5955 Select the Resolution option required. - 72 dpi produces the smallest file size and is recommended for output displayed on a computer. - 100 dpi delivers low image quality and is recommended for low quality text documents. This setting should ideally be used for output displayed on a computer rather than printed.
Internet Services • • • • • WorkCentre® 5945/5955 Select the Edge Erase option required. - Border Erase erases an equal amount from all the edges. Use the arrow buttons to adjust the amount to be erased from 0 mm (0”) to 50 mm (2.0”) or select the entry field and use your keyboard to enter the amount required. - Edge Erase enables a different amount to be erased from each of the edges, on both the first and second sides. Use the arrow buttons to adjust the amount to be erased from 0mm (0”) to 50mm (2.
Internet Services • WorkCentre® 5945/5955 Select the Save button. 15. Select the Report options required. • • • • Select the Edit button. Check the Confirmation Sheet checkbox to have the device print a confirmation sheet when a job has been completed successfully. Leave the box empty to disable the confirmation sheet option. Check the Save Job Log (.XST) in Repository checkbox to create a report with information about your scan job. The report is filed in the same place as your scanned image.
Internet Services WorkCentre® 5945/5955 You can store your documents in the Default Public Folder or create a private folder. If you create a private folder, you must enter a name and password to access the folder. All users can create private folders. Your System Administrator can choose to set up the Scan to Mailbox option so that you have to enter a password to access a folder.
Internet Services WorkCentre® 5945/5955 You can store your documents in the Default Public Folder or create a private folder. If you create a private folder, you must enter a name and password to access the folder. All users can create private folders. Your System Administrator can choose to set up the Scan to Mailbox option so that you have to enter a password to access a folder.
Internet Services WorkCentre® 5945/5955 Address Book Creating an E-mail Address using Internet Services Internet Services uses the embedded web server on the device. This allows you to communicate with the device over the internet or intranet through your web browser. Use the E-mail feature to scan images and send them to a recipient as an attachment to an e-mail. Use the Address Book tab to create and manage the Device Address Book.
Internet Services WorkCentre® 5945/5955 Creating a Fax Address using Internet Services Internet Services uses the embedded web server on the device. This allows you to communicate with the device over the internet or intranet through your web browser. Use the Fax (Embedded Fax) service to scan your documents and send them to most types of fax machines that are connected to the telephone network. Use the Address Book tab to create and manage the Device Address Book.
Internet Services WorkCentre® 5945/5955 Creating a Scan To Address using Internet Services Internet Services uses the embedded web server on the device. This allows you to communicate with the device over the internet or intranet through your web browser. Use the Scan To... Feature to scan a document and store it in a folder on your computer or network. To use Scan To you need to create an entry in the Device Address Book which contains the path to the location that you want to scan to.
Internet Services • WorkCentre® 5945/5955 SMB scans to a computer using Server Message Block protocol. Select this option to scan to a Windows computer. 12. Select the required Address Type and enter the host name or address of your scan destination. 13. If you selected SMB for the Protocol, click the Share entry box and use your keyboard to enter the name of the shared folder. 14. Click the Document Path entry box and use your keyboard to enter your scan destination. 15.
Internet Services WorkCentre® 5945/5955 4. Click the Address Book tab. 5. Click the Add button. 6. If required, select the First Name and Last Name entry boxes and use your keyboard to enter a name to identify your address. 7. If required, click in the Company entry box and use your keyboard to enter a name to identify your address. 8. Select the Display Name entry box and use your keyboard to enter a name to identify your address.
Internet Services WorkCentre® 5945/5955 Support General Assistance Links Linking to the Latest Xerox Software Solutions from Internet Services Internet Services uses the embedded web server on the device. This allows you to communicate with the device over the internet or intranet through your web browser. If Authentication or Accounting has been enabled on your device you may have to enter login details to access this feature. Use the Xerox.
Internet Services WorkCentre® 5945/5955 Note: This option must be made available by your System Administrator. Your System Administrator may have loaded a specific print driver on your computer. However, if the choice of driver is yours, the following information may help you decide which driver to install. • PS (PostScript) gives you the most options to scale and manipulate images; it offers more precision with high-end graphics.
Internet Services WorkCentre® 5945/5955 Use the Browser Software links to access and download browser software that supports Internet Services. You should be able to view Internet Services with most web browsers, but if you find that certain pages do not display correctly, you can download and use one of the browsers recommended on the Support page. 1. At your computer, open your web browser. 2. In the URL field, use your keyboard to enter http:// followed by the IP Address of the device.
Internet Services WorkCentre® 5945/5955 Xerox Support Using Internet Services to find Contact Details for Xerox Support Internet Services uses the embedded web server on the device. This allows you to communicate with the device over the internet or intranet through your web browser. If Authentication or Accounting has been enabled on your device you may have to enter login details to access this feature.
Internet Services WorkCentre® 5945/5955 3. Press the Enter button on your keyboard to load the page. 4. Click the Support tab. 5. If required, click the General tab. This is usually the active tab when the Support page opens. 6. Click the Send Diagnostic Information to Xerox button. The process may take several minutes. When the information has been sent a Communication Successful page will be displayed. Your Xerox support team will advise you of the next steps.
Internet Services WorkCentre® 5945/5955 Your System Administrator can use the Edit Settings button to enter contact details for device support in your organisation, and the contact details for the Xerox Support service. Note: This feature is for System Administrator use only. Refer to the System Administrator Guide for further information. More Information Using Internet Services to find System Administrator Contact Details System Administrator Guide www.xerox.com/support.
Internet Services WorkCentre® 5945/5955 Using the Remote Control Panel from Internet Services Internet Services uses the embedded web server on the device. This allows you to communicate with the device over the internet or intranet through your web browser. If Authentication or Accounting has been enabled on your device you may have to enter login details to access this feature. Use the Remote Control Panel to open and view the device touch screen from your computer.
Internet Services WorkCentre® 5945/5955 Top right menu Logging in to Internet Services Internet Services uses the embedded web server on the device. This allows you to communicate with the device over the internet or intranet through your web browser. Your System Administrator can use Authentication (Login Method) to control access to particular areas or features of the device. When Authentication is enabled, the area or feature is locked until you login.
Internet Services WorkCentre® 5945/5955 Refer to the System Administrator Guide for further information. 1. Select the Logout link at the top right hand side of the Internet Services screen. 2. At the confirmation screen, select the Logout button. More Information Logging in to Internet Services Using Internet Services to find System Administrator Contact Details System Administrator Guide www.xerox.com/support.
Internet Services WorkCentre® 5945/5955 Use the Internet Services Site Map link to see a structure of the pages and features available in Internet Services. The Site Map helps you find information more easily. Use the Home link to return to the Internet Services Status tab. The Internet Services feature is designed primarily for System Administrators.
Internet Services WorkCentre® 5945/5955 Using the Internet Services Help Feature Internet Services uses the embedded web server on the device. This allows you to communicate with the device over the internet or intranet through your web browser. If Authentication or Accounting has been enabled on your device you may have to enter login details to access this feature. Use the Internet Services Help link to see instructions and information on how to use the features in Internet Services.
Internet Services 644 WorkCentre® 5945/5955 User Guide
Paper and Media 10 Loading Tray 1 and Changing the Tray Settings This tray is fully adjustable and can be used for media sizes A5 LEF (5.5 x 8.5" LEF) to A3 (11 x 17"). Note: SEF is Short Edge Feed (where the short edge of the paper is the leading edge when the paper is fed into the device). LEF is Long Edge Feed (where the paper is oriented so that the long edge is fed into the device first). Detailed media specifications for your device are provided at www.xerox.com.
Paper and Media WorkCentre® 5945/5955 Only use the types of media specified for use in the tray. • Plain • Bond • Recycled • Punched • Letterhead and Pre-printed • Cardstock • Up to 200 gsm (53 lb). Only feed the media specified for this particular tray. The Bypass Tray can feed all the media types listed for the device and the optional Envelope Tray can be used in place of Tray 2 for envelopes. ! Caution A problem will occur if a tray is opened while it is being used to feed media.
Paper and Media WorkCentre® 5945/5955 Changing the paper tray settings 1. Select the Size option required. If the size required is not shown on the list select the Custom button. • • • Use the arrow buttons to increase or decrease the width setting. Or select the Width (y) entry box and use the numeric keypad to enter the size required. Use the arrow buttons to increase or decrease the length setting. Or select the Length (x) entry box and use the numeric keypad to enter the size required.
Paper and Media WorkCentre® 5945/5955 The tray is located on the front of the device and feeds the majority of media sizes. Media can be loaded Long Edge Feed (LEF) or Short Edge Feed (SEF). Your device uses a system of programable settings to manage the trays and media. These settings are established by your System Administrator who can set the tray to Fully Adjustable or Dedicated. • Fully Adjustable if this option is set, the paper settings screen is displayed each time the tray is opened and closed.
Paper and Media WorkCentre® 5945/5955 Paper must not be loaded above the maximum fill line. • • • • Load LEF pre-printed paper face-down and with the top towards the front of the device. Load SEF pre-printed paper face-down and with the top towards the left of the device. Load LEF hole punched paper with the holes towards the left of the device if the holes are along the longest edge of the paper.
Paper and Media WorkCentre® 5945/5955 Loading the Optional Envelope Tray The optional envelope tray can be fitted instead of the paper tray 2 and used to print envelopes. Note: . Do not feed window, board-backed, gusset type, padded or peel and seal envelopes, or envelopes with triangular flaps. Detailed media specifications for your device are provided at www.xerox.com. The trays automatically detect when the media they are loaded with is in low supply, or when they are empty.
Paper and Media WorkCentre® 5945/5955 Loading Tray 3 This is a high capacity paper tray used for media size A4 LEF (8.5 x 11" LEF). Detailed media specifications for your device are provided at www.xerox.com. The trays automatically detect when the media they are loaded with is in low supply, or when they are empty. A warning message is displayed on the touch screen when a tray needs loading. Always use the information labels in the tray for guidance on loading orientations and maximum fill information.
Paper and Media WorkCentre® 5945/5955 3. Close the paper tray. More Information Storing Paper and Other Media Loading Different Types of Media Using Internet Services to find System Administrator Contact Details Loading Tray 4 This is a high capacity paper tray used for media size A4 LEF (8.5 x 11" LEF). Detailed media specifications for your device are provided at www.xerox.com. The trays automatically detect when the media they are loaded with is in low supply, or when they are empty.
Paper and Media ! WorkCentre® 5945/5955 Caution A problem will occur if a tray is opened while it is being used to feed media. 1. Open the tray. 2. Place the media in the tray. Media must be positioned against the right side of the tray. Paper must not be loaded above the maximum fill line. • • Load LEF pre-printed paper face-down and with the top towards the front of the device. Load hole punched paper with the holes on the left edge. 3. Close the paper tray.
Paper and Media WorkCentre® 5945/5955 Only use the types of media specified for use in the tray. • Plain • Bond • Recycled • Carbonless • Punched • Letterhead and Pre-printed • Cardstock • Up to 200 gsm (53 lb). • Labels • Transparencies (paper backed and non paper backed) • Envelopes Note: Labels can only be printed 1-sided. 1. Make sure the tray is in the down position. For larger media, use the tray extension. 2. Place the media in the tray.
Paper and Media WorkCentre® 5945/5955 Changing the paper tray settings 1. Select the Size option required. If the size required is not shown on the list select the Custom button. • • • Use the arrow buttons to increase or decrease the width setting. Or select the Width (y) entry box and use the numeric keypad to enter the size required. Use the arrow buttons to increase or decrease the length setting. Or select the Length (x) entry box and use the numeric keypad to enter the size required.
Paper and Media WorkCentre® 5945/5955 Labels should be left in the printing environment for 72 hours before being used in the printer to allow them to adjust to the ambient temperature. Leave labels sealed in their plastic wrapping until they are ready to be loaded into the printer. Note: Do not fan the label sheets before use unless the package instructs you to do so. If jamming or multi-sheet feeding occurs shuffle the labels before loading. Labels can only be printed 1-sided.
Machine and Job Status 11 Job Status Active Jobs Viewing Active Jobs using the Job Status Menu The Job Status button gives you access to job information. You can use this to check the progress of active jobs or display detailed information about jobs you have completed. You can also release held jobs or secure print jobs you have sent to the device. Use the Active Jobs screen to see all the jobs currently in the list waiting to be processed.
Machine and Job Status WorkCentre® 5945/5955 • Held the job has been temporarily stopped from printing because the required resources are not available. The job remains in the job list and continues to proceed up the list as prior jobs are printed. If a held job is at the top of the list all subsequent jobs continue to be processed and printed, a held job does not hold up other jobs in the list. The reason for the held status is displayed on the Job Progress screen.
Machine and Job Status WorkCentre® 5945/5955 6. Select the option required. Delete removes the selected job from the list. Any job can be deleted using this option, regardless of the job originator. • Promote moves a job to the top of the list. It will be completed after the current job. The Promote option is only available if a job is processing. • Release submits a job that is held in the queue. • Hold pauses the job until it is released or deleted. • Job Progress shows the current status of the job.
Machine and Job Status WorkCentre® 5945/5955 Releasing a Secure Print Job using the Job Status Menu The Job Status button gives you access to job information. You can use this to check the progress of active jobs or display detailed information about jobs you have completed. You can also release held jobs or secure print jobs you have sent to the device. Use the Secure Print Jobs tab to see a list of print jobs that have been sent to the device with a passcode.
Machine and Job Status WorkCentre® 5945/5955 More Information Sending a Job for Secure Printing using Internet Services Releasing Jobs Held in a Public Queue using the Job Status Menu System Administrator Guide www.xerox.com/support. Using Internet Services to find System Administrator Contact Details Releasing Jobs Held in a Public Queue using the Job Status Menu The Job Status button gives you access to job information.
Machine and Job Status WorkCentre® 5945/5955 Refer to the System Administrator Guide for further information. 1. Press the Log In / Out button on the Control Panel. 2. Select the User ID entry box on the touch screen and use the keyboard to enter your user name. 3. Select the Next button. 4. Select the Password entry box and use the touch screen keyboard to enter your password. 5. Select the Done button. 6. Press the Job Status button on the Control Panel. 7.
Machine and Job Status WorkCentre® 5945/5955 More Information Releasing Jobs Held in a Public Queue using the Job Status Menu Releasing Jobs Held in a Private Queue using the Job Status Menu System Administrator Guide www.xerox.com/support. Using Internet Services to find System Administrator Contact Details Accessing Your Personal Secure Jobs List using the Job Status Menu The Job Status button gives you access to job information.
Machine and Job Status WorkCentre® 5945/5955 Viewing Completed Jobs using the Job Status Menu The Job Status button gives you access to job information. You can use this to check the progress of active jobs or display detailed information about jobs you have completed. You can also release held jobs or secure print jobs you have sent to the device. Use the Completed Jobs option to view the jobs which have been completed on the device. Up to 150 jobs can be displayed.
Machine and Job Status WorkCentre® 5945/5955 • Host Name states the name assigned to your device when it was set up by your System Administrator. • Fax Line gives the fax number for your device, if configured. 1. Press the Machine Status button on the Control Panel. 2. View the information required, or select the option required for further information. • • • • Paper Tray Status displays the type of paper loaded in each tray, and its status.
Machine and Job Status WorkCentre® 5945/5955 5. Select the Close button. 6. Press the Job Status button on the device control panel to view the job list and check the status of the job. 7. If your job remains held in the Active Jobs list, the device needs you to supply additional resources, such as paper or staples before it can complete the job. To find out what resources are needed, select the job and then select the Details button. Once the resources are available the job will print.
Machine and Job Status WorkCentre® 5945/5955 4. Select the Close button. More Information System Administrator Guide www.xerox.com/support. Using Internet Services to find System Administrator Contact Details Viewing the status of SMart eSolutions in Internet Services Faults and Alerts Viewing Faults using the Machine Status Menu The Machine Status button gives you access to useful information about the machine, including the serial number and model.
Machine and Job Status WorkCentre® 5945/5955 Checking the Status of Supplies using the Machine Status Menu The Machine Status button gives you access to useful information about the machine, including the serial number and model. You can also view the status of the paper trays, billing and supplies information, and print useful information pages. Use the Supplies section to monitor the status of the components you can replace yourself, without support from a Xerox Support Representative.
Machine and Job Status WorkCentre® 5945/5955 Note: If you need to provide regular billing information for your device you may find the SMart eSolutions feature helpful. SMart eSolutions automatically sends meter readings to Xerox so you don’t have to collect them manually. Refer to the System Administrator Guide for further information. 1. Press the Machine Status button on the Control Panel. 2. Select the Billing Information tab on the touch screen. More Information System Administrator Guide www.xerox.
Machine and Job Status 670 WorkCentre® 5945/5955 User Guide
Administration and Accounting 12 Using a User ID to Log In at the Device Authentication is used to manage access to the device or specific features. Accounting is used to record numbers of prints or scans produced at the device. If authentication or accounting is enabled you will need to log into the device. Note: This option must be made available by your System Administrator. Use the Login feature if your System Administrator has enabled Authentication (Login Method) or Accounting on your device.
Administration and Accounting WorkCentre® 5945/5955 Logging out at the Device Authentication is used to manage access to the device or specific features. Accounting is used to record numbers of prints or scans produced at the device. If authentication or accounting is enabled you will need to log into the device. Note: This option must be made available by your System Administrator.
Administration and Accounting WorkCentre® 5945/5955 Device Settings General Changing the Billing Impression Mode using the Tools Menu You can use the Tools menu to adjust the brightness of the Control Panel display, change the billing impression mode or enable an optional feature on your device. Use the Billing Impression Mode option to change the billing plan for your device. There are 2 billing impression modes which define how the device tracks images made on large-sized paper such as A3 or tabloid.
Administration and Accounting WorkCentre® 5945/5955 10. Select the Close button. More Information Viewing Billing Information using the Machine Status Menu System Administrator Guide www.xerox.com/support.
Administration and Accounting WorkCentre® 5945/5955 4. Select the Display Brightness button. 5. Move the Brighten / Darken indicator towards Brighten to increase the illumination or move the indicator towards Darken to reduce the brightness. 6. Select the Save button. More Information System Administrator Guide www.xerox.com/support.
Administration and Accounting WorkCentre® 5945/5955 Perform a Software Reset You can use the Tools menu to adjust the brightness of the Control Panel display, change the billing impression mode, perform a software reset or enable optional features on your device. Note: This option must be made available by your System Administrator. Use Software Reset if you need to reboot the device.
Feature Installation 13 Using the Software Activation Portal (SWAP) to obtain a Feature Installation Key Use the Software Activation Portal (SWAP) to obtain a Feature Installation Key. Feature Installation Keys are used to install optional services on the device. When you purchase an optional service you will receive a kit which contains an activation key. Enter the activation key and your machine serial number on the SWAP website to receive a Feature Installation Key.
Feature Installation 678 WorkCentre® 5945/5955 User Guide
General Care and Troubleshooting 14 General Care Customer Replaceable Units Identifying the Replaceable Units There are several consumables on the device that need replenishing or replacing, such as paper, staples, and customer replaceable units. 1. Toner Cartridge 2. Print Cartridge The device will display a message on the touch screen when any of the units need to be re-ordered. This message is a warning that the unit is nearing the end of its life.
General Care and Troubleshooting WorkCentre® 5945/5955 attempt any maintenance procedure that is NOT specifically described in the documentation supplied for your device. More Information Replacing the Toner Cartridge Replacing the Print Cartridge Replacing the Toner Cartridge The device displays the status code 09-588-00. The message on the device touch screen reads: Replace Toner Cartridge (R1). The Toner Cartridge is a replaceable unit on the device.
General Care and Troubleshooting WorkCentre® 5945/5955 The print cartridge is a replaceable unit on the device. You will be notified by the device when the module needs replacing. ! WARNING When replacing consumables do NOT remove the covers or guards that are fastened with screws. You cannot maintain or service any of the parts that are behind these covers and guards. Do NOT attempt any maintenance procedure that is NOT specifically described in the documentation supplied for your device. 1.
General Care and Troubleshooting WorkCentre® 5945/5955 Staple Cartridges and Hole Punch Waste Staple Cartridges Replacing the Staple Cartridge in the Office Finisher The device displays the status code 12-714-01. The message on the device touch screen reads: Replace Staple Cartridge (R7). This finisher and some of its’ components are optional and may not be fitted to your device. 1. Open the finisher front door. 2. Locate the staple cartridge unit. 3.
General Care and Troubleshooting WorkCentre® 5945/5955 7. Close the finisher door. Booklet Maker Cartridges Note: If you experience difficulty performing this task, it may be necessary to request a service engineer to perform it for you. 1. Open the finisher front door. 2. Locate the staple cartridges. These are in the upper left part of the cavity at the bottom of the unit. 3. Remove each staple cartridge individually by pulling the orange handle upwards. 4.
General Care and Troubleshooting WorkCentre® 5945/5955 6. Close the finisher door. Note: For more detailed instructions see the device touch screen. Cleaning the Document Glass and Both Constant Velocity Transport Glass Strips To ensure optimum print quality at all times, regularly clean the glass areas of your device. This helps avoid output with streaks, smears and other marks that may transfer from the glass area when scanning documents.
General Care and Troubleshooting ! WorkCentre® 5945/5955 WARNING When replacing consumables do NOT remove the covers or guards that are fastened with screws. You cannot maintain or service any of the parts that are behind these covers and guards. Do NOT attempt any maintenance procedure that is NOT specifically described in the documentation supplied with your device. 1. Open the front door on the device. 2. Rotate the orange print cartridge locking lever anti-clockwise until it clicks.
General Care and Troubleshooting WorkCentre® 5945/5955 Note: For more information on paper storage see the Xerox website www.xerox.com/printersupplies/paper-stock/paper-storage/enlu.html. It is important for optimum printing that paper is stored and loaded correctly. Take note of the following when loading media. • Do not use folded or wrinkled papers. • Do not load paper of varied sizes into the tray. • If feed problems occur, fan the media or shuffle labels before loading.
General Care and Troubleshooting WorkCentre® 5945/5955 Understanding Faults There are different categories of faults that can occur on your device and different ways in which they are identified depending on the type of fault occurring. This section gives an overview of the different types of faults and the way that faults are displayed and recorded. Your device has three fault types.
General Care and Troubleshooting WorkCentre® 5945/5955 Alerts Alerts are informal messages that do not stop the device from functioning properly. There are two categories of Alert: • Warning Messages are informational and usually have to do with replacing consumables. The messages warn the local user of impending problems, or actions, that need to be taken to avoid a fault occurring.
General Care and Troubleshooting WorkCentre® 5945/5955 Fault Logs Fault information can be accessed using the Machine Status button. Machine Status provides information about the device, the status of the paper trays, consumables and any current faults. Usage counters are also available. The Active Messages tab displays fault listings and the device error logs. The faults are separated into Faults, Alerts and Fault History. • Faults this option displays a list of any current faults on the device.
General Care and Troubleshooting WorkCentre® 5945/5955 Paper Jams Document Feeder Clearing a Misfeed in the Top of the Document Feeder The device displays status code 05-330-00, 05-335-00 or 05-361-00. The message on the device touch screen reads: Misfeed in Document Feeder. Open the Document Feeder Top Cover. Follow the instructions provided on the Control Panel. If you are unable to resolve the problem, contact the Xerox Support Center.
General Care and Troubleshooting WorkCentre® 5945/5955 Clearing a Misfeed in the Bottom of the Document Feeder The device displays status code 05-340-00 or 05-363-00. The message on the device touch screen reads: Misfeed in Document Feeder. Lift the Document Feeder. Follow the instructions provided on the Control Panel. If you are unable to resolve the problem, contact the Xerox Support Center.
General Care and Troubleshooting WorkCentre® 5945/5955 Clearing Misfeeds in the Top and Bottom of the Document Feeder Clearing a Misfeed in the Middle of the Document Feeder The device displays the status code 05-343-00. The message on the device touch screen reads: Misfeed in Document Feeder. Open the Document Feeder Top Cover. Follow the instructions provided on the Control Panel. If you are unable to resolve the problem, contact the Xerox Support Center.
General Care and Troubleshooting WorkCentre® 5945/5955 Clearing Misfeeds in the Top and Bottom of the Document Feeder The device displays the status code 05-362-00 The message on the device touch screen reads: Misfeed in Document Feeder. Open the Document Feeder Top Cover. Follow the instructions provided on the Control Panel. If you are unable to resolve the problem, contact the Xerox Support Center.
General Care and Troubleshooting WorkCentre® 5945/5955 More Information Identifying the Parts of Your Device Documents will not feed through the document feeder Clearing a Misfeed in the Top of the Document Feeder Clearing a Misfeed in the Bottom of the Document Feeder Clearing a Misfeed in the Middle of the Document Feeder Clearing Jams in the Office Finisher Clearing Jams in the Top of the Office Finisher The device displays the status code 12-610-00 or 12-612-00.
General Care and Troubleshooting WorkCentre® 5945/5955 More Information Identifying the Parts of Your Device Repeated paper jams, misfeeds or multi sheet feeds Clearing Jams in the Output Tray of the Office Finisher Clearing Jams in the Output Tray of the Office Finisher Clearing Jams in the Output Tray of the Office Finisher The device displays the status code 12-618-00. The message on the device touch screen reads: Paper Jam in Finisher. Open the Finisher Top Cover.
General Care and Troubleshooting WorkCentre® 5945/5955 Clearing Jams in the Output Tray of the Office Finisher The device displays the status code 12-620-00. The message on the device touch screen reads: Paper Jam in Finisher. Remove any sheets from the main output tray. This finisher and some of its’ components are optional and may not be fitted to your device. If you are unable to resolve the problem, contact the Xerox Support Center. 1. Pull any jammed pages free from the output tray.
General Care and Troubleshooting WorkCentre® 5945/5955 New Office Finisher Booklet Maker Clearing Jams in the New Office Finisher Booklet Maker The device displays the status code 12-610-03 or 12-612-03. The message on the device touch screen reads: Paper Jam in Finisher. Open the Finisher Front Door. This finisher and some of its’ components are optional and may not be fitted to your device. If you are unable to resolve the problem, contact the Xerox Support Center. 1. Open the finisher front door. 2.
General Care and Troubleshooting WorkCentre® 5945/5955 Clearing Jams in the Top of the New Office Finisher Booklet Maker The device displays the status code 12-618-03. The message on the device touch screen reads: Paper Jam in Finisher. Open the Finisher Top Cover. This finisher and some of its’ components are optional and may not be fitted to your device. If you are unable to resolve the problem, contact the Xerox Support Center. 1. Open the cover on top of the finisher. 2. Remove any jammed pages. 3.
General Care and Troubleshooting WorkCentre® 5945/5955 Clearing Jams in the Output Tray of the New Office Finisher Booklet Maker The device displays the status code 12-620-03. The message on the device touch screen reads: Paper Jam in Finisher. Remove any sheets from the main output tray. This finisher and some of its’ components are optional and may not be fitted to your device. If you are unable to resolve the problem, contact the Xerox Support Center. 1.
General Care and Troubleshooting WorkCentre® 5945/5955 Clearing Jams in the Booklet Maker Entry Area of the New Office Finisher Booklet Maker The device displays the status code 12-630-03 or 12-717-03. The message on the device touch screen reads: Paper Jam in Finisher. Open the Finisher Front Door. This finisher and some of its’ components are optional and may not be fitted to your device. If you are unable to resolve the problem, contact the Xerox Support Center. 1. Open the finisher front door. 2.
General Care and Troubleshooting WorkCentre® 5945/5955 Clearing Jams in the Booklet Maker Area of the New Office Finisher Booklet Maker The device displays the status code 12-636-03. The message on the device touch screen reads: Paper Jam in Finisher. Open the Finisher Front Door. This finisher and some of its’ components are optional and may not be fitted to your device. If you are unable to resolve the problem, contact the Xerox Support Center. 1. Open the finisher door. 2.
General Care and Troubleshooting WorkCentre® 5945/5955 Clearing Jams in the Horizontal Transport to the Finisher The device displays the status code 10-200-00 The message on the device touch screen reads: Jam in Horizontal Transport. Raise Horizontal Transport Cover. The horizontal transport is optional and may not be fitted to your device. If you are unable to resolve the problem, contact the Xerox Support Center. 1. Open the horizontal transport top. This is located underneath the touch screen. 2.
General Care and Troubleshooting WorkCentre® 5945/5955 Clearing Jams in the Center Output Tray The device displays the status code 81-200-01. The message on the device touch screen reads Paper Jam Inside Left Side Door. Jams in the center output tray may result in a message saying there’s a jam in the left door. Check the left door and clear any jams before checking the center tray for jams. This output tray is only present on your device if you do not have a finisher fitted.
General Care and Troubleshooting WorkCentre® 5945/5955 8. Pull any jammed pages free from the output tray. Pull the pages from the device in the direction they were travelling, not at an angle (or the page may tear). 9. Check the output guide is still fitted correctly and has not been pulled into the tray when a previous jam was cleared.
General Care and Troubleshooting WorkCentre® 5945/5955 3. Lift the door on the left side of the device and gently push it towards the device until you hear it click into place. More Information Identifying the Parts of Your Device Clearing Jams in the Paper Path for 2-Sided Jobs Repeated paper jams, misfeeds or multi sheet feeds Clearing Jams in the Paper Path for 2-Sided Jobs The device displays the status code 81-200-00. The message on the device touch screen reads: Paper Jam Inside Left Side Door. 1.
General Care and Troubleshooting WorkCentre® 5945/5955 More Information Identifying the Parts of Your Device Clearing Jams in the Paper Path for 1-Sided Jobs Repeated paper jams, misfeeds or multi sheet feeds Trays Tray 1 Clearing Jams in Tray 1 (4 Tray Device) The device displays the status code 81-201-00. The message on the device touch screen reads: Clear the misfeed in Tray 1. 1. Open tray 1. 2. Remove any misfed pages. 3.
General Care and Troubleshooting WorkCentre® 5945/5955 Tray 2 Clearing Jams in Tray 2 (4 Tray Device) The device displays the status code 81-202-00. The message on the device touch screen reads: Clear the misfeed in Tray 2. 1. Open tray 2. 2. Remove any misfed pages. 3. Check the tray guides are set correctly for the size of media loaded in the tray. 4. If the paper keeps jamming open a new pack and load fresh paper, or if the paper is still relatively new refresh the existing stack.
General Care and Troubleshooting WorkCentre® 5945/5955 Tray 3 Clearing Jams in Tray 3 (4 Tray Device) The device displays the status code 81-203-00. The message on the device touch screen reads: Paper Jam Inside Left Side Door. 1. Lift the handle to open the door on the left side of the device. Gently lower the door until it comes to rest. 2. Remove any jammed pages that are sticking out from the device. Pages may be jammed at the top, middle and bottom of the device.
General Care and Troubleshooting WorkCentre® 5945/5955 4. Close tray 3. More Information Identifying the Parts of Your Device Clearing Jams in Tray 1 (4 Tray Device) Clearing Jams in Tray 2 (4 Tray Device) Repeated paper jams, misfeeds or multi sheet feeds Clearing Jams in Tray 4 The device displays the status code 81-204-00. If the message on the device touch screen reads: Clear the misfeed in Tray 4.
General Care and Troubleshooting WorkCentre® 5945/5955 Clear Tray 4 1. Open tray 4. 2. If required, lift the handle to open the transport cover. 3. Remove any misfed pages. 4. If the paper keeps jamming open a new pack and load fresh paper, or if the paper is still relatively new refresh the existing stack. • • • Fan the media to ensure no pages are stuck together. Remove the top few sheets from the stack. Flip the paper over in the paper tray. 5. If required, close the transport cover. 6. Close tray 4.
General Care and Troubleshooting WorkCentre® 5945/5955 Clearing Jams in the Bypass Tray The device displays the status code: 75-150-00. The message on the device touch screen reads: Tray 5 is unavailable. Empty and reload. 1. Remove any misfed pages. 2. Fan the media to ensure no pages are stuck together. 3. Check the tray guides are set correctly for the size of media loaded in the tray.
General Care and Troubleshooting WorkCentre® 5945/5955 Troubleshooting Tips The device will not power on • Check to see that the device is not in Energy Saver mode as indicated by the green light on the control panel. • To re-activate the device when in Low Power or Sleep mode, press the Power button. The device takes longer to recover from Sleep mode. If the issue is not with the device, check the power outlet. • Plug another electrical appliance into the outlet and see if it operates properly.
General Care and Troubleshooting WorkCentre® 5945/5955 Repeated paper jams, misfeeds or multi sheet feeds If you clear a jam only to see the device jam again, there are some steps you can try before contacting the Xerox Support Centre. 1. Check the paper path for obstructions. If paper repeatedly jams at the same place, check the path immediately after that position in case part of a jammed sheet is still blocking the path. 2.
General Care and Troubleshooting WorkCentre® 5945/5955 Paper curls • Load the paper in the paper trays with the seam side of the paper up. Load the paper in the Bypass Tray with the seam side down. • Load non-standard media in the Bypass Tray. • If the paper curls excessively, flip the paper over in the applicable paper tray. • Check media has been stored correctly.
General Care and Troubleshooting WorkCentre® 5945/5955 • Check the correct paper size has been selected for the paper loaded in the tray. • Check that the printer is not positioned near a source of draft. • Check the correct paper type, such as the weight, has been selected for the paper loaded in the tray.
General Care and Troubleshooting WorkCentre® 5945/5955 Pages are out of sequence or upside down when the Booklet Creation feature is used • Ensure that the originals are in the correct sequence. • Feed LEF originals to SEF orientated paper. • Enable the display options for Booklet Creation and ensure that the correct sequence is selected (i.e. Left to Right or Right to Left). Note: SEF is Short Edge Feed (where the short edge of the paper is the leading edge when the paper is fed into the device).
General Care and Troubleshooting WorkCentre® 5945/5955 Image Loss • When copying a document from a larger paper size to a smaller size, use Auto% to reduce the image onto the smaller size. • Use reduction i.e. copy at 90% instead of 100%. • Use the Auto Center feature and run the job again. • If scanning from the document glass use Original Size to define the document size, refer to Original Size in the Copy section. Register the document in the top left corner and copy with the cover down.
General Care and Troubleshooting WorkCentre® 5945/5955 There are gloss variations (coining) • Check the quality of the original. • If the original has large areas of solid density, adjust the contrast. More Information Setting the Copy Contrast There is a double image or show through (ghosting) • Check the quality of the original. • Clean the document glass, if it is being used. • Rotate the original 180 degrees and try the job again.
General Care and Troubleshooting WorkCentre® 5945/5955 More Information Setting a Fax to Reduce Size or Split when Received (Embedded Fax) Specifying the Size of the Original to be Faxed (Embedded Fax) Specifying the Size of the Original to be Faxed (Server Fax) Specifying the Size of the Original to be sent by Internet Fax The device does not answer incoming fax calls • Change the Auto Answer Delay setting to 0 seconds. Note: This feature is for System Administrator use only.
General Care and Troubleshooting WorkCentre® 5945/5955 The Device User Interface does not Respond There may be occasions when the Device User Interface will not respond. Reboot your device by powering OFF and ON using the button on the control panel. • Wait approximately 20 seconds before turning the device back ON. Any incomplete jobs in the jobs list will be lost. • Only use the correct power off process to reboot your device. Damage may occur to your device if power is removed by other means.