
Printer User Guide


Table Of Contents
- Contents
- Introduction
- Getting Started
- Unpacking
- Installing the Toner Cartridge
- Loading Paper
- Connecting Telephone Line
- Connecting a Printer Cable
- Turning the Machine On
- Changing the Display Language
- Setting the Machine ID
- Setting the Time and Date
- Setting the Paper Size and Type
- Setting Sounds
- Using the Save Modes
- Installing Xerox drivers in Windows
- System Requirements
- Installing Xerox Drivers in Microsoft Windows XP or Windows 2000 using the USB port
- Installing Xerox Drivers in Microsoft Windows XP, 2000 or Windows 98/ME using the Parallel port
- Installing Xerox Drivers in Microsoft Windows 98 or Windows Millennium using the USB port
- Printer Driver Features
- Using ControlCentre
- Paper Handling
- Printing Tasks
- Copying
- Scanning
- Faxing
- Changing the Fax Setup options
- Available Fax Setup Options
- Loading a Document
- Selecting the Paper Tray
- Adjusting the Document Resolution
- Sending a Fax Automatically
- Sending a Fax Manually
- Redialing the Last Number
- Confirming Transmission
- Automatic Redialing
- About Receiving Modes
- Loading Paper for Receiving Faxes
- Receiving Automatically in Fax Mode
- Receiving Manually in Tel Mode
- Receiving Automatically in Ans/Fax Mode
- Receiving Manually Using an Extension Telephone
- Receiving Faxes Using the DRPD Mode
- Receiving Faxes in the Memory
- One-touch Dialing
- Speed Dialing
- Group Dialing
- Searching for a Number in Memory
- Printing a Phonebook List
- Sending Broadcast Faxes
- Sending a Delayed Fax
- Sending a Priority Fax
- Adding Documents To a Scheduled Fax
- Canceling a Scheduled Fax
- Using Secure Receiving Mode
- Printing Reports
- Using Advanced Fax Settings
- Maintenance
- Troubleshooting
- Using USB Flash Drive
- Using Your Machine In Linux
- Using Windows PostScript Driver (WorkCentre PE120i Only)
- Printing From a Macintosh (WorkCentre PE120i Only)
- Installing Machine Options
- Specifications
- Index
Paper Handling
3.9
3
3
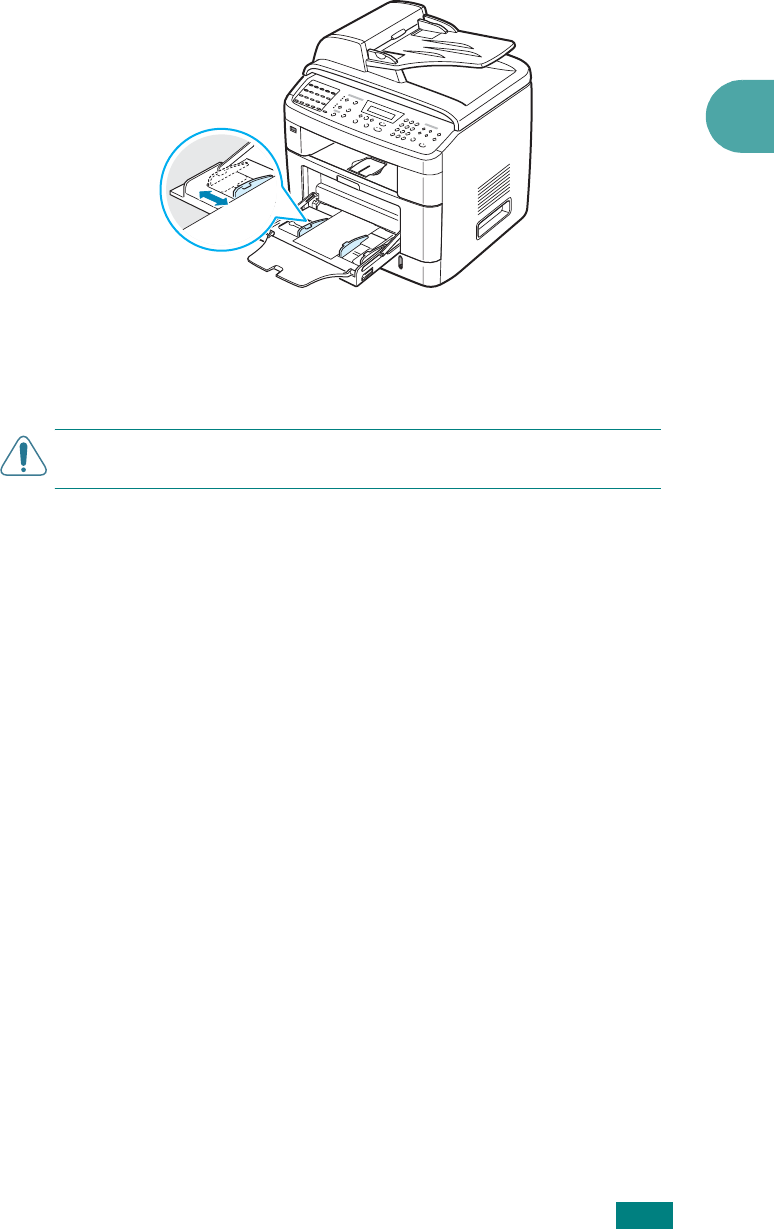
Squeeze the width guide and adjust it to the width of the
print material without bending it.
4
If you want the machine to stack the printed pages on the
rear output slot, open the rear door to use the rear output
slot.
C
AUTION
: Make sure to open the rear output slot when you print
on transparencies. If not, they may tear while exiting the machine.
5
After printing, fold away the paper support extension and
close the Bypass tray.
Tips on Using the Bypass Tray
• Load only one size of print material at a time in the Bypass
tray.
• To prevent paper jams, do not add paper when there is still
paper in the Bypass tray. This also applies to other types of
print materials.
• Print materials should be loaded face up with the top edge
going into the Bypass tray first and be placed in the center of
the tray.
• Always load only the print materials specified in the
Specifications on page E.6 to avoid paper jams and print
quality problems.
• Flatten any curl on postcards, envelopes, and labels before
loading them into the Bypass tray.
• When you print on 76 mm x 127 mm (3 x 5 in.) sized media
on the Bypass tray, open the rear door to use the rear output
slot.
• Make sure to open the rear door when you print on
transparencies. If not, they may tear while exiting the
machine.