Printer User Guide
Table Of Contents
- Contents
- Introduction
- Getting Started
- Unpacking
- Installing the Toner Cartridge
- Loading Paper
- Connecting Telephone Line
- Connecting a Printer Cable
- Turning the Machine On
- Changing the Display Language
- Setting the Machine ID
- Setting the Time and Date
- Setting the Paper Size and Type
- Setting Sounds
- Using the Save Modes
- Installing Xerox drivers in Windows
- System Requirements
- Installing Xerox Drivers in Microsoft Windows XP or Windows 2000 using the USB port
- Installing Xerox Drivers in Microsoft Windows XP, 2000 or Windows 98/ME using the Parallel port
- Installing Xerox Drivers in Microsoft Windows 98 or Windows Millennium using the USB port
- Printer Driver Features
- Using ControlCentre
- Paper Handling
- Printing Tasks
- Copying
- Scanning
- Faxing
- Changing the Fax Setup options
- Available Fax Setup Options
- Loading a Document
- Selecting the Paper Tray
- Adjusting the Document Resolution
- Sending a Fax Automatically
- Sending a Fax Manually
- Redialing the Last Number
- Confirming Transmission
- Automatic Redialing
- About Receiving Modes
- Loading Paper for Receiving Faxes
- Receiving Automatically in Fax Mode
- Receiving Manually in Tel Mode
- Receiving Automatically in Ans/Fax Mode
- Receiving Manually Using an Extension Telephone
- Receiving Faxes Using the DRPD Mode
- Receiving Faxes in the Memory
- One-touch Dialing
- Speed Dialing
- Group Dialing
- Searching for a Number in Memory
- Printing a Phonebook List
- Sending Broadcast Faxes
- Sending a Delayed Fax
- Sending a Priority Fax
- Adding Documents To a Scheduled Fax
- Canceling a Scheduled Fax
- Using Secure Receiving Mode
- Printing Reports
- Using Advanced Fax Settings
- Maintenance
- Troubleshooting
- Using USB Flash Drive
- Using Your Machine In Linux
- Using Windows PostScript Driver (WorkCentre PE120i Only)
- Printing From a Macintosh (WorkCentre PE120i Only)
- Installing Machine Options
- Specifications
- Index

Installing Machine Options
D.4
7
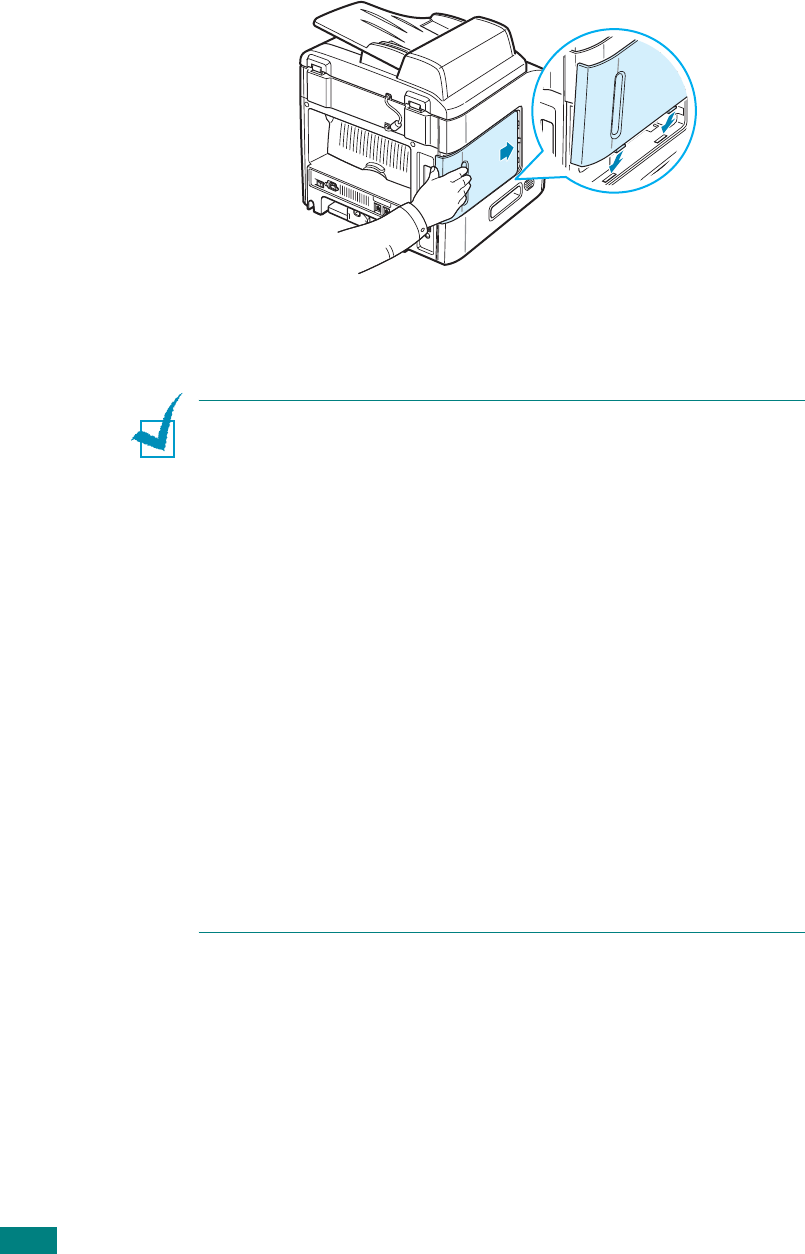
Replace the control board cover.
8
Reconnect the power cord and printer cable, and turn the
machine on.
N
OTE
: After installing the memory DIMM,
you need to select it in
the printer properties of the PostScript printer driver so that
you can use it with your machine (
WorkCentre PE120i only
)
:
1. Make sure that the PostScript printer driver is installed in your
computer. For details about installing the PS printer driver, see
page B.2.
2. Click the Windows
Start
menu.
3. For Windows 95/98/Me/NT 4.0/2000, select
Settings
and then
Printers
.
For Windows XP, select
Printers and Faxes
.
4. Select the
Xerox WC PE120 Series
PS
printer.
5. Click the right mouse button on the machine icon and select
Properties
.
6. For Windows 95/98/Me, select
Device Options
tab.
For Windows NT 4.0/2000/XP, select
Device Settings
tab.
7. Select the memory DIMM you installed in from
Printer
Memory
in the
Installable Option
section and click
OK
.
For Windows 98, select
Installable Option
→
VMOption
→
change setting for:VMOption
→
change memory
.


