
WorkCentre User's Guide Pro 555, Pro 575
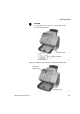
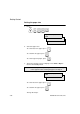
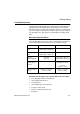
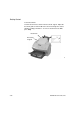
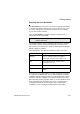
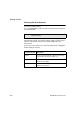
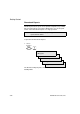
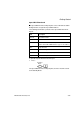
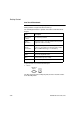
Table Of Contents
- XEROX
- Table of Contents
- 1 How to Use This Manual
- 2 Introduction
- 3 Getting Started
- Printing a Menu Map
- Setting the Date and Time
- 1. Press:
- 2. Using the Numeric Keypad and the arrow keys, enter the date, then press Enter
- 3. Select the Date format.
- 4. Select the Month format.
- 5. Select the Time format:
- 6. Using the Numeric Keypad and arrow keys, enter the time, (if necessary, use the arrow key to s...
- The menu selection screen redisplays. Press Exit or Stop to return to the standby mode.
- Setting your Machine ID*
- Setting the Dial Mode*
- Setting the Send Header
- Setting the Receive Footer
- Loading Paper
- Bypass Tray:
- Paper Tray:
- Setting the paper size
- Document Specifications
- Selecting the Scan Resolution
- Selecting the Scan Contrast
- To Receive
- To Send
- To Copy
- To Print
- 1. Install the print drivers supplied with your WorkCentre following the instructions on the CD.
- 2. To print from your application select Print from you File menu.
- 3. Select the printer name you have given to the WorkCentre print queue.
- 4. Select any printing options you require.
- 5. Select OK to send you documents to the WorkCentre
- Phonebook Reports
- 4 Basic Troubleshooting
- Paper Jam
- 1. Remove any documents from the Document Support and Copy Output Tray.
- 2a. Bypass Tray
- Pull up the Document Output Tray and pull the jammed paper straight out of the machine.
- 2b. Main Paper Tray
- Remove the Bypass Tray and pull the jammed paper straight out of the machine.
- 2c. Optional Paper Cassette
- Remove the Optional Paper Cassette Cover and pull out Paper Cassette. Press down on the stack of ...
- Remove the stack of paper from the Optional Paper Cassette and pull the jammed paper straight out...
- 3. Push the Top Cover Open Button to the Top Cover and open the Top Cover.
- 4. Remove the Toner Cartridge and the Drum Cartridge.
- 5. Pull up the Paper Guide and remove the jammed paper while pressing the Paper Holder to the rea...
- 6. If the paper is jammed partway through the Fuser Unit (black colored housing), remove the jamm...
- 7. If the paper is jammed partway through the Paper Exit Guide, open the Paper Exit Guide and rem...
- 8. Install the drum cartridge into the machine, aligning the guides of the cartridge with the gro...
- Color coordinated “1” labels have been affixed to the drum cartridge and to the inside of the mac...
- Make sure the drum cartridge is inserted inside the machine as far as it will go.
- 9. Holding onto the toner cartridge’s handle, lower it into the machine. Make sure that the four ...
- Color coordinated “2” labels have been affixed to the toner cartridge and to the inside of the ma...
- The cartridge will click into place when it is completely installed.
- 10. Replace the Paper Exit Guide, Paper and Bypass Tray.
- 11. Press down on the Top Cover until a “Click” is heard to ensure the latches engage.
- 12. Verify the display has returned to the Standby Mode.
- Document Jam
- Paper Jam
- A Safety Certification and Environmental Compliance
- Index
Getting Started
3-24 WorkCentre Pro 555, 575
One Touch Phonebook
The One Touch Phonebook Report prints a list of all Remote Station
dialing numbers assigned to One Touch Keys.
The following information is printed on the One Touch Phonebook
Report.
To print the One Touch Phonebook Report:
1. Press:
The One Touch Phonebook Report prints, then the machine returns
to the Standby Mode.
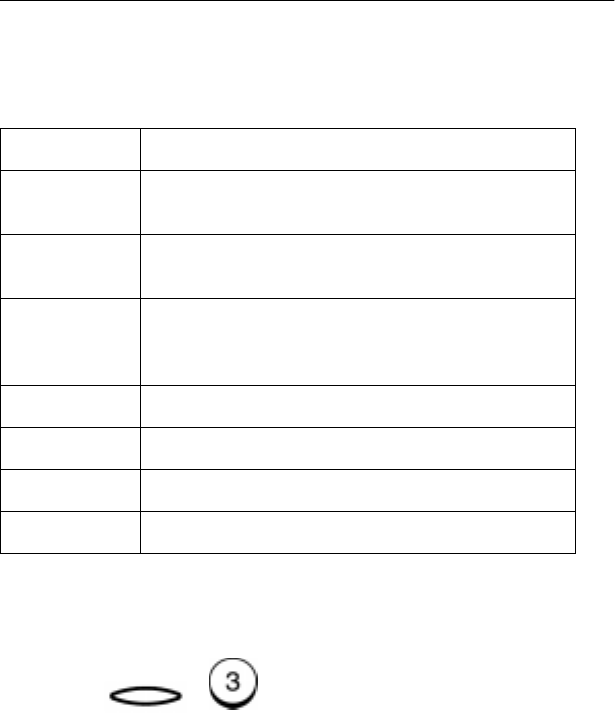
Item Description
One Touch
number
One Touch key number.
Name/
Operation
The remote name, or the Speed Dial or Group name
assigned to a One Touch Key.
Speed Dial/
Group/
Fax number
Speed Dial/Group or Fax number assigned to a One
Touch key (
“u” indicates an alternate number. SUB,
SEP, or PWD indicates type of sub address).
Time Delay Start time.
MON Line monitoring On/Off status.
BPS Communication speed (x 1000).
Report Confirmation report On/Off status.
Phonebook
Report