Phaser® 7700 Color Printer User Guide 071-0806-00 September 2001
Copyright ©, 2001, Xerox Corporation. Unpublished rights reserved under the copyright laws of the United States. Contents of this publication may not be reproduced in any form without permission of Xerox Corporation. Phaser®, PhaserShare®, the TekColor® icon, Made For Each Other®, DocuPrint®, WorkSet®, Ethernet®, the stylized X, and XEROX® are registered trademarks of Xerox Corporation.
As an ENERGY STAR® partner, Xerox Corporation has determined that this product meets the ENERGY STAR guidelines for energy efficiency. The ENERGY STAR name and logo are registered U.S. marks. Other marks are trademarks or registered trademarks of the companies with which they are associated. PANTONE® Colors generated by the Phaser 7700 Color Printer are four- and/or three-color process simulations and may not match PANTONE-identified solid color standards.
Contents Printer Warranty . . . . . . . . . . . . . . . . . . . . . . . . . . . . . . . . . . . . ix User Safety Summary. . . . . . . . . . . . . . . . . . . . . . . . . . . . . . . xii Xerox Supplies and Accessories . . . . . . . . . . . . . . . . . . . . . . . 1 Customer-Replaceable Consumables (CRCs). . . . . . . . . . . . . . . . . . . . . . 2 Customer Replaceable Units (CRUs) . . . . . . . . . . . . . . . . . . . . . . . . . . . . . 4 Supplies . . . . . . . . . . . . . . . . . . . . . . . . . . . . . .
Envelopes . . . . . . . . . . . . . . . . . . . . . . . . . . . . . . . . . . . . . . . 33 Loading Envelopes . . . . . . . . . . . . . . . . . . . . . . . . . . . . . . . . . . . . . . . . . . . 34 Loading Labels . . . . . . . . . . . . . . . . . . . . . . . . . . . . . . . . . . . 36 Automatic 2-Sided Printing . . . . . . . . . . . . . . . . . . . . . . . . . 37 Manual 2-Sided Printing. . . . . . . . . . . . . . . . . . . . . . . . . . . . 41 Paper specifics. . . . . . . . . . . . . . . . . . . . . . . .
Getting Help . . . . . . . . . . . . . . . . . . . . . . . . . . . . . . . . . . . . . . 76 The front panel. . . . . . . . . . . . . . . . . . . . . . . . . . . . . . . . . . . . . . . . . . . . . . 76 Printer CD-ROM . . . . . . . . . . . . . . . . . . . . . . . . . . . . . . . . . . . . . . . . . . . . . 76 PhaserSMART™. . . . . . . . . . . . . . . . . . . . . . . . . . . . . . . . . . . . . . . . . . . . . . 77 Xerox web site . . . . . . . . . . . . . . . . . . . . . . . . . . . . . . . . . . . . . . . .
viii Phaser 7700 Color Printer
Printer Warranty Xerox warrants that the Phaser 7700 Printer will be free from defects in materials and workmanship for a period of one (1) year from the date of shipment.
CONSUMABLES WARRANTY Xerox warrants that toner cartridges will be free from defects in materials and workmanship for a period of one (1) year from date of installation. All other Customer Replaceable Consumables (CRCs) will be covered for a period of ninety (90) days (six (6) months where longer periods are required by law) from the date of installation, but not more than one (1) year from date of shipment.
THE ABOVE WARRANTIES ARE GIVEN BY XEROX WITH RESPECT TO THIS PRODUCT AND ITS CUSTOMER REPLACEABLE CONSUMABLES IN LIEU OF ANY OTHER WARRANTIES, EXPRESS OR IMPLIED. XEROX AND ITS VENDORS DISCLAIM ANY IMPLIED WARRANTIES OF MERCHANTABILITY OR FITNESS FOR A PARTICULAR PURPOSE OR ANY SIMILAR STANDARD IMPOSED BY APPLICABLE LEGISLATION.
User Safety Summary Your printer and the recommended consumable supplies have been designed and tested to meet strict safety requirements. Attention to the following notes will ensure the continued safe operation of your printer. The Phaser 7700 complies with international safety standards and is certified as a Class 1 Laser Product.
■ If any of the following conditions occur, switch off the printer power immediately, disconnect the power cord, and call an authorized service representative. ■ The power cord is damaged or frayed. ■ Liquid is spilled into the printer. ■ The printer is exposed to water. ■ Any part of the printer is damaged. Maintenance Safety ■ Do not attempt any maintenance procedure that is not specifically described in the documentation supplied with your printer. ■ Do not use aerosol cleaners.
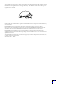
■ Place the printer on a level, solid surface with adequate strength for the weight of the machine. The base printer weight without any packaging materials is 82 kg (180 pounds). ■ The printer is heavy, and must be lifted by three people. The illustration below shows the proper technique for lifting the printer. Note Do not use the Multi-Purpose Tray (MPT) to lift the printer. 82 kg 180 lbs. 0806-62 ■ Follow the recommended procedure (on page 74) when moving the printer from one location to another.
While printing, follow these safety guidelines: ■ Do not remove the paper source tray that you have selected in the driver or front panel ■ Do not open the covers while printing. 0806-02 ■ Do not switch off the printer power while printing. ■ Do not move the printer while printing.
Symbols as marked on product: DANGER high voltage: Protective ground (earth) terminal: Hot surface on or in the printer. Use caution to avoid personal injury: Use caution (or draws attention to a particular component). Refer to the manual(s) for information: Warning If the product loses the ground connection, usage of knobs and controls (and other conductive parts) can cause an electrical shock. Electrical products may be hazardous if misused.
Xerox Supplies and Accessories 3 4 2 Supplies 1 5 6 7 0806-10 1 Transfer Roller 5 Accumulator Belt Cleaner 2 Fuser 6 Print Cartridges 3 Toner Cartridges 7 Waste Cartridge 4 Accumulator Belt Note Inside the printer, all handles and points of user interaction for replacing Customer-Replaceable Consumables (CRCs) are light orange. When the front panel notifies you that a supply is low or needs to be replaced, make sure that you have replacements on hand.
Supplies Customer-Replaceable Consumables (CRCs) 0806-11 High-Capacity Toner Cartridges Black toner cartridge life expectancy is up to 12,000 images on letter-size paper at 5 percent coverage per color. Cyan, magenta, and yellow toner cartridge life expectancy is up to 10,000 images on letter-size paper at 5 percent coverage per color.
Supplies 0806-12 Print Cartridge Print cartridge life expectancy is up to 24,000 letter-size pages based on standard print job sizes. The following customer-usage patterns may significantly reduce print cartridge life: greater than 5 percent coverage per color, using paper that is larger than letter-size, and printing jobs of less than 3 pages.
Supplies 0806-15 Fuser Fuser life expectancy is 60,000 letter-size pages based on continuous printing. The following customer-usage patterns may significantly reduce the fuser life: using paper that is larger than letter-size, greater than 5 percent coverage per color, printing short-edge feed, and printing on transparencies or specialty papers.
Supplies 0806-13 Accumulator Belt Item Part Number Accumulator Belt 016-1889-00 0806-16 Transfer Roller Item Part Number Transfer Roller 016-1890-00 User Guide 5
Supplies Supplies Xerox Phaser Professional Printing Paper Item Size Description Part Number Phaser Premium Color Printing Paper 90 g/m2 (24 lb. bond) A/Letter (U.S.) 8.5 x 11 in. 500 sheets 016-1368-00 A4 (Metric Letter) 210 x 297 mm 500 sheets 016-1369-00 11 x 17 in. 500 sheets 016-1699-00 A3 500 sheets 016-1700-00 12 x 18 in. 500 sheets 016-1900-00 A/Letter (U. S.) 8.5 x 11 in. 100 sheets 016-1704-00 A4 (Metric Letter) 210 x 297 mm 100 sheets 016-1705-00 11 x 17 in.
Xerox Phaser Transparency Sleeves and Pockets Item Description Part Number Transparency Sleeve A/Letter-size 50 sleeves 016-1130-00 ■ A4-size 50 sleeves 016-1131-00 50 pockets 016-1194-00 Supplies ■ Transparency Pocket ■ A/Letter-size Xerox Phaser Color Laser Labels Size Description Part Number A/Letter (U. S.) 8.5 x 11 in. (108 lb. label) 100 sheets / 30 labels per sheet 016-1695-00 (1.0 x 2.625 in. labels) A/Letter (U. S.) 8.5 x 11 in. (108 lb.
Accessories Universal Trays Item Trays 1-4 Description 500 sheets of 75 Part Number g/m2 (20 lb. bond) paper 116-1091-00 Supplies 150 transparency sheets Lower Tray Deck Feature Part Number 7700LTD/A ■ Includes three Universal trays. ■ Increases paper-printing capacity. ■ Paper capacity is 1500 sheets of 75 g/m2 (20 lb. bond) paper. High-Capacity Feeder Feature Part Number ■ Includes one Universal tray and two High-Capacity Letter/A4 trays. ■ Increases paper-printing capacity.
Printer Cart Feature Available for printers without a Lower Tray Deck or High-Capacity Feeder. ■ Ergonomic surface height. ■ Provides storage for supplies.
Front Panel Usage Front panel description The front panel: Displays the printer’s operating status (Printing, Ready to Print, etc.). ■ Alerts you to load paper, replace consumables and clear jams. ■ Enables you to access tools and information pages to help troubleshoot problems. ■ Enables you to change printer settings and network settings; driver settings override the printer’s front panel settings.
Printing a Menu Map The Menu Map shows you where features, such as the information pages, are located in the front panel’s menu structure. 1. Highlight Menus and press OK. 2. Scroll to the Print Menu Map by pressing the Down Arrow or Up Arrow key. 3. To print the Menu Map, press the OK key. Printing information pages A large amount of useful information is stored in your printer as printable pages.
Features Your Phaser 7700 Color Printer comes with many useful features to help you create the best possible printed documents. You can access the printer features in the printer driver, which you use when you send a print job to the printer. To ensure that you have access to all printer features, make sure that you have installed the printer driver that is on your Phaser 7700 Printer CD-ROM. Updated printer drivers are also available on the Xerox web site: www.xerox.
Print-quality modes You can choose between different print-quality modes to obtain the best combination of speed and print quality for your job.
TekColor™ color corrections You can select a color correction to match particular press specifications or one that simulates your computer screen’s colors. Otherwise, select Automatic to let the printer automatically pick the best color correction for elements in your document. Description Automatic ■ Automatically optimizes the color correction for each element (text, graphics, and photographs) on the page. sRGB Display ■ Closely approximates the colors on a standard display screen.
Energy saver After a predefined period of time since its last activity, the Phaser 7700 printer enters ENERGY STAR® standby mode. In this mode, the printer systems are shut down. When a print job is sent to the printer, it will wake up the printer. You can also wake the printer by pressing the OK key on the front panel. You may find that the printer is going into ENERGY STAR standby mode too often and you do not want to wait for your print jobs while the printer is waking up.
Intelligent Ready mode Intelligent Ready mode is an automated system that monitors the printer’s usage and warms up the printer when you are most likely to need it. To turn Intelligent Ready mode on or off from the printer’s front panel: With Menus highlighted, press the OK key. 2. Scroll to Printer Setup Menu by pressing the Up or Down Arrow key. 3. Press the OK key. 4. Scroll to Intelligent Ready by pressing the Up or Down Arrow key. 5. To change the setting, press the OK key. Features 1.
Paper Tips Caution Use only Phaser 7700 Premium Transparencies. Other transparencies may cause damage to the fuser. Any damage that is caused due to the use of unsupported transparency film may not be covered by your printer’s warranty. See page 32. ■ For a comprehensive list of paper types, weights, sizes and part numbers, print the Paper Tips Page from the front panel: ■ Select the Printable Pages Menu by pressing the Down Arrow key. ■ Press the OK key.
Paper Tips ■ Always keep paper in a sealed package to avoid the effects of humidity, which can affect print quality. ■ If you use non-Xerox paper, make sure that it meets the following criteria: ■ ■ Weight range: 60-220 g/m2 (16-58 lb. bond) ■ Smooth surface ■ Intended for laser printers Do not use wrinkled or damaged paper. Supported paper weights, page sizes and print area The following table identifies the paper weights that can be placed in each tray or component of the printer.
Supported Paper Sizes The table identifies the paper weights that can be placed in each tray: Laser Paper with the following weights: 60-90 g/m2 (16-24 lb. bond, 40-60 lb. book); Heavy Laser Paper with the following weights: 91-105 g/m2 or (25-28 lb. bond, 61-71 lb. book); and Thin Cover/ Index with the following weights: 106-169 g/m2 (50-60 lb cover, 65-90 lb. index, 32-40 lb. bond). Statement (5.5 x 8.5 in.) Universal Tray 1 Universal Trays 2- 4* MultiPurpose Tray • • • Executive (7.25 x 10.5 in.
Specialty paper Paper Tips Paper Type and Size Tray 1 Phaser 7700 Premium Transparency Trays 2- 4 • MultiPurpose Tray HighCapacity Feeder • Labels • Paper Envelopes (all sizes) • Print area Margins Paper Page size Image area Top / Bottom Sides Statement 5.5 x 8.5 in. 5.1 x 8.1 in. .2 in. .2 in. Executive 7.25 x 10.5 in. 6.85 x 10.1 in. .2 in. .2 in. 8 x 10 in. 8 x 10 in. 7.6 x 9.6 in. .2 in. .2 in. UK Foolscap 8 x 13 in. 7.6 x 12.6 in. .2 in. .2 in. Letter 8.
Print area (cont'd.) Margins Page size Image area Top / Bottom Sides B6 JIS 128 x 182 mm 118 x 172 mm 5 mm 5 mm B5 JIS 182 x 257 mm 172 x 247 mm 5 mm 5 mm B4 JIS 257 x 364 mm 247 x 354 mm 5 mm 5 mm RA3 305 x 430 mm 297 x 420 mm 5 mm 4 mm SRA3* 320 x 450 mm 303 x 432 mm 9 mm 8.5 mm Official #10 Envelope 4.13 x 9.5 in. 105 x 241 mm 3.73 x 9.1 in. 95 x 231 mm .2 in. 5 mm .2 in. 5 mm #9 1/2 Booklet 9 x 12 in. 8.6 x 11.6 in. .2 in. .2 in.
Loading Trays (Tray 1, 2, 3 or 4) For a list of the acceptable papers, transparencies, and labels that can be used in each tray, refer to page 18. For transparency loading instructions, see page 31. Videos are available with instructions for loading trays. Videos are located on the CD-ROM or the Xerox web site: www.xerox.com/officeprinting/7700support/ If you loaded the videos on your PC’s hard drive, you can also access them in the driver’s Troubleshooting tab.
2. Fan the paper to release sheets that are stuck together. 0806-20 3. Adjust the width and length guides to match the size of your paper.
4. Insert a stack of paper into the tray. See the following illustrations for proper print orientation: Long-Edge Feed (LEF) LEF Trays 0806-83 ■ Place Letter and A4 paper long-edge feed (LEF). ■ Place the side to be printed face-up. ■ Prepunched holes should be on your right as you face the printer. ■ Letterhead should be at the front of the tray. Short-Edge Feed (SEF) SEF 0806-82 24 ■ Place Legal, Tabloid (11 x 17 in.), A3, A5, B4, B5, U.S Folio, Statement and 8 x 10 in.
5. Do not load paper or transparencies above the fill line because it may cause a jam. MAX 0806-22 6. Reinsert the Universal tray. 7. If you are prompted to enter the paper type, enter it on the front panel. To select the paper type, press the Down or Up Arrow key. b. To save your selection, press the OK key. Note To avoid possible print-quality and paper-feed problems, make sure that the loaded paper matches the tray’s paper type setting. User Guide 25 Trays a.
Multi-Purpose Tray (MPT) The Multi-Purpose Tray (MPT) can be used for specialty paper. When sending a Multi-Purpose Tray (MPT) job from the driver, the printer may prompt you to load the correct paper if the paper does not match what you previously loaded. ■ If a different paper size is loaded in the Multi-Purpose Tray (MPT) than what is selected in the driver, the image is scaled to fit on the paper in the tray. ■ The Multi-Purpose Tray (MPT) does not automatically detect paper size.
Loading the Multi-Purpose Tray (MPT) 1. Open the Multi-Purpose Tray (MPT) tray. 2. Adjust the guide for the paper width. If you are using RA3, SRA3 or 12 x 18 in. sizes, adjust the paper guide on the right side of the tray 3. Insert the paper. See the following illustrations for proper print orientation: Long-Edge Feed (LEF) L EF 0806-88 ■ Place Letter, A4, A6, B6, Statement, Executive, UK Foolscap, SP Folio and 8 x 10 in. paper long-edge feed (LEF). ■ Place the side to be printed face-down.
Short-Edge Feed (SEF) SEF 0806-87 ■ Place Legal, Tabloid, Tabloid Extra, A3, A5, B4, B5, US Folio, Officio, RA3 and SRA3 short-edge feed (SEF). Note SRA3 paper size and A3 full bleed imageable area is supported through the Multi-Purpose Tray (MPT) tray. Print quality outside the imageable area is not guaranteed. Multi-Purpose Tray 4. 28 ■ Place the side to be printed face-down. ■ Prepunched holes should be towards the back of the printer. ■ Letterhead should enter the printer last.
e. Select the paper size by pressing the Up or Down Arrow key. f. To save your selection, press the OK key. Note To avoid possible print-quality and paper-feed problems, make sure that the loaded paper matches the tray’s paper type setting.
Xerox Phaser 7700 Premium Transparencies Transparencies Videos are available with instructions for loading transparencies. Videos are located on the CD-ROM or the Xerox web site: www.xerox.com/officeprinting/7700support/ If you loaded the videos on your PC’s hard drive, you can also access them in the driver’s Troubleshooting tab. Loading transparencies in the Multi-Purpose Tray 1. 2. Insert the transparencies (maximum capacity is 150 sheets): ■ Place the transparencies long-edge feed (LEF).
Select Phaser 7700 Transparency by pressing the Down or Up Arrow key. d. To save your selection, press the OK key. e. Select the paper size by pressing the Up or Down Arrow key. f. To save your selection, press the OK key. Transparencies c. Loading transparencies in Tray 1 1. Pull out the tray. 2. Adjust the width and length guides to match the size of the transparencies. 3. Insert a stack of transparencies into the tray. ■ Place the transparencies long-edge feed (LEF).
Transparencies Using non-Phaser 7700 transparency film The printer features a unique oil-less fuser. Phaser 7700 Premium Transparency film is designed specifically to work with the printer's fuser. If you wish to use non-Phaser 7700 transparency film you must use film that meets the following specifications: ■ Compatible with oil-less fuser systems ■ Fusing temperature: 165C ■ Thickness: 4.
Envelopes Guidelines for envelope printing: Caution Never use envelopes with windows or metal clasps; they will damage the printer. Damage caused by using unsupported envelopes may not be covered by your printer’s warranty. Envelopes can only be printed from the Multi-Purpose Tray (MPT). ■ Use only paper envelopes. ■ Do not print on the back of the envelope. ■ Keep unused envelopes in their packaging to avoid the effects of moisture and dryness, which can affect print quality and cause wrinkling.
Loading Envelopes 1. Insert the envelopes in the Multi-Purpose Tray (MPT): ■ Place #9 1/2 Booklet, B4, B5 and B6 envelopes short-edge feed (SEF). ■ Place #10, C4, C5, C6 and DL envelopes long-edge feed (LEF). ■ Place the side to be printed face-down with the flap closed. ■ The flap enters the printer last. Envelopes 0806-98 Note If the envelopes jam in the printer, you must tuck in the flap. 2. Adjust the Multi-Purpose Tray (MPT) guides for the width of your envelopes. 3.
4. e. Select the envelope size by pressing the Up or Down Arrow key. f. To save your selection, press the OK key. Make a test print from your application to confirm that the orientation of your envelope is correct.
Loading Labels Labels can only be loaded in the Multi-Purpose Tray (MPT). 1. Insert the label sheets (maximum capacity is 30 sheets). ■ Do not use sheets with missing labels. ■ Place the side to be printed face-down. ■ Labels should be fed long-edge feed (LEF). 0806-28 Adjust the Multi-Purpose Tray (MPT) guides for the width of the labels. 3. The front panel prompts you to confirm or change the selected paper type and size. Labels 2. 36 a.
Automatic 2-Sided Printing Automatic 2-sided printing (duplexing) is available from trays 1-4; it is not available from the Multi-Purpose Tray (MPT). 2-Sided Prints Automatic 2-sided printing is available for all paper sizes that are supported by trays 1-4 but only when the paper type is set to either Laser Paper or Heavy Laser Paper. Paper weight must be between 64-105 g/m2 (17-28 lb. bond). For best results with 2-sided printing, use 90 g/m2 (24 lb. bond) laser paper.
1. Load the Universal tray: 2-Sided Prints Long-Edge Feed (LEF) ■ Place Letter and A4 paper long-edge feed (LEF). ■ The first side to be printed is face-down. ■ The top of the first page to be printed should be toward the front of the tray. ■ Prepunched holes should enter the printer first. LEF 0806-91 Short-Edge Feed (SEF) ■ Place Legal, Tabloid (11 x 17 in.), A3, A5, B4, B5, U.S Folio, Statement and 8 x 10 in. short-edge feed (SEF). ■ The first side to be printed is face-down.
2. Determine the orientation of the images on the page: Portrait or Landscape. When you print two-sided jobs, you also select the binding preference, which determines how the pages turn; refer to the table on page 40 for the selections used in each of the printer drivers.
3. Locate your driver in the following table to determine the steps to use for 2-sided printing. 2-Sided Prints Setting the printer driver for two-sided printing 1. From the File menu, select Print, and then select Layout. 2. Select Print on Both Sides. 3. Select a binding preference. Windows 95 1. From the File menu, select Print. or 2. Click the Properties button. 3. On the Setup tab, select Print on 2 sides. 4. Check or uncheck Bind on Top Edge. 1. From the File menu, select Print.
Manual 2-Sided Printing Manual 2-sided printing can be done from the Multi-Purpose Tray (MPT) or the Universal Trays. ■ Use only the following paper types for manual 2-sided printing: ■ Laser Paper ■ Heavy Laser Paper ■ Thick Cover/Index ■ Thin Cover/Index ■ When printing from Tray 1, use only Laser or Heavy Laser Paper for manual 2-sided prints. ■ For the best opacity and feed reliability, use Laser Paper that is 90 g/m2 (24 lb. bond) paper.
Printing side 1 2-Sided Prints Note For a multi-page document, print odd-numbered pages for side 1. (This may not be available in all applications.) 1. Load the Universal Tray or the Multi-Purpose Tray (MPT): Long-Edge Feed (LEF) - Universal Tray ■ Place Letter and A4 paper long-edge feed (LEF). ■ Place the side to be printed face-up. ■ Prepunched holes should be on your right as you face the printer. ■ Letterhead should be at the front of the tray.
Short-Edge Feed (SEF) - Universal Tray Place Legal, Tabloid (11 x 17 in.), A3, A5, B4, B5, U.S Folio, Statement and 8 x 10 in. short-edge feed (SEF). ■ Place the side to be printed face-up. ■ Prepunched holes should be at the back of the tray. ■ Letterhead should enter the printer last. 2-Sided Prints ■ S EF 0806-82 Long-Edge Feed (LEF) - Multi-Purpose Tray (MPT) ■ Place Letter, A4, A6, B6, Statement, Executive, UK Foolscap, SP Folio, and 8 x 10 in. paper long-edge feed (LEF).
Short-Edge Feed (SEF) - Multi-Purpose Tray (MPT) ■ Place Legal, Tabloid, Tabloid Extra, A3, A5, B4, B5, US Folio, Officio, RA3 and SRA3 short-edge feed (SEF). 2-Sided Prints Note SRA3 paper size and A3 full bleed imageable area is supported through the Multi-Purpose Tray (MPT). Print quality outside the imageable area is not guaranteed. ■ Place the side to be printed face-down. ■ Prepunched holes should be towards the back of the printer. ■ Letterhead should enter the printer last. SEF 0806-87 2.
Printing side 2 Note 1. Load the Universal Tray or the Multi-Purpose Tray (MPT): Long-Edge Feed (LEF) - Universal Tray ■ Place the side to be printed face-up. ■ Prepunched holes should be on your left as you face the printer. ■ Letterhead or the top of the side that has already been printed should be at the front of the tray. L EF 0806-91 User Guide 45 2-Sided Prints For a multi-page document, print even-numbered pages for side 2. (This may not be available in all applications.
2-Sided Prints Short-Edge Feed (SEF) - Universal Tray ■ Place the side to be printed face-up. ■ Prepunched holes should be at front of the tray. ■ Letterhead or the top of the side that has already been printed should enter the printer last. SEF 0806-92 Long-Edge Feed (LEF) - Multi-Purpose Tray (MPT) ■ Place the side to be printed face-up. ■ Prepunched holes should be on your right as you face the printer.
Short-Edge Feed (SEF) - Multi-Purpose Tray (MPT) Place the side to be printed face-up. ■ Prepunched holes should be towards the front of the printer. ■ Letterhead or the top of the side that has already been printed should enter the printer first. SEF 0806-89 2. Adjust the width and length guides to match the paper size. 3. Select the paper type and size from the front panel.
Offsetting Output You can offset the output in the output tray or the finisher output tray. Offsetting separates print jobs or collated sets of a single job. Offsetting Output You can switch job offsetting on or off in the front panel: 1. With Menus highlighted, press the OK key. 2. Select the Printer Setup Menu by pressing the Down and Up Arrow key. 3. Press the OK key. 4. Select the Job Defaults Menu by pressing the Down or Up Arrow key. 5. Press the OK key. 6.
Using the Stapler The optional finisher can staple sets of up to 50 sheets of 90 g/m2 (20 lb. bond) paper or 35 sheets of 105 g/m2 (28 lb. bond) paper. Once the set of copies is stapled, it is delivered to the finisher output tray. The stapler holds 5000 staples. Note You cannot staple from the Multi-Purpose Tray (MPT). Notes about stapling: ■ If output sheets are sent to the stapler unit but the sheet count exceeds 50, the sheets are sent to the finisher tray without being stapled.
Staple position In the driver, select the location of the staples: None: (default) The prints are not stapled. Front: Inserts one staple in each set of copies. See the table below to determine the position of the staple. Rear: Inserts one staple in each set of copies. See the following tables to determine the position of the staple. Dual: Inserts two staples in each set of copies. See the tables on page 51 to determine the position of the staples.
Dual Stapling Long-Edge Feed (LEF) Applicable Paper Size ■ Portrait Universal Trays Letter A4 A Landscape A Short-Edge Feed (SEF) Applicable Paper Size ■ Universal Trays A3 B4 JIS B5 JIS Tabloid Portrait A Landscape A Stapling User Guide 51
Adding Staples 1. Open the front cover of the finisher (labeled J). 0806-78 Stapling 2. Pull the stapler cartridge to the front of the printer.
3. Remove the stapler cartridge by lifting up and pulling on the green handle on the stapler cartridge. 0806-81 4. Hold the staple cartridge upright. 5. Press together the sides of the staple cartridge where it is labeled PUSH and lift the part of the staple cartridge that was released. Stapling 0806-93 6. Remove the empty cardboard from the staple cartridge.
7. Slide a new set of staples into the cartridge and pull the tab to release the packaging. 0806-94 8. Push down the top of the staple cartridge until you hear it click. 9. Replace the staple cartridge in the printer. Stapling 10. Close the front cover of the finisher (labeled J).
Troubleshooting Print-Quality Problems To reduce possible print problems: Maintain a stable temperature and relative humidity for the printer. ■ Use only the paper recommended for this printer; see page 17. ■ Align the paper edge guides in the paper tray to fit the paper. ■ Protect the print cartridges from prolonged exposure to direct light. ■ Print the Diagnosing Print-Quality Problems pages to help you troubleshoot print problems: Print Quality ■ 1.
If the information provided in this section does not solve your print problem, refer to Getting Help on page 76. Print Defects and Potential Remedies Print Quality Print-Quality Problem Potential Remedies Thin, light or white lines appear in only one color. 1. Open the front cover. 2. Remove the waste toner cartridge; be careful not to spill toner as you remove the cartridge. .
Print Defects and Potential Remedies (cont'd.) Potential Remedies 1. Make sure that the paper you are using is the correct type for the printer and is correctly loaded in the printer in the correct tray. From the front panel’s Printable Pages Menu, select Print Paper Tips Page. 2. Make sure that the paper loaded in the tray matches the paper type selected on the printer’s front panel. 3.
Print Quality Print Defects and Potential Remedies (cont'd.) Print-Quality Problem Potential Remedies 1. From the front panel’s Support Menu, select the Improve Print Quality? menu. Select the Remove Print Smears menu item. This function passes several blank sheets of paper through the printer to clean the fuser rollers. 2. From the front panel menu select the Printable Pages menu. Select the Service Pages menu. Print the Repeating Defects page.
Print Defects and Potential Remedies (cont'd.) Print-Quality Problem Potential Remedies 0806-41 Make sure that the paper you are using is the correct type for the printer and is correctly loaded in the printer. From the front panel’s Printable Pages Menu, select the Print Paper Tips Page. 2. Make sure that the paper loaded in the tray matches the paper type selected on the printer’s front panel. 3.
Print Defects and Potential Remedies (cont'd.) Print-Quality Problem Potential Remedies Print Quality 1. Make sure that the paper you are using is the correct type for the printer and is correctly loaded in the printer. From the front panel’s Printable Pages Menu, select Print Paper Tips Page. 2. Make sure that the paper loaded in the tray matches the paper type that you selected on the printer’s front panel. 3.
Print Defects and Potential Remedies (cont'd.) Print-Quality Problem Potential Remedies 2. Make sure that the paper loaded in the tray matches the paper type that you selected on the printer’s front panel. 3. From the front panel’s Support Menu, select the Improve Print Quality? menu. Select Remove Print Smears. This function passes several blank sheets of paper through the printer to clean the fuser rollers. 4.
Print Quality Print Defects and Potential Remedies (cont'd.) Print-Quality Problem Potential Remedies ■ " Color has shifted outside the designated area or has been superimposed over another color. Turn the printer off and on; the printer will perform an automatic registration calibration.
Clearing Paper Jams Preventing jams ■ To reduce the frequency of paper and transparency jams, use only Xerox Phaser paper, Xerox Phaser labels, and Xerox Phaser 7700 transparencies. See page 8 for ordering supplies. ■ Fan paper prior to loading in the Universal Trays or Multi-Purpose Tray (MPT). ■ For supported paper sizes, refer to page 18. ■ For proper paper-loading instructions, refer to page 22.
Clearing paper jams When a paper jam occurs, printing stops and a message displays on the front panel. The message indicates the location of the jam and the corrective action. More than one sheet of paper may be jammed in the paper path. Refer to the labels on the printer to clear the jam. Caution To avoid possible injury, do not touch the printer’s fuser rollers; they may be hot. Be careful not to touch the toner on jammed paper as the toner has not been fused to the paper and rubs off.
Jam at A Follow these steps to clear a jam from the left door: Warning Some components behind the left door may be hot. To avoid injury, use caution when clearing jams. 1. Open the left door (labeled A). Jams 0806-34 2. Lift the green release latch located on the right side of the fuser. 0806-45 3. Remove the jammed paper.
4. Push down the release latch. 5. Close the left door. Jam at B Follow these steps to clear a jam from the left door below the Multi-Purpose Tray (MPT): Open the door labeled B (below Multi-Purpose Tray). 2. Remove jammed paper. Jams 1. 0806-97 3. Close the door. 4. Pull out tray 1. 5. Make sure that the paper is loaded correctly in the tray and that guides are set flush against the paper. 6. Reinsert tray 1.
Jam at Multi-Purpose Tray (MPT) Warning Some components behind the left door may be hot. To avoid injury, use caution when clearing jams. 1. Open the left door (labeled A). 0806-34 Remove the jammed paper. 3. Close the door. User Guide Jams 2.
Jam at C Follow these steps to clear a jam from the lower left door: 1. Open the lower left door (labeled C). 2. Remove the jammed paper. 2 3 4 Jams 0806-47 3. Close the door. 4. Pull out the tray that is specified on the front panel (2, 3, or 4). 5. Make sure that the paper is loaded correctly in the tray and that guides are set flush against the paper. 6. Reinsert the tray.
Jam at D - Duplex Unit Follow these steps to clear a jam from the duplex unit: 1. Open (a) the Multi-Purpose Tray (MPT) and (b) the upper left door (labeled D). a b 0806-66 Remove the jammed paper. 3. Close the door. User Guide Jams 2.
Jam at E - Tray 4 Follow these steps to clear a jam at the High-Capacity Feeder: Open the lower left door (labeled C). 2. Remove the jammed paper. 3. Close the door. 4. Pull out tray 4. 5. Open the lid on the left side of the tray and remove jammed paper, if any. Jams 1. 0806-67 6. Make sure that the paper is loaded correctly in the tray and that the guide is set flush against the paper. 7. Reinsert tray 4.
Jam at the Finisher-Bypass Feeder (labeled G) Follow these steps to clear a jam at the Finisher-Bypass Feeder: 1. Open the printer's left door (labeled A). 0806-34 Remove the jammed paper, if any. 3. Close the printer's left door (labeled A). 4. Open the finisher-bypass door (labeled G). Jams 2. 0806-75 5. Remove the jammed paper, if any. 6. Close the finisher-bypass door (labeled G).
Jam at H - Finisher Follow these steps to clear a jam at the finisher: 1. Push the button on the top of the finisher to open the cover. Jams 0806-72 2. Remove the jammed paper. 0806-73 3. 72 Close the top cover.
Jam at F (with Finisher only) 1. Pull the finisher away from the printer. 0806-96 Remove the jammed paper from the printer or from the entrance to the Finisher-Bypass. 3. Push the finisher back into position. User Guide Jams 2.
Moving and Shipping the Printer Warning Follow these guidelines to avoid injuring yourself or damaging the printer: ■ Always use at least three people to lift the printer. ■ Always turn off the printer using the power switch on the top-rear of the printer. Moving the printer within the office The printer can be safely moved from one location within an office to another, as long as it travels gently over smooth surfaces.
If you do not have all of the original packaging, order repackaging kit 065-0592-00. To order replacement packaging, go to www.xerox.com/officeprinting/support or contact your local Xerox service representative. Instructions for repackaging the printer are provided in the repackaging kit, on the CD-ROM or on the web site. If you are unable to repackage the printer, Xerox service personnel can repackage the printer for a fee.
Getting Help Getting Help Refer to the following resources for information about your printer. The front panel ■ Offers you a suite of tools along with information pages to help solve printing quality, paper feed, supplies, and printer administration problems. ■ Press the information key on the front panel, see page 10 for information about the front panel. ■ To print troubleshooting pages: scroll to the Printable Pages menu by pressing the Down or Up Arrow key. Press OK.
PhaserSMART™ PhaserSMART™ is an automated, Internet-based, support system. You can access interactive troubleshooting by selecting: In the printer driver, the Technical Support link on the Troubleshooting Tab. ■ In CentreWare IS, the Technical Support link, under the Support Links section on the Support tab. Xerox web site www.xerox.
Color Connection Getting Help www.colorconnection.xerox.com Color resource for tools and information to help you get the most from your color printer: ■ Interactive tutorials and helpful tips for using your printer and favorite software applications. ■ Easy access to on-line technical support. ■ Customized features to meet your individual needs. Other on-line services Subscribe to email update notices: www.colorconnection.xerox.com Technical Support www.xerox.
Customer Support Center See www.xerox.com/officeprinting/contacts for the most updated information.
Specifications Material Safety Data Sheet Manufacturer: Xerox Corporation Office Printing Business P. O.
SECTION 3 - HAZARDS IDENTIFICATION ROUTES OF EXPOSURE: Toner and developer powders are encased in a cartridge. Minimal exposure through inhalation or skin contact is expected when used as intended. POTENTIAL HEALTH EFFECTS: Health effects from this product are expected to be negligible, when product is used as intended. See Section 11, Toxicology Information.
SECTION 6 - ACCIDENTAL RELEASE MEASURES SPILL OR LEAK: Sweep up or vacuum spilled materials and carefully transfer into sealable waste container. Sweep slowly to minimize generation of dust during clean up. If a vacuum is used, the motor must be rated as dust tight. A conductive hose bonded to the machine should be used to reduce static buildup. Clean up residue if necessary with soap and cold water. Wash or dry clean garments after removing loose toner.
SECTION 10 - STABILITY AND REACTIVITY STABILITY: Stable. INCOMPATIBILITY WITH OTHER MATERIALS: Strong oxidizers HAZARDOUS POLYMERIZATION: Will not occur HAZARDOUS DECOMPOSITION PRODUCTS: During a fire, toxic gases may be generated by thermal decomposition or combustion. SECTION 11 - TOXICOLOGICAL INFORMATION This material has been evaluated by Xerox Corporation. The toxicity data noted below is based on test results of similar toners.
SECTION 13 - DISPOSAL CONSIDERATIONS These materials are not RCRA hazardous wastes as specified in 40 CFR 261. State and local waste disposal requirements, however, may be more restrictive. Dispose in accordance with all federal, state, and local regulations. Incinerate only in a closed container. SECTION 14 - TRANSPORTATION INFORMATION DOT: Not regulated. SECTION 15 - REGULATORY INFORMATION TSCA: All components of these toners have been manufactured in compliance with TSCA.
Index Numerics 2-sided printing 37 A Automatic 37 automatic 2-sided printing 37 Automatic color correction 14 B belt cleaner assemblies 4 belt cleaner assembly part numbers 4 binding preference 39 Black and White color correction 14 Supplies C Color Connection 78 color corrections 14 Commercial Press color correction 14 D DIC color correction 14 duplex printing 37 E User Guide Index email notification service 78 envelopes printing 33 Euroscale Press color correction 14 85
F fax friendly 14 features front panel 11 front panel 10 G getting help front panel 76 infoSMART software 78 printer CD-ROM contents 76 H high-capacity toner cartridge part number 2 High Resolution/Photo print quality mode 13 I Image Offset print-quality problems 56, 57, 58, 59, 60, 61, 62 infoSMART software 78 J jams clearing 63 preventing 63 Index L labels part numbers 7 printing 36 printing tips 37 local reseller 78 86 Phaser 7700 Color Printer
M manual 2-sided printing 41 media supported sizes 18 universal tray usage 37 memory, additional part number 9 menu map 11 modes print quality 13 moving kit part numbers 7 Multi-Purpose Tray (MPT) loading 27 loading envelopes 33 loading labels 36 loading transparencies 30 Supplies N None color correction 14 O offsetting output 48 orientation 39 output offset 48 P User Guide Index page size, image area supported sizes 18 paper loading Multi-Purpose Tray (MPT) 27 part numbers 6 Universal tray usage 22
part number additional memory 9 high-capacity toner cartridge 2 labels 7 moving kit 7 paper 6 print cartridges 3 printer station 8 standard toner cartridges 2 transparency 6 waste cartridge 3 phone number support 79 photographic print-quality mode 13 prepunched paper printing 37 print cartridge part number 3 print quality troubleshooting problems 55 print-quality modes 13 printer quality modes 13 printer station part number 8 printing tips labels 37 menu map 11 Q Index quality modes 13 88 Phaser 7700 C
S SNAP Press color correction 14 sRGB Display color correction 14 Standard print quality mode 13 standard toner cartridges part number 2 staple position 50 stapler using 49 staples adding 52 support phone numbers 79 SWOP Press color correction 14 T Supplies TekColor color corrections 14 Toyo color correction 14 transparencies loading 30 print quality modes 13 transparency part numbers 6 universal tray usage 37 troubleshooting getting help 76 using front panel to get help 76 using infoSMART software 78 us
U universal loading into universal tray 22 Universal tray paper specifics 22 Universal tray usage 22 universal tray loading media 22 loading transparencies 30 paper specifics 37 transparency specifics 37 V Vivid Color color correction 14 W waste cartridge part number 3 X Index Xerox web site 77 90 Phaser 7700 Color Printer