
User guide


Installation and Setup
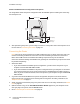
Phaser 6121MFP Multifunction Printer
User Guide
38
Installing the Software
This section includes:
• Operating System Requirements on page 38
• Installing the Drivers for Windows – Network on page 38
• Installing the Drivers for Windows – USB on page 40
• Installing the MCC Utility on page 42
• Installing the Drivers for Macintosh on page 43
• Adding the Printer for Macintosh on page 44
Operating System Requirements
• PC: Windows 2000/XP/Vista, Windows Server 2003 or newer
• Macintosh: OS X, version 10.3 or newer
Installing the Drivers for Windows – Network
Notes:
• These instructions are for Phaser 6121MFP/N or /D printer configurations connected by an
Ethernet cable to a network. If you have a Phaser 6121MFP/S printer configuration, see
Installing the Drivers for the Phaser 6121MFP/S on page 41.
• When you perform a standard installation of the software for a network-connected printer as
shown below, all of the drivers and utilities are installed automatically.
To install the drivers for your Phaser 6121MFP network-connected printer:
1. Verify that the printer is plugged in, turned on, and connected to the same active network as your
computer.
2. Insert the Software and Documentation CD into your computer’s CD drive. The installer will start
automatically unless you have autorun disabled on your computer. If the installer does not start,
navigate to your computer’s CD drive and double-click the Setup.exe installer file.
Note: If the Software and Documentation CD is not available, you can download the latest driver
from www.xerox.com/office/6121MFPsupport.
3. At the setup screen, click Phaser 6121MFP/N / Phaser 6121MFP/D.
4. At the next screen, click Install Drivers.
5. At the next screen, click Install Print, Scan and Fax Drivers.
6. Read and then accept the License Agreement by clicking I Agree.
When the Printer Installation window appears, it will search for and list any discovered network
printers.