
User guide


Installation and Setup
Phaser 6121MFP Multifunction Printer
User Guide
36
3. Use the keypad buttons to enter the date in the format shown in the menu, then enter the time in
the format shown. When finished, press OK.
Note: If you press OK before entering the time, you may accidentally exit out of the language and
fax setup menu. You can access this information again to finish the setup. See Accessing the
General Setup Menu on page 36. For fax settings, see Enabling the Printer for Faxing on page 50.
4. Enter the printer’s fax number and press OK.
5. To enter a default sender name, use the keypad buttons. Each button cycles through lowercase and
uppercase letters, so keep pressing the button until you see the desired letter in the desired case. To
clear a mistake, press the Back/Menu button. To add a space between letters, press the 0 button.
When finished, press OK.
6. Leave the other copy defaults, such as tray, paper size, scale, etc., as they are for now.
You are finished with the initial setup. A map of the printer’s main menus prints automatically. Use
the information in the Menu Map as a reference for setting up other printer functions.
7. If your printer has an Ethernet cable connection to a network, go to Assigning the Printer’s
Network Address on page 36.
Note: If you are not sure what type of connection you have, see What Type of Connection Do I
Have? on page 30.
Accessing the General Setup Menu
Note: After setting up the printer and installing the software, if you need to access the General
Setup menu, use these instructions.
Use the General Setup menu to change settings such as the power saver mode, language, speaker
volume (Phaser 6121MFP/N or /D printer configurations only), etc.
To access the General Setup Menu:
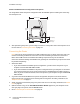
1. At the printer control panel, press the Back/Menu button to enter the System Menu.
2. Press the Down Arrow button to go to General Setup and then press the OK button.
3. Arrow down to the desired feature you want to set and then press OK.
4. Change the setting and then press OK.
See also:
Control Panel General Setup on page 26
Assigning the Printer’s Network Address
Note: These instructions are for Phaser 6121MFP/N or /D printer configurations connected by an
Ethernet cable to a network.
By default, your printer is set to pick up an IP address automatically if it is connected to a network that
has a DHCP server. If this is the case, then you do not need to do anything except write down your
printer’s IP address because you will need it when you install the software and for setting up certain
features. If you are connected to a network that does not have a DHCP server, or if you require a static