
User guide


Installation and Setup
Phaser 6121MFP Multifunction Printer
User Guide
32
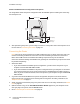
Phaser 6121MFP/N or /D Printer Configurations
1. Unpack the printer, remove all packing tape from the outside and inside of the printer, then attach
any parts that were packed separately from the main printer body. See the Installation Guide for
details.
2. Select a location for the printer. See Choosing a Location for the Printer on page 33.
3. Connect the printer to your computer. If your computer is connected to a network, connect your
printer to the network using an Ethernet cable. If you do not have a network, connect your printer
to your computer using a USB cable. See Connecting the Printer on page 34.
4. Connect the fax phone line and the power cord. See Connecting the Printer on page 34.
5. Turn the printer on.
6. Load paper into Tray 1. See step #10 of the Installation Guide that came in the setup packet with
the printer.
7. Perform the initial setup at the printer control panel. See Configuring the Phaser 6121MFP/N or /D
on page 35.
8. If your printer is connected via an Ethernet cable, set up/verify the network connection. See
Assigning the Printer’s Network Address on page 36.
9. Check your operating system requirements. See Operating System Requirements on page 38.
10. Windows users, install the printer, scan, and fax drivers:
• Windows users with a network connection, see Installing the Drivers for Windows – Network on
page 38.
• Windows users with a USB connection, see Installing the Drivers for a Phaser 6121MFP/N or /D
– USB on page 40.
11. Macintosh users, install the printer and scan drivers. See Installing the Drivers for Macintosh on
page 43.
12. Macintosh users, add the printer. See Adding the Printer for Macintosh on page 44.
13. Windows users with USB connections, install the MCC utility. See Installing the MCC Utility on
page 42.
14. Users with network connections, set up scanning to email and FTP servers. See Setting Up Network
Scanning Options on page 48.