7300 Phaser Color Printer ® Troubleshooting Guide
Copyright © 2002, Xerox Corporation. All Rights Reserved. Unpublished rights reserved under the copyright laws of the United States. Contents of this publication may not be reproduced in any form without permission of Xerox Corporation.
Contents Resources . . . . . . . . . . . . . . . . . . . . . . . . . . . . . . . . . . . . . . . . . . . . . . . . . . . 1 Calibration . . . . . . . . . . . . . . . . . . . . . . . . . . . . . . . . . . . . . . . . . . . . . . . . . . . 2 Diagnosing Print Quality . . . . . . . . . . . . . . . . . . . . . . . . . . . . . . . . . . . . . . . 3 Paper Jams . . . . . . . . . . . . . . . . . . . . . . . . . . . . . . . . . . . . . . . . . . . . . . . . . . 4 Preventing jams . . . . . . . . . . . . . . . . . . . .
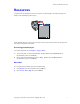
Phaser® 7300 Color Printer Resources A large amount of information is stored in your printer as printable pages. The following pages are samples of the printable page for this topic. 7300-58 All the printable pages have this format, with color bars at the top and at the bottom of the page. Print these pages at the printer’s front panel. Accessing printable pages Access these pages from the Printable Pages Menu: 1.
® PHASER 7300 COLOR PRINTER Help Guide Resources CentreWare® Internet Services (IS) Printer management tool that helps System Administrators: • Configure and manage multi-vendor printers. • Provide remote diagnostics and troubleshooting for printer problems. • Monitor printer and consumable status. • Hotlink to software updates and Technical Support. CentreWare IS uses TCP/IP to communicate directly with the printer's embedded web server and runs on any computer with a web browser.
Button You can press the Information button at any time to get additional information about the message displayed on the front panel. Printable pages To print a Menu Map, navigate the front panel and its menu items: 1. Select Menus and press OK. 2. Select Print Menu Map and press OK. Driver help If you are using Windows 95/98, Windows 2000/XP, or Windows NT, install the driver from your printer's software CD-ROM and access the printer driver to: • Link to relevant web sites from the Troubleshooting tab.
PhaserSMART After you launch PhaserSMART, select the Troubleshooting Guide to help identify your printer's problem. Starting with Print/Image Quality Issues, PhaserSMART will walk you through a decision tree to resolve print-quality problems. Interactive Documentation CD-ROM For print-quality problems, see the Troubleshooting section. Networking problems Printable pages To obtain information on printer options, configurations and settings: 1. On the front panel, highlight Printable Pages and press OK. 2.
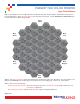
Phaser® 7300 Color Printer Calibration A large amount of information is stored in your printer as printable pages. The following pages are samples of the printable page for this topic. 7300-58 All the printable pages have this format, with color bars at the top and at the bottom of the page. Print these pages at the printer’s front panel. Accessing printable pages Access these pages from the Support Menu: 1.
® PHASER 7300 COLOR PRINTER Color Calibration Tutorial Overview Color calibration procedures adjust the printer for optimal color output. Color settings may need adjustment upon initial printer set-up or when toners and imaging units are replaced. There are two procedures: Lighten/Darken Colors and Balance Colors. If the overall image appears either too light or dark, use the Lighten/Darken Colors procedure.
® PHASER 7300 COLOR PRINTER Light Color Balance Step 1. Hold this print at arm's length and find the numbered circle (0 to 54) that appears to blend with some portion of the surrounding gray. Select Set Circle Number from the printer's front panel. Use the Up Arrow and Down Arrow keys to select that circle's number and press OK.
® PHASER 7300 COLOR PRINTER Dark Color Balance Step 1. Hold this print at arm's length and find the numbered circle (0 to 54) that appears to blend with some portion of the surrounding gray. Select Set Circle Number from the printer's front panel. Use the Up Arrow and Down Arrow keys to select that circle's number and press OK.
® PHASER 7300 COLOR PRINTER Calibrate for Margins (Long-Edge Feed) The Calibrate Margins Menu allows you to adjust the printer's imaging area relative to the edges of the paper. The imaging area is shown as a dashed rectangle; the printer will not print outside this rectangle. Step 1. Adjust Side 1 Margins. To move the dashed rectangle to the position you want it on the page: 1. From the printer's front panel Support Menu, scroll to Improve Print Quality? and press OK. 2.
® PHASER 7300 COLOR PRINTER Calibrate for Margins (Short-Edge Feed) The Calibrate Margins Menu allows you to adjust the printer's imaging area relative to the edges of the paper. The imaging area is shown as a dashed rectangle; the printer will not print outside this rectangle. Step 1. Adjust Side 1 Margins. To move the dashed rectangle to the postion you want it on the page: 1. From the printer's front panel Support Menu, scroll to Improve Print Quality? and press OK. 2.
Phaser® 7300 Color Printer Diagnosing Print Quality A large amount of information is stored in your printer as printable pages. The following pages are samples of the printable page for this topic. 7300-58 All the printable pages have this format, with color bars at the top and at the bottom of the page. Print these pages at the printer’s front panel. Accessing printable pages Access these pages from the Printable Pages Menu: 1.
® PHASER 7300 COLOR PRINTER Diagnosing Print Quality Review the five test pages printed with this page: The pages consist of cyan, yellow, magenta, and black; and another page with all four colors. Use the information below to help solve your print-quality problems. Note: The examples shown are Long-Edge Feed (LEF). If you print Short-Edge Feed (SEF), the examples below are rotated 90 degrees. The images shown are for reference only. Not all pages represented are printed.
Problem Solution Dark Lines/Smudges or Streaks All Colors 1. From the printer's front panel Support Menu select Improve Print Quality?, then select Print Paper Tips Page and press OK. Black and/or colored areas appear on the page in all colors and/or in non-print areas. 2. Ensure the paper you are using is the correct type for the printer and is properly loaded. 3. Ensure the paper loaded in the tray matches the paper type selected on the printer's front panel and in the computer's printer driver. 4.
Problem Solution Incomplete Fusing 1. Open the top cover and make sure the orange fuser restraint pin is removed and the green lever on the back side of the Fuser is in the locked positon. Toner appears to be pulled off print, or is easy to rub off. 2. Turn the printer off and then on. 3. From the printer's front panel Support Menu select Improve Print Quality?, then select Print Paper Tips Page and press OK. 4. Ensure the paper you are using is the correct type for the printer and is properly loaded.
Phaser® 7300 Color Printer Paper Jams In addition to information on preventing jams and what causes a paper jam, this section includes instructions for clearing the following jams: ■ Jam at Door A — see page 5. ■ Jam at the duplex unit — see page 6. ■ Jam at the Multi-Purpose Tray — see page 7. ■ Jam at the top cover — see page 8. ■ Jam at the tray — see page 11. When there is a paper jam, the printer’s front panel displays a message about the jam location and information on how to clear the jam.
Paper Jams What causes a paper jam? Paper jams occur most often under these conditions: ■ An incorrect paper type was selected in the printer driver. ■ The paper does not meet specifications. ■ The loaded paper size or weight is not supported by the paper tray. ■ The paper is moist, bent, or folded. ■ The paper is not loaded properly. ■ The tray’s side and rear guides are not adjusted properly for the paper. ■ The tray is overfilled; paper is loaded above the tray’s fill line.
Paper Jams 2. Remove any jammed paper or transparencies. 7300-57 3. Close the right door. Jam at the duplex unit Follow these steps to clear the jam. Refer to the labels inside the printer for jam-clearing instructions. 1. Open the duplex unit: a. Flip down the center front plate on the printer to access the green handle to the duplex unit. b. Use the green handle to firmly pull the duplex unit out of the printer. This also opens Tray 1 underneath to support the duplex unit.
Paper Jams 2. Lift the lid of the duplex unit. 7300-56 3. Remove the jammed paper. 4. Replace the lid of the duplex unit. 5. Use both hands to push the duplex unit (and Tray 1) back into the printer. Jam at the Multi-Purpose Tray 1. Remove the jammed paper from the Multi-Purpose Tray on the right side of the printer. 7300-03 2. If needed, load paper in the Multi-Purpose Tray.
Paper Jams Jam at the top cover Follow these steps to clear the jam. Refer to the labels inside the printer for jam-clearing instructions. 1. Use the latch on the right side of the printer to open the top cover. Caution Avoid touching or handling the LED bars. 7300-04 2. Lift out each toner cartridge/imaging unit assembly.
Paper Jams 3. Place each toner cartridge/imaging unit assembly on a flat surface. Cover the imaging units with dark paper or the bags they came in. Caution Be careful not to place the assembly on the edge of the table or an uneven surface. Do not touch the green film on the imaging units since this might damage the film. Avoid exposing the toner cartridge/imaging unit assemblies to light for more than 10 minutes as this might damage them. 7300-06 4.
Paper Jams 5. If there is paper jammed in the fuser area, remove the fuser for better access to the jammed paper. Rotate the release levers on the fuser and pull out the paper. 7300-91 6. Reseat the fuser. 7300-92 Warning To avoid possible injury, do not touch the printer’s fuser rollers; they may be hot. 7. Replace each toner cartridge/imaging unit assembly in the correct location for its color.
Paper Jams 8. Slowly lower the top cover into place. 7300-11 Jam at the tray Follow these steps to clear the jam. Refer to the labels inside the printer for jam-clearing instructions. 1. On the right side of the printer, open the door specified on the front panel. 7300-01 Warning Be careful when clearing jams. Some components behind the right door may be hot.
Paper Jams 2. Remove any jammed paper. 7300-57 3. Close the door that you opened in Step 1. 4. Pull out the tray specified on the front panel. 7300-13 5. Remove any jammed paper. 6. Make sure that the paper is located correctly in the tray and that the paper guides are set flush against the paper. 7. Push the tray back into the printer. Note Even if you don't find any jammed paper, following these steps clears the error and the printer should resume printing.
Phaser® 7300 Color Printer Regular Printer Maintenance Your printer needs little maintenance other than periodic cleaning of the LED bars and replacing the following Customer-Replaceable Consumables (CRCs): ■ Toner cartridges (black, cyan, magenta and yellow) ■ Imaging units (black, cyan, magenta and yellow) ■ Transfer unit ■ Fuser Clean the LED bars every time you replace a toner cartridge. The replacement toner cartridge package includes cleaning instructions.
Cleaning Kit Cleaning Kit 00:10 4x Phaser® 7300 Color Printer 14
Replacing the Fuser Replacing the Fuser 00:10 Phaser® 7300 Color Printer 15
Replacing the Fuser Phaser® 7300 Color Printer 16
Replacing an Imaging Unit Replacing an Imaging Unit 00:10 1 2 Phaser® 7300 Color Printer 17
Replacing an Imaging Unit 7 6 8 Remove Packing Material 8.1 8.2 Retirez le matériel d'emballage Rimuovere il materiale d'imballaggio Verpackungsmaterial entfernen Retire el material de embalaje Remova o material de embalagem Verwijder verpakkingsmateriaal Ta bort förpackningsmaterial 8.3 9 Phaser® 7300 Color Printer 8.
Replacing an Imaging Unit 1 1 2 2 4x Phaser® 7300 Color Printer 19
Replacing a Toner Cartridge Replacing a Toner Cartridge 00:10 4 Phaser® 7300 Color Printer 20
Replacing a Toner Cartridge 7 8 7.1 1 4x 2 7.
Replacing the Transfer Unit Replacing the Transfer Unit 00:10 1 2 2 1 00:10 3 1 2 Phaser® 7300 Color Printer 22
Replacing the Transfer Unit Phaser® 7300 Color Printer 23
Phaser® 7300 Color Printer Repacking Instructions 2 1 00:10 3 4 1 5 Copyright © 2002 Xerox Corporation. All Rights Reserved.
Repacking Instructions 6 6.1 7 7.1 6.2 7.2 8 68 kg 149 lbs. 7.3 9 7.
Index C P calibration 2 cleaning kit 14 clearing jams 4 Customer-Replaceable Consumables (CRCs) 13 paper jams clearing 4 preventing 4 preventing jams 4 printable pages 1 Calibrate Margins 2 Color Calibration Tutorial 2 Dark Color Balance 2 Diagnosing Print Quality 3 Help Guide 1 Light Color Balance 2 printer cleaning 14 D diagnosing print quality 3 Door A jam 5 duplex unit jam 6 F fuser replacing 15 I imaging unit replacing 17 instruction sheets Cleaning Kit 14 Repacking Instructions 24 Replacing a To