XEROX Xerox MRP Family 4215/MRP, 4219/MRP, 4220/MRP, 4230/MRP Fax Modem for Macintosh Operator Guide May 1995 720P12322
Xerox Corporation 701 S. Aviation Boulevard El Segundo, CA 90245 © 1995 by Xerox Corporation. All rights reserved.
Notices Your optional fax board must be installed by a qualified service representative. Safety CAUTION: This equipment generates, uses, and can radiate radio frequency energy, and if not installed and used in accordance with the installation requirements, may cause radio interference to radio communications. U.S.A.
NOTICES Laser safety Your printer complies with appropriate safety standards. Specifically regarding lasers, the equipment complies with laser product performance standards set by governmental, international and national agencies as a Class 1 laser product. It does not emit hazardous light; the beam is totally enclosed during all phases of customer operation and maintenance.
NOTICES WARNING: Use of unsuitable materials may result in poor performance and can possibly create a hazardous condition. Always use a Xerox specified cordset with the Equipment Leakage Circuit Interrupter/Residual Current Device (ELCI/RCD). Use caution when installing or modifying telephone lines. Do not do this Never use an extension cord with the ELCI/RCD. Never use the ELCI/RCD where water may enter the casing. Never attempt any maintenance function that is not specifically described in this document.
NOTICES U.S. configuration of ELCI/RCD 1 2 Window Reset button International configuration of ELCI/RCD 1 2 Window Reset button If power is interrupted to the printer, follow these steps: 1. Locate the safety device, using the U.S. or International Configuration (above). 2. Check to see if a red flag displays in the window of the safety device. 3. If the red flag does not display, press and release the black Reset button. The red flag displays and power is restored to the system.
Table of contents Notices iii Safety iii Laser safety iv Operational safety iv Introduction ix About this guide ix Conventions 1. Installation ix 1-1 Macintosh fax utility software package 1-1 Hardware and software requirements 1-1 Fax printer driver 1-2 Fax printer utility 1-2 Before you begin installation 1-2 Installation procedure 1-3 Initial configuration settings 1-4 Removing the fax utility 1-6 2.
TABLE OF CONTENTS Deleting phonebook entries 3-4 Options 3-4 Adding individuals to the phonebook 3 -5 Adding groups to the phonebook 3-5 Broadcasting a fax 3-5 4. Additional configuration options 4-1 Accessing the fax printer utility 4-1 Accessing the Fax Phonebook option 4-1 Incoming fax settings 4-1 Fax Printer Calendar 4-2 Print Activity Report 4-3 Clear Activity Report 4-3 5.
Introduction This guide is intended to be an information reference for the Macintosh fax modem option for your printer. About this guide The procedures presented in this guide were written with the assumption that the reader is a network administrator familiar with installing printers on networks, and is familiar with basic Macintosh operations and terminology. Conventions This manual uses conventions in text and procedures. Text conventions This manual uses the following conventions throughout.
INTRODUCTION Procedure conventions This guide uses the following conventions within printer control panel procedures.
1. Installation Each time you print with your Macintosh, the printer fax utility gives you the capability to send your document as a high-quality fax directly from your Macintosh to compatible fax machines or fax printers anywhere in the world. Macintosh fax utility software package The Macintosh fax utility software package is comprised of a program disk with the following items: • • • Build Fax Driver Fax Printer Utility Teach Text document.
INSTALLATION • Fax Utility for Macintosh disk that contains the following files: — Build Fax Driver — Fax Printer Utility. The following options, if installed on your printer, can increase performance when you fax and print at the same time, or when you send and receive complex faxes: • 20 MB of RAM installed on your printer • A high-capacity hard drive (to allow the spooling of fax jobs).
INSTALLATION The fax utility does not function correctly in any other setting, because this utility sends PostScript queries to the printer and feed back is returned only in the AppleTalk PostScript mode. 2. Make a backup copy of the program disk. Store the original disk in a safe place and use the backup copy. 3. Make sure you have at least 373 KB available on your hard disk to store the fax utility software. 4. On your hard disk, create a new folder for the fax utility software.
INSTALLATION 5. Click on Fax Printer to change the printer driver to the required printer. Make sure your printer is selected in the Select LaserWriter window. 6. Click on Continue if the system prompts you to select Page Setup and confirm the settings. This is necessary for the application to format documents correctly for the fax printer. 7.
INSTALLATION 3. Click on the [Options] radio button. The Fax Options window displays. N Note: Clicking the [Help] button at any point gives you advice and information about the current window. 4. Complete the fields in the Fax Options window. Refer to table 1-1. 5. Click on the [OK] button after you complete the entries in the Fax Options window. The Fax Destinations window displays. 6. Click on [Cancel] to complete the installation.
INSTALLATION Table 1-1. Fax Options window field descriptions (continued) Field/Button Description [Tone Dialing] [Pulse Dialing] These radio buttons enable you to specify whether your phone system uses tone dialing or pulse dialing. [Tone dialing] is the default setting. Long Distance Prefix Enter the prefix you must dial when calling outside your local calling area (for example, you may need to dial a “1” before dialing the long distance area code and number).
2. Operation This chapter explains how to use the fax utility to send faxes from any Macintosh that supports printing. You learn how to perform the following tasks: • Use the options provided in the Fax Destinations window • Fax a document directly from your Macintosh applications • Add an optional cover page • Transmit a PostScript file • Send a fax to multiple locations (broadcast fax) using your phonebook • Specify a time for a delayed fax transmission • Edit fax options.
OPERATION Table 2-1 lists and defines each of the options available from the Fax Destinations window. Table 2-1. Fax Destinations window options Field/Button Description Fax Number Enter the phone number of the destination fax. If more than one individual (or one or more groups) is selected in the scrolling list, the Fax Number field displays the word “Group” and you are unable to edit the field.
OPERATION 3. Click on the [Options] button, and make sure the current Fax Options configuration settings are appropriate for this fax transmission. For a description of the fax option settings, refer to table 1-1. If you wish to override any of the settings you specified during installation, simply change the setting and continue with this procedure. Change the Resolution setting to PostScript only if the receiving fax can support PostScript.
OPERATION 3. Enter your name, your company name, and your fax number in the From: fields. 4. Enter the phone number where you can be reached in the Voice Phone field. 5. Enter any comments that you wish to include on the cover page. 6. Click on the [Add To Phonebook...] button if you wish to add this recipient to the phonebook. Refer to “Creating your Fax Phonebook” in the “Phonebook” chapter. 7. Click on the [Send Fax] button to begin transmitting your fax and fax cover page.
OPERATION Delaying fax transmissions The fax utility gives you the option to delay transmission of a fax to selected individuals or groups. For example, you may choose to use this option to send a fax after business hours when the cost of telephone calls is lower. Follow these steps to delay sending your fax job: 1. Check the Chooser to see if Background Printing is on. This option allows your system to spool selected fax jobs to the print spool. 2. Disable your print option to stop printing.
OPERATION Editing fax options The “Installation” chapter provides instructions on setting initial fax configuration options. This section explains how to modify these settings, or to override them for an individual fax job. Follow these steps to edit existing fax configuration settings: 1. Click on the [Options...] button on the Fax Destinations window. The Fax Options window displays. 2. Make any necessary changes.
3. Phonebook This chapter contains instructions on how to to create, edit, use, and maintain your Fax Phonebook. Creating your Fax Phonebook There are three options for creating and adding names and phone numbers to your phonebook. They are: • • • Phonebook option in the Fax Destinations window Add To Phonebook option in the Fax Cover Page window Fax Phonebook option in the Fax Printer Configuration menu.
PHONEBOOK 4. If the destination is a fax printer (that is, it can receive faxes in PostScript format), refer to the “Transmitting a PostScript file” section in the “Operation” chapter for special conditions and considerations. Select the Can Receive PostScript checkbox to enable the PostScript Password field. For the destination fax printer, enter the PostScript password. The receiving party must provide the password to you. 5.
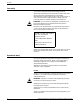
PHONEBOOK Using the Fax Phonebook Editor window When the Fax Phonebook Editor window is first displayed, a blank, rectangular area and a scroll bar is seen in the window. This rectangular area is for Fax Phonebook entries. The Fax Phonebook Editor window automatically displays the names associated with your entries (as you add entries in the Fax Destinations or Fax Cover Page windows).
PHONEBOOK 4. Click on the [Replace] button to update an entry or click on the [Add] button to create a new entry in the phonebook. When creating entries that share information (such as numerous individuals at the same company or the same fax number), the Add option is useful. Make the necessary changes to one entry and save it with a new name to save time. Deleting phonebook entries Follow these steps to delete Fax Phonebook entries: 1.
PHONEBOOK Adding individuals to the phonebook The procedures outlined in “Creating your Fax Phonebook” are also used to add names and fax numbers to your phonebook. Individuals and groups you add are displayed in the Fax Phonebook Editor window (previously blank). For more information, refer to the “Using the Fax Phonebook Editor window” and “Creating your Fax Phonebook” sections of this chapter.
PHONEBOOK Checking the current broadcast setting Follow the steps below to check the current setting: 1. Pull down the Apple menu. 2. Open the Chooser window. 3. Select Fax Printer. Broadcasting a fax Follow the steps below to broadcast a fax: 1. Click on the individual or group names that you want to send your fax to in the Fax Destination window. 2. Do one of the following: • Click on the [Send Fax] button to begin the fax transmission.
4. Additional configuration options The fax printer utility allows you to configure the settings for the following fax options: • • • • • Fax Phonebook Incoming Fax Settings Fax Printer Calendar Print Activity Report Clear Activity Report. N Note: If your printer is connected to an AppleTalk network, check with your system administrator before changing fax printer settings.
ADDITIONAL CONFIGURATION OPTIONS Follow the steps below to change incoming fax settings from your Macintosh: 1. Pull down the Fax Printer Configuration menu and select Incoming Fax Settings. The Fax Configuration window displays. 2. Enter the number of times the phone should ring, from 1 to 10 rings, before the fax printer answers the call in the Rings Before Answering field. 3. Enter the ID you wish to send to other fax machines in the Fax Machine ID field.
ADDITIONAL CONFIGURATION OPTIONS Table 4-1. Fax Printer Calendar Editor date and time parameters Field Parameters Month Enter a number between 1 and 12 to represent the current month, where 1 equals January, 5 equals May, and 12 equals December. Day Enter a number between 1 and 31 to represent the current day of the month. Year Enter a two- or four-digit number to represent the current year (for example, 93 or 1993).
5. Fax Setup menu This chapter provides the following information: • Fax Setup menu maps and item descriptions for your printer • Examples of how to use the printer control panel to change fax settings. Fax Setup menu The Fax Setup menu on your printer control panel provides four separate headings with options that allow you to configure the settings of the fax modem. This section explains the parameters that can be set within the Fax Setup menu.
FAX SETUP MENU Figure 5-1. Fax Setup menu SEND AND RECEIVE* 5. FAX SETUP FAX MODE SEND ONLY RECEIVE ONLY DISABLED CLOCK SETUP DATE Enter date (MO/DY/YR). 1/1 93 is the default. TIME SEND SETUP RECEIVE SETUP 5-2 Enter time (HR:MIN). 00:00 is the default. See figure 5-2 for Send Setup submenu. See figure 5-2 for Receive Setup submenu.
FAX SETUP MENU Figure 5-2. Send/Receive Setup submenus FAX MODE CLOCK SETUP SEND SETUP REDIAL COUNT Enter number of redials. 0 is the default. REDIAL INTERVAL Enter time between redials. 5 minutes is the default. TRANSMISSION STANDARD* RESOLUTION FINE SPEAKER ENABLE* DISABLE HEADER ENABLE* DISABLE RECEIVE SETUP RING COUNT Enter number of rings. 2 is the default.
FAX SETUP MENU Fax setup item descriptions The following items and options are available through the Fax Setup menu: • • • • Fax Mode Clock Setup Send Setup Receive Setup. The default settings for these items can be changed through the control panel. The changes you make to these menu items become the default settings, in place each time the printer is powered up. Fax Mode The Fax Mode can be set to send and receive, to send only, to receive only, or to be completely disabled through this menu item.
FAX SETUP MENU Time The time is entered in the following format: Time HR:MIN Where: HR is a one or two-digit number (01 through 24) representing the current hour of the day, based on a 24 hour clock. For example, 01 = 1:00 a.m., 12 = 12:00 noon, 15 = 3:00 p.m., and 24 = 12:00 midnight. MIN is a two-digit number (00 through 60) representing the number of minutes past the current hour. The factory default is set to 00:00.
FAX SETUP MENU Header The Header option enables or disables the printing of a header on the sent fax document. The factory default is on, Enable*. Receive Setup The Receive Setup options allow you to make changes to the settings which affect the incoming fax documents received at your printer. The Receive Setup options include: • • • • Ring Count Input Tray Automatic Tray Switching Output Destination.
FAX SETUP MENU Output Destination The Output Destination option for fax received jobs determines to which output tray pages are sent. Settings include: • • • Top Tray* Face-Up Tray High-Capacity Stacker (if installed). Fax setup configuration examples The examples provided in this section illustrate the step-by-step procedures for changing the fax configuration through the control panel.
FAX SETUP MENU L 7. Press the Enter key. 4. 1 * 8. Press the one key at the numeric keypad to direct scroll. 1. L RECEIVE SETUP / INPUT TRAY: TRAY 4 RECEIVE SETUP / INPUT TRAY: TRAY 1 9. Press the Enter key. 1. RECEIVE SETUP / INPUT TRAY: TRAY 1 * Followed by: 2. FAX SETUP / RECEIVE SETUP INPUT TRAY Disabling automatic tray switching for fax received This example shows how to disable automatic tray switching for fax received, immediately after setting the input tray. 2 1.
FAX SETUP MENU Setting the date In this example, the date is set to October 3, 1995 (10/03/95): M 1. Press the Main Menu key to enter the Main Menu. 1. 5 2. Press the five key at the numeric keypad to direct scroll. 5. L FAX SETUP CLOCK SETUP 5. Press the Enter key. 1. L FAX SETUP FAX MODE 4. Press the Scroll Next key. 2. L MAIN MENU FAX SETUP 3. Press the Enter key to enter the Fax Setup Menu. 1. 2 MAIN MENU PRINT MODE FAX SETUP / CLOCK SETUP DATE 6. Press the Enter key.
FAX SETUP MENU Setting the time This example would be done immediately after setting the date, and sets the time to 1:10 p.m: 2 1. Press the Scroll Next key. 2. L FAX SETUP / CLOCK SETUP: TIME 2. Press the Enter key. FAX SETUP / CLOCK SETUP: >> ENTER TIME (HR:MIN): 00:00 0 through 9 3. Use the numeric keypad to enter the time.
FAX SETUP MENU L 3. Press the Enter key to enter the Fax Setup Menu. 1. 22 4. Press the Scroll Next key two times. 3. L FAX SETUP SEND SETUP 5. Press the Enter key. 1. L FAX SETUP FAX MODE FAX SETUP / SEND SETUP REDIAL COUNT 6. Press the Enter key. SEND SETUP / REDIAL COUNT: >> ENTER NUMBER OF REDIALS: 000 5 7. Press the 5 key at the numeric keypad to enter the new redial count. SEND SETUP / REDIAL COUNT: >> ENTER NUMBER OF REDIALS: 005 L 8. Press the Enter key. 1.
FAX SETUP MENU MM 5. Press the Main Menu key two times to return to the top of the Main Menu. 1. L 5-12 MAIN MENU PRINT MODE 6. Press the Enter key to reenter print mode to begin printing.
6. Troubleshooting This chapter lists error messages that may appear on the printer control panel. Instructions on how to print a Fax Setup Report are also included. Fax Setup menu error messages The following messages are associated with the Fax Setup menu. These messages appear on the printer control panel display when you are entering numbers. Table 6-1. Fax Setup menu error messages Fax Setup menu error messages Result/Reason Action ILLEGAL NUMERIC INPUT--EXCEEDS 23 HOURS.
TROUBLESHOOTING Table 6-1. Fax Setup menu error messages (continued) Fax Setup menu error messages Result/Reason Action ILLEGAL NUMERIC INPUT--EXCEEDS 60 MINUTES. TO RETURN PRESS . Redial interval entry exceeds 60. Press the Clear/C key at the control panel. Enter a number between 1 and 60. ILLEGAL NUMERIC INPUT--EXCEEDS 10 RINGS. TO RETURN PRESS . Ring count entry exceeds 10. Press the Clear/C key at the control panel. Enter a number between 1 and 10.
TROUBLESHOOTING Table 6-1. Fax Setup menu error messages (continued) Fax Setup Menu error messages Result/Reason Action INVALID WITH TRAY 5 SELECTION: 1. CONTINUE 0. EXIT TO PREVIOUS STEP An output destination is selected (top tray or highcapacity stacker) that conflicts with Tray 5 selection. Use Scroll keys or direct scrolling to: [1] continue-- invalid entry is not changed. You can continue to make changes to the Fax Setup, but you must resolve this conflict before exiting the menu.
TROUBLESHOOTING Printer Configuration Report The Hardware Status section of the Printer Configuration Report reports the following information on the status of the fax modem: • When the fax modem is installed and working properly, “Installed” is reported. • When not installed, “Not Installed” is reported. • If the fax modem has failed, “Failed” is reported.
A. Performance enhancement Adding memory For the fax modem option to take advantage of RAM added to your printer beyond the standard eight megabytes, a “Restore to factory defaults” should be preformed at the printer after additional RAM is installed. This is done by simultaneously pressing the Reset/R and Pause/P keys at the printer control panel. A maximum of 20 MB of memory can be installed in your printer.
B. Related publications Related publications The following publications, as well as this manual, are available through the Xerox Documentation and Software Services (XDSS) (U.S. only). For additional details, see “XDSS ordering information” at the back of this manual. N Note: Xerox Canada, Ltd. and Rank Xerox Ltd. publications are available through your local sales representative or analyst. Xerox MRP Family publications The Xerox 4220/MRP and 4230/MRP library sets includes the following manuals.
RELATED PUBLICATIONS Publication U.S.
Index A accessing fax printer utility, 4-1 activity log, 4-3 Add option, 3-4 [Add To Phonebook...
INDEX Fax Phonebook Editor window, 3-3 to 3-4 Fax Phonebook Entry Editor window, 3-1 to 3-2 Fax Phonebook file, 1-7 Fax PostScript password field, 1-7 Fax Print window, 2-5 Fax Printer Calendar, 4-2 Fax Printer Configuration menu, 4-1 Fax Printer file, 1-3 Fax Printer Utility file, 1-3 Fax Printer Utility icon, 4-1 fax setup error messages, 6-4 Fax Setup menu, error messages, 6-1 to 6-3 fax utility, delaying transmissions, 2-5 Fax Utility for Macintosh disk, 1-1 to 1-2 removing software, 1-7 [Fax...
INDEX Print Monitor queue, 1-4 window, 2-5 print spool utility, 2-5 Printer Calendar Editor date and time parameters, 4-3 printer control panel, conventions used, x printer driver, 1-2 procedure conventions, ix to x [Pulse Dialing] field, 1-6 R radio interference, iii RAM, A-1 Receive Setup options, 5-6 to 5-7 receive setup, Printer Configuration Report, 6-4 Redial Count option, 5-5 redial count, Printer Configuration Report, 6-4 Redial Interval option, 5-5 redial interval, Printer Configuration Report, 6-