
Printer User Manual


Table Of Contents
- System Administrator Guide
- Contents
- Safety Notes
- Configuring the Printer
- Managing Printer Usage
- Using the Hard Drive and Flash Memory
- Maintaining the Printer
- Troubleshooting
- Installing Printer Options
- Index
Maintenance Kit Instructions
Chapter 4: Maintaining the Printer ❖ 4-11
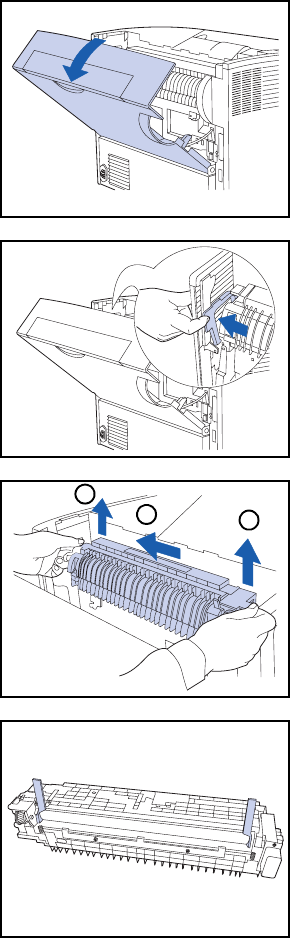
2
After waiting for the fuser to cool down, open the rear
cover.
3
While facing the back of the printer, push the lever on the
left side of the fuser.
4
Hold the fuser tabs with both hands as shown and remove
the fuser as follows:
1
Lift up the left end.
2
Slide the fuser to the left.
3
Lift up the right end, then remove the fuser assembly
from the printer.
5
Remove the spacers from the new fuser.
1
2
3