
Operation Manual


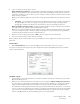

Table Of Contents
- Table of Contents
- Safety
- Welcome
- Scanner Setup
- Installation
- Loading Documents to Scan
- Scanning and Configuring One Touch
- Default One Touch Settings
- Scan from the One Touch Button Panel
- Changing the Button Settings
- Selecting Options for One Touch
- Scan Configurations
- File Formats
- Configure Before Scan
- Open Scanned Document(s)
- Transfer to Storage
- Burn to CD-ROM
- Printer or Fax
- PaperPort
- SharePoint
- FTP Transfer
- SMTP
- Email Applications
- Text Editors
- Still Image Client
- Image Editors
- PDF Applications
- Send to Application
- Scanning to Multiple Destinations
- Scanning with Job Separation
- Scanning with Optical Character Recognition (OCR)
- Selecting One Touch OmniPage OCR Options
- One Touch with Visioneer Acuity Technology
- Hardware Properties and Interface Behavior
- Scanning from TWAIN and WIA
- Scanning from ISIS
- Maintenance
- Regulatory Information
- Compliance Information
- Index
Xerox DocuMate 3125
User’s Guide
109
Scanning with Optical Character Recognition
(OCR)
Optical Character Recognition (OCR) converts text and numbers on a scanned page into editable text and numbers.
You can then work with the text and numbers to edit, spell check, change font or type size, sort, calculate, and so
forth.
The One Touch OmniPage Module or the OmniPage Pro software must be installed on your computer in order to use
the OCR options with the One Touch software and your Xerox scanner. The One Touch OmniPage Module was
automatically installed when you installed your driver from the installation disc.
To scan with OCR:
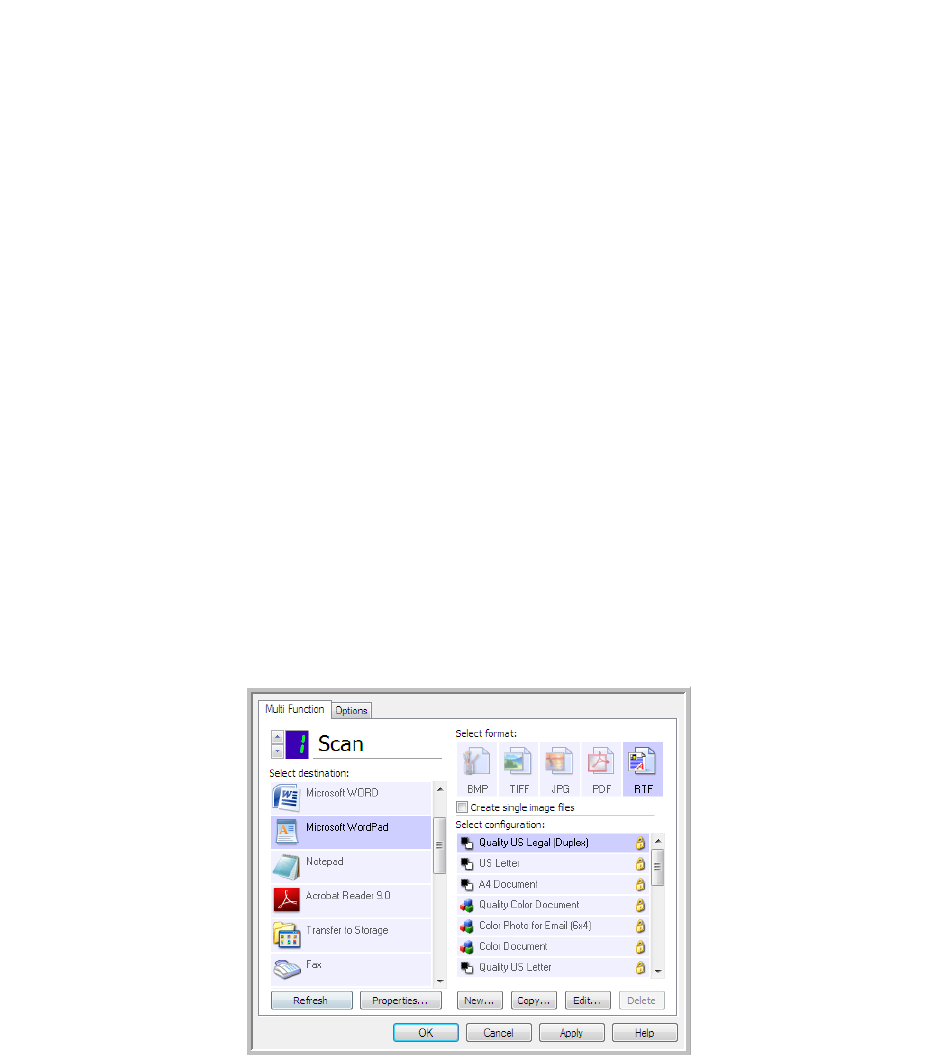
1. Open the One Touch Properties window.
2. Select a text editing program in the Select Destination list, then select a text file format in the Select format
panel.
For example, if you want to edit your document in Microsoft’s WordPad, select that application then choose a
file format such as TEXT or RTF.
3. Click on OK to save the changes and close the One Touch Properties window.
4. Press or click the One Touch button you set to scan with OCR.
Your scanned pages appear in the Destination Application with the text ready for editing and other text
processing.
Note: Xerox recommends that all OCR processing use the original factory settings for OCR scanning that came
with your scanner. When scanning with other settings, use at least 300 dpi for the resolution. If the original
documents are of poor quality or have a small type font, 400 dpi can be used as the maximum resolution.
Note: Some of the illustrations in this section may not look exactly as they appear on your computer’s screen. The
differences are minor and do not affect the steps to use the new features.