Customer Release Notes FreeFlow Express to Print, Makeready, Process Manager, Web Services, Print Manager, and Output Manager, version 8.0 for the Xerox EX Print Server, Powered by Fiery, version 1.0 This document contains information about the installation and use of FreeFlow Express to Print, Makeready, Process Manager, Web Services, Print Manager, and Output Manager, version 8.0, for the Xerox EX Print Server, Powered by Fiery, version 1.0.
Page 2 N OTE : If the network cannot automatically detect the digital press and EX8002, do the following: • Select DocuColor 8002/7002 Digital Press from the Printer Model list. • Select Xerox EX Print Server 1.0 IPP from the Print Controller/Server Type list. • Follow the Printer Registration instructions to complete the printer installation. Latest features Spot Color Matching The FreeFlow enablement supports Spot Color Matching.
Page 3 N OTE : If you switch to Color Wheel mode after adjusting color curves in Curves mode, all of your curve adjustments are lost. A warning message appears before you lose your adjustments. This occurs regardless of whether the changes come with the FreeFlow job, or are performed manually on the job in Image Viewer. Virtual Printers The FreeFlow enablement supports Fiery Virtual Printers, which allow you to print to the EX8002 using predefined settings saved as a special print queue.
Page 4 Limitations and workarounds Orientation The FreeFlow Output Manager does not support orientation options (Portrait and Landscape) for Fiery IPP print paths. Stapling Landscape jobs If you select 2 Staples - Top Portrait for a 17 x 11 or A3 Landscape job, the job staples at the bottom. If you select 2 Staples - Bottom Portrait for a 17 x 11 or A3 Landscape job, the job staples at the top.
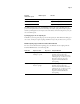
Page 5 FreeFlow EX8002 Stacker 2 HCS2 Stacker CSS Stacker Finishing Bypass HCS Bypass DFA Profiles The following EX8002 DFA Profiles are supported through the FreeFlow Custom finishing option. Enter the options in the FreeFlow Custom finishing dialog box exactly as follows: DFA Profile None Profile 1 Profile 2 Profile 3 Profile 4 Profile 5 Additional DFA profiles If you add an additional DFA profile, the new profile is displayed as “None” on the EX8002.
Page 6 FreeFlow submission option EX8002 queue Outcome Print Hold queue Job goes to Hold queue. Save Job goes to Hold queue. Print and Save Job goes to Hold queue. The EX8002 Print queue is the standard EX8002 queue. Jobs sent to the Print queue are processed and printed in the order in which they are received. Jobs prioritized by an operator with the job management tools and jobs sent via the Direct connection take priority over jobs sent to the Print queue.
Notes de mise à jour client FreeFlow Express to Print, Makeready, Process Manager, Web Services, Print Manager et Output Manager, version 8.0 pour le Xerox EX Print Server, piloté par Fiery, version 1.0 Ce document contient des informations concernant l’installation et l’utilisation de FreeFlow Express to Print, Makeready, Process Manager, Web Services, Print Manager et Output Manager, version 8.0 avec la version 1.0 du Xerox EX Print Server, piloté par Fiery.
Page 8 POUR CONFIGURER UNE APPLICATION FREEFLOW DE FAÇON À IMPRIMER VIA L’EX8002 1 A partir de l’application FreeFlow Printer Registration, cliquez sur Ajouter (Add). L’Assistant Ajout d’imprimante s’affiche. 2 Entrez l’adresse IP de l’EX8002 et cliquez sur Identify Configuration (Identifier la configuration) afin de détecter automatiquement le modèle d’imprimante et le type de serveur/contrôleur.
Page 9 Pour voir les résultats obtenus avec les options de saturation, de contraste et de dominante sur l’EX8002, procédez comme suit : 1 Envoyez une tâche couleur vers la queue Attente de l’EX8002. 2 Dans la Command WorkStation, sélectionnez la tâche et cliquez dessus avec le bouton droit de la souris. 3 Sélectionnez Traiter et attendre. 4 Une fois la tâche rippée et en surbrillance (couleur or sombre), cliquez dessus avec le bouton droit de la souris. 5 Sélectionnez Démarrer EFI ImageViewer.
Page 10 Impression de fichiers RDO (Raster Document Object) contenant des intercalaires avec onglet L’EX8002 prend en charge les intercalaires avec onglet dans les applications FreeFlow comme Makeready. Pour que le texte s’imprime bien sur les onglets, envoyez la tâche directement à l’EX8002 sans la prévisualiser dans la Command WorkStation ni modifier ses paramètres dans les propriétés de la tâche.
Page 11 Utilisation de maquettes EX8002 FreeForm à partir de FreeFlow Pour utiliser une maquette EX8002 FreeForm à partir de FreeFlow, procédez comme suit : 1 Sélectionnez Background Form (Maquette d’arrière-plan) dans l’onglet Image Adjustment (Réglage de l’image) de FreeFlow. 2 Saisissez le numéro FreeForm, tel qu’il est attribué sur l’EX8002, dans la boîte de dialogue Form Name (Nom de maquette).
Page 12 Profils DFA Les profils DFA suivants de l’EX8002 sont pris en charge via l’option de finition personnalisée de FreeFlow. Entrez les options dans la boîte de dialogue de finition personnalisée de FreeFlow exactement comme suit : Profil DFA Non Profil 1 Profil 2 Profil 3 Profil 4 Profil 5 Profils DFA supplémentaires Si vous ajoutez un profil DFA, le nouveau profil s’affiche sous la forme « Non » sur l’EX8002.
Page 13 La queue Impression de l’EX8002 est également sa queue standard. Les tâches envoyées vers la queue Impression sont traitées et imprimées dans l’ordre de leur réception. Les tâches dont la priorité a été définie par un opérateur à l’aide des outils de gestion des tâches et les tâches envoyées via la connexion Direct sont prioritaires sur celles qui ont été envoyées vers la queue Impression.
Note di release per l’utente FreeFlow Express to Print, Makeready, Process Manager, Web Services, Print Manager e Output Manager, versione 8.0 per Xerox EX Print Server, Powered by Fiery, versione 1.0 Questo documento contiene informazioni relative all’installazione e all’uso di FreeFlow Express to Print, Makeready, Process Manager, Web Services, Print Manager e Output Manager, versione 8.0, per Xerox EX Print Server, Powered by Fiery, versione 1.0.
Pagina 16 N OTA : Se la rete non riesce a rilevare automaticamente la macchina da stampa digitale e EX8002, fare quanto segue: • Selezionare DocuColor 8002/7002 Digital Press dall’elenco dei modelli di stampanti. • Come tipo di server/controller di stampa, selezionare Xerox EX Print Server 1.0 IPP. • Seguire le istruzioni di Printer Registration per completare l’installazione della stampante.
Pagina 17 7 Per visualizzare contrasto e dominante di colore, selezionare la scheda Curve e prendere nota di come sono cambiate le curve. Le curve dei colori in ImageViewer rispecchiano le regolazioni effettuate in FreeFlow. Image Viewer consente di apportare le regolazioni ai colori in un lavoro in modalità Ruota cromatica o Curve. Nell’implementazione IPP di FreeFlow, EX8002 usa la modalità Curve per regolare i colori per saturazione, contrasto e dominante di colore.
Pagina 18 N OTA : I separatori devono essere programmati come separatori pretagliati di formato 9 x 11 pollici, non 8,5 x 11 pollici. Quando si invia un file RDO su EX8002 e si inseriscono separatori da Command WorkStation, il testo dei separatori non viene stampato correttamente sul lato destro. Per ovviare al problema, inserire i separatori in FreeFlow Makeready o inviare il lavoro su Command WorkStation come file PDF (non in formato RDO). N OTA : Il file deve essere salvato con l’estensione .RDO.
Pagina 19 Numero accettabile di inserti Non è consentito impostare un numero di inserti maggiore di 999, anche se FreeFlow ne consente l’immissione. Se si seleziona un numero di inserti maggiore di 999 da FreeFlow, si potrebbero avere risultati imprevisti. Vassoi di uscita di FreeFlow e destinazioni di uscita di EX8002 Per informazioni sulla corrispondenza dei vassoi di uscita di FreeFlow alle destinazioni di uscita di EX8002, vedere la seguente tabella.
Pagina 20 Profili DFA aggiuntivi Se si aggiunge un profilo DFA, il nome del nuovo profilo appare come “None” (Nessuno) su EX8002. Se non è richiesto un profilo, FreeFlow Print Manager usa il profilo predefinito della stampante. Stampa su EX8002 con l’opzione Job Submission (Inoltro lavoro) di FreeFlow Se si usa l’opzione Job Submission (Inoltro lavoro) di FreeFlow, selezionare la coda di stampa di EX8002 per ottenere il risultato desiderato.
Pagina 21 Supporto della graffatura su EX8002 con il percorso di stampa IPP di FreeFlow Per ovviare a eventuali problemi quando si stampano lavori su EX8002 per cui à specificata la graffatura con il percorso di stampa IPP di FreeFlow, vedere la tabella seguente. Formato del supporto Impostazione graffatura Alimentazione Problema/soluzione carta Tutti i formati Graffa singola Orizzontale - in alto a sinistra SEF La graffa viene inserita in basso a destra di una pagina in orizzontale.
Release-Informationen FreeFlow Express to Print, Makeready, Process Manager, Web Services, Print Manager und Output Manager, Version 8.0, für den Xerox EX Print Server, Powered by Fiery, Version 1.0 Dieses Dokument enthält Hinweise zum Installieren der FreeFlow Komponenten Express to Print, Makeready, Process Manager, Web Services, Print Manager und Output Manager, Version 8.0, im Hinblick auf den Xerox EX Print Server, Powered by Fiery, Version 1.0, sowie Hinweise zur Verwendung dieser Komponenten.
Seite 24 Einrichten des Druckpfads Damit Sie Aufträge aus FreeFlow Anwendungsprogrammen auf dem EX8002 drucken können, müssen Sie die folgenden vorbereitenden Schritte ausführen. FREEFLOW ANWENDUNGSSOFTWARE FÜR DRUCKAUSGABEN AUF DEM EX8002 EINRICHTEN 1 Wählen Sie „Add“ (Hinzufügen) in der FreeFlow Komponente „Printer Registration“ (Druckerregistrierung). Daraufhin wird der Assistent zum Hinzufügen eines Druckers gestartet.
Seite 25 Kontrast, Sättigung und Farbton Mit der FreeFlow Aktivierung werden nun auch die Einstellungen für den Kontrast, die Sättigung und den Farbton unterstützt und übernommen. H INWEIS : Für die ordnungsgemäße Funktionsweise muss die Fiery Patchsoftware „1-12S4R5“ installiert werden. Sie können diese Datei mit dem Dienstprogramm System-Update oder mithilfe der WebTools auf den EX8002 herunterladen.
Seite 26 Weitere Hinweise zu virtuellen Druckern finden Sie im Dokument Dienstprogramme der Anwenderdokumentation in den Abschnitten über die Anwendung Command WorkStation. H INWEIS : Nachdem Sie in der Fiery Umgebung einen neuen virtuellen Drucker erstellt haben, müssen Sie den EX8002 neu starten, damit dieser neue virtuelle Drucker im FreeFlow Druckpfad registriert wird.
Seite 27 H INWEIS : Die Datei muss mit der Dateierweiterung „.RDO“ gespeichert werden. Wenn Sie den Namen ändern, der in den Job Notes (auftragsspezifische Notizen) enthalten ist, müssen Sie darauf achten, dass der Auftragsname die Namenserweiterung „.RDO“ aufweist. Eine RDO-Datei, die vorgeschnittene Registermedien umfasst, kann außerdem nur an die EX8002 Warteschlange „Drucken“ oder „Halten“ gesendet werden.
Seite 28 Maximale Anzahl von Einlegerseiten Mehr als 999 Einlegerseiten werden nicht unterstützt, obwohl in FreeFlow ein höherer Wert eingegeben werden kann. Wenn Sie in FreeFlow einen höheren Wert als 999 wählen, kann dies zu unerwarteten Ergebnissen führen. FreeFlow und EX8002 Ausgabeziele Der folgenden Tabelle können Sie entnehmen, welche FreeFlow und EX8002 Ausgabeziele einander entsprechen.
Seite 29 Zusätzliche DFA-Profile Für ein zusätzlich hinzugefügtes (neues) DFA-Profil wird auf dem EX8002 die Einstellung „Nein“ („None“) angezeigt. Wenn kein Profil benötigt wird, verwendet die FreeFlow Komponente Print Manager das „Druckerstandard“-Profil.
Seite 30 Angabe der Papiergröße für zu heftende Aufträge In der FreeFlow Umgebung muss für alle zu heftenden Aufträge die Papiergröße eingestellt werden. Ein Auftrag, der geheftet werden soll und für den die Einstellung „Druckerstandard“ als Papiergröße eingestellt wird, wird vom EX8002 zurückgewiesen und nicht gedruckt.
Notas de la versión para el cliente FreeFlow Express to Print, Makeready, Process Manager, Web Services, Print Manager y Output Manager, versión 8.0 para el Xerox EX Print Server, con tecnología Fiery, versión 1.0 Este documento contiene información acerca de la instalación y uso de FreeFlow Express to Print, Makeready, Process Manager, Web Services, Print Manager y Output Manager, versión 8.0, para el Xerox EX Print Server, con tecnología Fiery, versión 1.0.
Página 32 Configuración de la ruta de impresión Utilice el siguiente procedimiento para configurar una aplicación FreeFlow para imprimir al EX8002. PARA CONFIGURAR UNA APLICACIÓN FREEFLOW PARA IMPRIMIR AL EX8002 1 En la aplicación FreeFlow Printer Registration, seleccione Add (Agregar). Aparece el cuadro de diálogo Add Printer Wizard (Asistente para agregar impresora).
Página 33 Contraste, saturación y tono de color La activación de FreeFlow admite las características Contraste, Saturación y Tono de color N OTA : Para que estas características funcionen, debe instalar el módulo 1-12S4R5 del Fiery, que puede descargarse en el EX8002 desde Actualizaciones del sistema o WebTools. Para ver cómo se correlacionan la Saturación, Contraste y Tono de color en el EX8002, realice los siguientes pasos: 1 Envíe un trabajo de color a la cola En espera del EX8002.
Página 34 Impresión de pestañas Impresión de pestañas La impresión con pestañas se admite tanto para pestañas cortadas completas como precortadas. Las pestañas precortadas se admiten tanto en los insertos de página como en las páginas de excepción. Cuando se utilizan para los insertos de página, se asignan a la función Insertar pestaña del Fiery dentro de Papeles mezclados. Cuando se utilizan para las páginas de excepción, se asignan a la función Insertar pestaña del Fiery dentro de Papeles mezclados.
Página 35 Limitaciones y soluciones temporales Orientation (Orientación) El FreeFlow Output Manager no admite las opciones de orientación (Vertical y Horizontal) para las rutas de impresión IPP del Fiery. Engrapado de trabajos horizontales Si selecciona 2 grapas - Arriba vertical para un trabajo horizontal de 17 x 11 o A3, el trabajo se engrapa en la parte inferior. Si selecciona 2 grapas - Abajo vertical para un trabajo horizontal de 17 x 11 o A3, el trabajo se engrapa en la parte superior.
Página 36 Ubicaciones de salida de FreeFlow y Destinos de salida del EX8002 Para obtener información acerca de cómo se corresponden las Output Locations (Ubicaciones de salida) de FreeFlow con los Destinos de salida del EX8002, consulte la siguiente tabla. FreeFlow EX8002 Printer’s Default (Por omisión de la impresora) Por omisión de la impresora System Specified (Especificado por el sistema) Sel. auto.
Página 37 Impresión al EX8002 usando la opción Job Submission (Envío de trabajos) de FreeFlow Si utiliza las opciones de Job Submission (Envío de trabajos) de FreeFlow, seleccione la cola Impresión del EX8002 para obtener el resultado previsto. En la siguiente tabla se describe el resultado cuando FreeFlow está conectado a las diferentes colas del EX8002. Opción de envío de FreeFlow Cola del EX8002 Resultado Print (Imprimir) Cola Impresión El trabajo se imprime.
Página 38 Especificación del tamaño de papel en los trabajos engrapados En FreeFlow, debe especificar el tamaño de papel de todos los trabajos engrapados. Si se utiliza el tamaño de papel Por omisión de la impresora y el trabajo requiere engrapado, el EX8002 rechaza el trabajo y no lo procesa. Compatibilidad de engrapado del EX8002 con la ruta de impresión IPP de FreeFlow.
Notas de versão do cliente FreeFlow Express to Print, Makeready, Process Manager, Web Services, Print Manager e Output Manager, versão 8.0 para o Xerox EX Print Server, otimizado pelo Fiery, versão 1.0 Este documento contém informações sobre a instalação e a utilização do FreeFlow Express to Print, Makeready, Process Manager, Web Services, Print Manager e Output Manager, versão 8.0, para o Xerox EX Print Server, otimizado pelo Fiery, versão 1.0.
Página 40 Configuração do caminho de impressão Utilize o procedimento a seguir para configurar um aplicativo do FreeFlow para imprimir no EX8002. PARA CONFIGURAR UM APLICATIVO DO FREEFLOW PARA IMPRIMIR NO EX8002 1 No aplicativo FreeFlow Printer Registration, selecione Add (Adicionar). A caixa de diálogo Assistente para adicionar impressora é exibida.
Página 41 Para visualizar como a saturação, o contraste e o tom da cor são mapeados no EX8002, execute as seguintes etapas: 1 Envie a tarefa colorida para a fila Em espera do EX8002. 2 Na Command WorkStation, selecione a tarefa e clique com o botão direito do mouse nela. 3 Selecione Processar e esperar. 4 Depois que a tarefa for processada em RIP e destacada na cor dourado escuro, clique com o botão direito do mouse nela. 5 Selecione Launch EFI Image Viewer (Iniciar o EFI Image Viewer).
Página 42 Impressão de arquivos RDO (Raster Document Object) que contêm separadores pré-cortados O EX8002 suporta separadores pré-cortados em aplicativos do FreeFlow, como o Makeready. Para garantir que o texto seja impresso nos separadores, envie a tarefa diretamente para o EX8002 sem visualizá-la na Command WorkStation ou alterar as configurações em Propriedades da tarefa.
Página 43 Cancelamento de tarefas Cancelar uma tarefa no FreeFlow Status (Status do FreeFlow) não cancela a tarefa no EX8002. Como uma alternativa, cancele a tarefa na Command WorkStation. Tarefas com escala automática e Tablóide As imagens cortadas ocorrem quando as tarefas em paisagem do FreeFlow com Escala automática são impressas em papel 11 x 17 ou A3. A imagem é deslocada para cima e para a direita.
Página 44 Perfis DFA Os Perfis DFA do EX8002 a seguir são suportados por meio da opção de acabamento personalizado do FreeFlow. Digite as opções na caixa de diálogo de acabamento personalizado do FreeFlow exatamente como a seguir: Perfil DFA Nenhum Perfil 1 Perfil 2 Perfil 3 Perfil 4 Perfil 5 Perfis DFA adicionais Se um perfil DFA adicional for incluído, o novo perfil será exibido como “Nenhum” no EX8002. Se nenhum perfil for necessário, o FreeFlow Print Manager usará o perfil padrão da impressora.
Página 45 A fila Impressão do EX8002 é a fila padrão do EX8002. As tarefas enviadas para a fila Impressão são processadas e impressas na ordem em que são recebidas. As tarefas priorizadas pelo operador com as ferramentas de gerenciamento de tarefas e as tarefas enviadas pela conexão Direta têm prioridade sobre as tarefas enviadas para a fila Impressão. Especificação do tamanho do papel para tarefas grampeadas No FreeFlow, é necessário especificar o tamanho do papel para todas as tarefas grampeadas.
Versienotities voor de klant FreeFlow Express to Print, Makeready, Process Manager, Web Services, Print Manager en Output Manager, versie 8.0 voor de Xerox EX Print Server, ondersteund door Fiery, versie 1.0 Dit document bevat informatie over de installatie en het gebruik van FreeFlow Express to Print, Makeready, Process Manager, Web Services, Print Manager en Output Manager, versie 8.0, voor de Xerox EX Print Server, ondersteund door Fiery, versie 1.0.
Pagina 48 O PMERKING : Als het netwerk de digitale pers en de EX8002 niet automatisch kan detecteren, gaat u als volgt te werk: • Selecteer DocuColor 8002/7002 Digital Press in de lijst met printermodellen. • Selecteer Xerox EX Print Server 1.0 IPP in de lijst met afdrukcontrollers/servertypen. • Volg de aanwijzingen van Printer Registration om de installatie van de printer te voltooien. Nieuwste functies Steunkleuraanpassing De FreeFlow-activering ondersteunt Steunkleuraanpassing.
Pagina 49 De kleurencurven in Image Viewer komen overeen met de wijzigingen die in FreeFlow zijn aangebracht. Image Viewer staat kleuraanpassing in een taak toe in zowel de modus Kleurenwiel als Curves. In de FreeFlow IPP-implementatie maakt de EX8002 gebruik van de modus Curves om kleuren aan te passen voor verzadiging, contrast en kleurzweem. O PMERKING : Wanneer u schakelt naar de modus Kleurenwiel nadat u kleurencurven in de modus Curves hebt aangepast, gaan alle aanpassingen aan curven verloren.
Pagina 50 O PMERKING : Tabbladen moeten worden geprogrammeerd als voorgesneden tabbladen van 9 x 11 inch, niet 8,5 x 11 inch. Wanneer u een RDO-bestand verzendt naar de EX8002 en tabbladen invoegt in Command WorkStation, wordt de tabtekst niet goed afgedrukt aan de rechterkant. U kunt dit vermijden door tabbladen in te voegen in FreeFlow Makeready of de taak als PDF-bestand (niet als RDO-bestand) te verzenden naar Command WorkStation. O PMERKING : Het bestand moet worden opgeslagen met de extensie .RDO.
Pagina 51 Taken met Automatisch schalen en Tabloid-formaat Wanneer liggende FreeFlow-taken met Automatisch schalen worden afgedrukt op 11 x 17of A3-papier, kunnen afbeeldingen worden afgekapt. De afbeelding wordt naar boven en naar rechts verschoven. Aanvaardbare hoeveelheid tussenvellen Een hoeveelheid tussenvellen groter dan 999 wordt niet ondersteund, ook al kunt u in FreeFlow grotere waarden invoeren.
Pagina 52 Aanvullende DFA-profielen Als u een aanvullend DFA-profiel toevoegt, wordt het nieuwe profiel op de EX8002 weergegeven als “Geen”. Als geen profiel vereist is, gebruikt FreeFlow Print Manager het standaardprofiel van de printer. Afdrukken naar EX8002 via de FreeFlow-taakverzendingsoptie Als u FreeFlow-taakverzendingsopties gebruikt, moet u de afdrukwachtrij van de EX8002 selecteren om het verwachte resultaat te verkrijgen.
Pagina 53 Ondersteuning van nieten door de EX8002 met het FreeFlow IPP-afdrukpad Raadpleeg de onderstaande tabel voor problemen en oplossingen bij het afdrukken van taken met nieten naar de EX8002 met het FreeFlow IPP-afdrukpad. Mediagrootte Selectie nieten Papierinvoer Probleem/oplossing Alle formaten Enkele niet Liggend - links boven SEF Taken worden afgedrukt met nietjes rechtsonder op een liggende pagina.