
Installation Guide

52 Installing User Software on a Mac OS Computer
Setting up the Fiery XJ in the Chooser
After you install the AdobePS printer driver and PPD file (see “Setting up PostScript
printing with Mac OS” on page 50), you need to set up the Fiery XJ in the Chooser in
order to take full advantage of its features. This section describes how to set up the
Fiery XJ with the AdobePS printer driver.
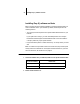
TO SET UP THE FIERY XJ IN THE CHOOSER:
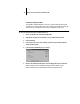
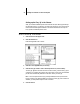
1. Select Chooser from the Apple menu.
2. Click the AdobePS icon.
Make sure AppleTalk is set to Active.
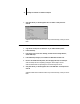
3. Select the correct AppleTalk Zone, if necessary.
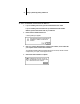
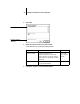
4. Select the Fiery XJ from the “Select a PostScript Printer” list, and click Setup.
The Fiery XJ appears in the list in the form of <server name>_<device name>_<print
connection>. The device name (DocuColor) is the name of your copier. The AdobePS
printer driver automatically selects the correct PPD file for your Fiery XJ.
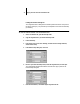
NOTE: The Hold queue for the Fiery XJ is always enabled; the Print queue and the
Direct connection may also be available. If more than one Fiery XJ print connection is
available, you must perform step 4 for each connection.
5. Close the Chooser.