
Installation Guide


22 Installing User Software on a Windows Computer
4. Click OK. When prompted, restart Windows.
5. In the Main group, double-click Control Panel, then double-click Printers.
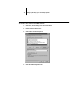
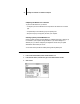
6. In the Printers window, select the Fiery XJ and click Connect.
7. Click Network, or, if you are printing to a file, select File.
Printing to a file is useful if the printer is elsewhere or off-site. However, if you select
the FILE port, you cannot print to a printer until you select a network or printer port.
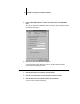
If you select Network, the next window depends on the NetWare client driver version.
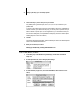
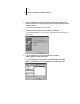
8. If the Network Printer Connections dialog box is displayed, select the port in the
Printer connections box.
9. In the Available queues list box, select the server and queue name that correspond to
the Fiery XJ.
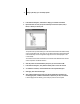
10. Click the Capture button, then click the Close button.
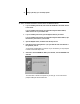
The Connect dialog box is displayed with the network path to the Fiery XJ.
11. Click OK in the Connect dialog box.
The Printers window appears again, with the selected port next to the selected printer
name in the Installed Printers list box.
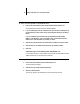
12. Click Close in the Printers dialog box.
You are now ready to print to the Fiery XJ from Windows applications. When you
select Print, jobs are routed to the print queue on the NetWare file server, and then
sent to the Fiery XJ. The network administrator should verify the network connection
by printing a test document from each networked computer that will use the Fiery XJ.
Setting up PostScript printing with Windows NT 4.0
You can use the following procedure whether you are installing from the User Software
CD or with installer files downloaded using the Installer WebTool.