
Installation Guide


18 Installing User Software on a Windows Computer
Setting up PostScript printing with Windows 3.1x
You can use the following procedure whether you are installing from the User Software
CD or with installer files downloaded using the Installer WebTool.
TO INSTALL THE ADOBE POSTSCRIPT PRINTER DRIVER FOR
WINDOWS 3.1X:
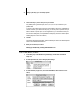
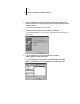
1. In the Main window, double-click the Control Panel icon.
If there is an Adobe PostScript Printers icon in the Control Panel window, proceed to
“To install the Fiery XJ PPD file for Windows 3.1x:” on page 19. Otherwise, install
the Adobe PostScript printer driver from the User Software CD as described below.
2. Exit all applications and close all windows.
3. Insert the User Software CD into the CD-ROM drive.
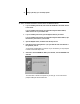
4. In the Windows Program Manager, choose Run from the File menu, and then click
Browse.
5. If you are installing from the CD, select the CD-ROM drive from the Drives: box. In the
Directories box, double-click to open the English\Instalrs\Ps_drvr\Win_31 folders.
If you are installing from the installer files you downloaded with the Installer
WebTool, select the drive you installed the files to from the Drives: box. In the
Directories box, double-click to open the Prntdrvr\Ps_drvr\Win_31 folders.
6. Select the Setup.exe file, and click OK.
7. Click OK in the Run dialog box.
8. Click Accept in the PostScript Printer Driver Setup dialog box.
9. Click Read to view the README file. When you are finished, close the README file and
click Continue.
The necessary files are installed to your hard disk. When installation is complete, the
PostScript Printer Driver Setup dialog box appears.
10. Click Restart Windows.