
Installation Guide

13 Setting up the Fiery XJ as a PostScript printer
TO SET UP IPX (NOVELL) PRINTING WITH WINDOWS 95:
1. Click the Start button, choose Settings, and then choose Printers.
2. Click the Fiery XJ icon, and choose Properties from the File menu (or right-click the
icon and left-click Properties).
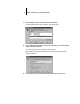
3. Click the Details tab and click Add Port.
A list of connection options is displayed.
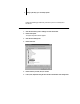
4. In the Add Port dialog box, specify the network path, or click Browse for a display of
your network environment.
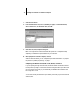
5. If you are using a NetWare file server, double-click the icon of the NetWare file server
you want to use for printing to the Fiery XJ.
6. Click the printer icon labeled with the NetWare print queue you will use and click OK.
7. In the Add Port dialog box, verify that the network path is updated and click OK.
You are ready to print from the workstation.
Your print jobs will be sent to the specified print queue on the Novell file server. The
Fiery XJ polls the file server and if jobs are present, they are sent to the Fiery XJ.
To confirm the connection, you can print a Windows 95 test page.
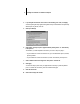
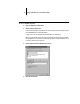
8. Click the General tab, click Apply, and then click Print Test Page.
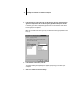
9. The Job Notes window appears. Enter user and job identification information for
accounting purposes, or whatever information is required at your site, and click OK.