CONTENT 1 Normal Printing 2 Secure Printing 3 Faxing from PC 4 Scanning documents into mailbox 5 Retrieve Scanned Image 6 Scanning Documents to Ifax / Email Service : 6766-8888 ( press 1 ) Serial Nos : ……………..
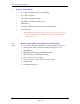
Basic Scanning / Printing Guide 1. Normal Printing + Click File, Print + Select Xerox printer + Click Properties (optional feature) ← Select duplex (long or short edge binding) for double side printing. ↑ Select watermark if require. ) + 2. Watermark can also be created. Click OK to print. Secure Printing 2.1 2.
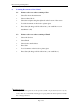
Basic Scanning / Printing Guide + 3. Faxing from PC (only available if machine connected to fax) + Click File, Print + Select Xerox printer + Click properties + Change the job type to Fax + Click OK + Click OK again + Fax recipient list will appear + Input the name and fax number + Click add to list ) The above two steps can be repeated to enter multi fax number for broad casting. + Select fax option if require a transmission report to be printed out after the fax is successful.
Basic Scanning / Printing Guide 4. Scanning documents into Mailbox. 4.1 4.2 Steps to follow when scanning a document + All Services + Select Scan to Mailbox + Select desire Mailbox number (ranging from 1 – 200) + Key in Password (at least 4 digits) + Press Confirm + Press Close + Select desire features + Insert document into feeder + Press Start Points to take note when scanning. ) A mailbox must be created at the machine before scanning.
Basic Scanning / Printing Guide 5. Retrieve Scanned Image + Go to Start, Programs, Accessories, Imaging + Go to File, Scan New + Choose the appropriate scanner + Input Mailbox Number and Password + Click Import + Document Will be imported and erase from the machine + Save the image ) 5.2 Steps Any application with twin acquire will be able to do the retrieval of the image from the Xerox Machine. E.g. Photoshop, Imaging, Adobe writer, etc.
Basic Scanning / Printing Guide 6. Scanning Documents to Ifax / Email 6.1 Points to take note when scanning to Ifax + Select Fax from the main menu + Select Address Book + Select the recipient using the alpha tab at the bottom of the screen + Load the document on the feeder or platen glass + Press Start (the image will be deliver into your email inbox as an attachment *.tiff) 6.
Basic Scanning / Printing Guide Page 6 of 5