
User's Manual


4
3. The .dlm file can be submitted to the device via several methods, but upgrades must first be enabled
at the device's Web User Interface (Web UI):
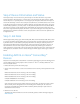
a. On the Web UI (CWIS) navigate to Properties > General Setup > Machine Software > Upgrades.
b. Make sure the Upgrades Enabled box is checked.
4. The following two methods are available for submitting the .dlm to the system once upgrades are
enabled:
a. Via the Manual Upgrade Web UI page:
i. Navigate to Properties > General Setup > Machine Software > Manual Upgrade.
ii. Select the Browse... button and find the .dlm file.
iii. Select the Install Software button.
b. Via a print protocol such as LPR/LPD or Port 9100 (Raw TCPIP Printing): Submit the .dlm file from
(2.) above to the device as a print job.
If the patch installation succeeds, the .dlm will update the system, install AirPrint, enable it, print a
confirmation sheet and then reboot. Upon reboot the Network Controller (NC) version will have
".AP" appended to it to indicate that the AirPrint patch has been applied. If the patch fails (due to
incompatibility), it will not install and a failure confirmation sheet will print.
5. AirPrint should now be enabled at the device. If however, it has been disabled, an administrator can
re-enable it by following the steps below:
a. You will need the device's IP address to access the AirPrint configuration screen. You can find the
IP address at the UI screen. From the front panel in the device select the "Machine Status"
button, then select the "Machine Information" tab. The IP address should be visible from this
screen. You can also print a configuration report by selecting the "Information Pages" button,
selecting "Configuration Report", and then tapping the "Print" button. The configuration report
will contain the IP address.
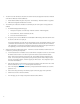
b. Open the Xerox device’s web interface by entering the IP address of the Xerox device into a web
browser’s address box (http://<IP>). This will open the web interface.
c. Click on the Properties tab (enter credentials if prompted: default administrative user is: admin,
password: 1111).
d. Select Connectivity, then Setup. This will bring up the Connectivity page in the right frame.
e. Under Protocols look for and select AirPrint.
f. From this page you can modify configuration values that affect AirPrint.