
User's Manual
Printing
ColorQube 8700/8900 Color Multifunction Printer 77
User Guide
Using the watermark options, you can do the following:
• Create a watermark or edit an existing watermark using the Watermark Editor:
− Name allows you to give the new watermark a unique name.
− Options enables you to use text, time stamps, or graphics for the watermark.
− Text provides a field in which you enter the text to be printed as the watermark.
− Font and Color determine the font, size, style, and color of the watermark.
− Angle sets the degree of rotation applied to the text or graphics used for the watermark.
− Density defines how faint or how prominent the watermark appears on the pages.
− Position from center determines the position of the watermark on the page. The default
position is in the center of the printed pages.
• Place a watermark on the first page or on every page in a document.
• Print a watermark in the foreground or background or blend it with the print job.
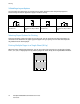
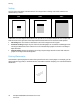
Printing Mirror Images
If the PostScript driver is installed, you can print pages as a mirror image. Images mirror left to right
when printed.
Creating and Saving Custom Paper Sizes
You can print custom-size paper from Tray 1 only. Custom-size paper settings are saved in the print
driver and are available for you to select in all your applications. For paper sizes that are supported for
each tray, see Supported Custom Paper Sizes on page 42.
To create and save custom sizes for Windows:
1. Click the Paper/Output tab of the print driver.
2. Click the arrow at the right of the Paper field, then select Other Size > Output Paper Size > New.
3. In the New Custom Size window, enter the height and width of the new size, then select the units.
4. Enter a title for the new size in the Name field, then click OK to save.
To create and save custom sizes for Macintosh:
1. In the application, click File > Page Setup.
2. Click Paper Sizes, then select Manage Paper Sizes.
3. To add a new size, in the Manage Paper Sizes window, click the plus sign (+).
4. Double-click Untitled at the top of the window and type a name for the new custom size.
5. Enter the height and width of the new custom size.
6. Click the arrow to the right of the Non-Printable Area field and select the printer from the list. Or set
the top, bottom, right, and left margins for User Defined margins.
7. To save the settings, click OK.