
Installation Guide


Density Uniformity Adjustment
6-10 Simple Image Quality Adjustment Tool
Installation and Adjustments Guide
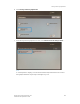
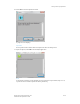
11. At the Input Address window, confirm or enter the machine’s IP Address, and then click OK.
Note
If the Open File - Security Warning window displays, click Run.
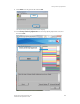
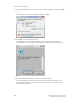
12. Select Yes to save the adjustment values.
The SIQA application accesses and reads the scanned image data from the printer
folder/Mail Box, analyzes the data, and automatically calculates the adjustment values.
A progress indicator screen displays.
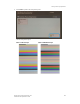
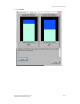
13. Review the information displayed on the Correction_Result screen.
This screen displays after the analysis and calculation processes have completed. The
Correction Result information displays the possible improvement to correct inboard-to-
outboard density variation.