
User's Guide Color Laser Printer C55/C55mp
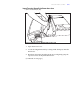


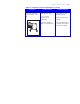
Table Of Contents
- Xerox DocuPrint C55/C55mp Color Laser Printer User’s Guide
- Table of Contents
- Chapter 1: Introduction
- Chapter 2: Introduction to Your C55 Printer
- Chapter 3: Print Media
- Chapter 4: The Control Panel
- Chapter 5: Special C55 Printer Driver Options
- Chapter 6: Troubleshooting
- Chapter 7: Printer Maintenance
- Chapter 8: Optional Equipment
- Chapter 9: Network Printer Services
- Appendix A: Safety Notes
- Appendix B: Special Notices
- Appendix C: Printer Technical Specifications
- Index
- Table of Contents
- CHAPTER1.PDF
- Introduction
- What Is In This Guide
- Chapter 1: Introduction
- Chapter 2: Introduction to Your C55 Printer
- Chapter 3: Print Media
- Chapter 4: The Control Panel
- Chapter 5: Xerox Printer Driver Options
- Chapter 6: Troubleshooting
- Chapter 7: Printer Maintenance
- Chapter 8: Optional Equipment
- Chapter 9: Network Printer Services
- Appendix A: Safety Notes
- Appendix B: Special Notices
- Appendix C: Printer Technical
- Index
- Conventions Used
- Where To Go For More Information
- What Is In This Guide
- Introduction
- CHAPTER2.PDF
- CHAPTER3.PDF
- CHAPTER4.PDF
- CHAPTER5.PDF
- Special C55 Printer Driver Options
- PostScript vs. PCL 5C Printer Driver Feature Comparison
- PCL 5C Printer Driver Features
- PostScript Printer Driver Features
- ImageFix (Windows 95 PostScript only)
- Special C55 Printer Driver Options
- CHAPTER6.PDF
- CHAPTER7.PDF
- CHAPTER8.PDF
- CHAPTER9.PDF
- CHAPTERA.PDF
- CHAPTERB.PDF
- CHAPTERC.PDF
- INDEX.PDF
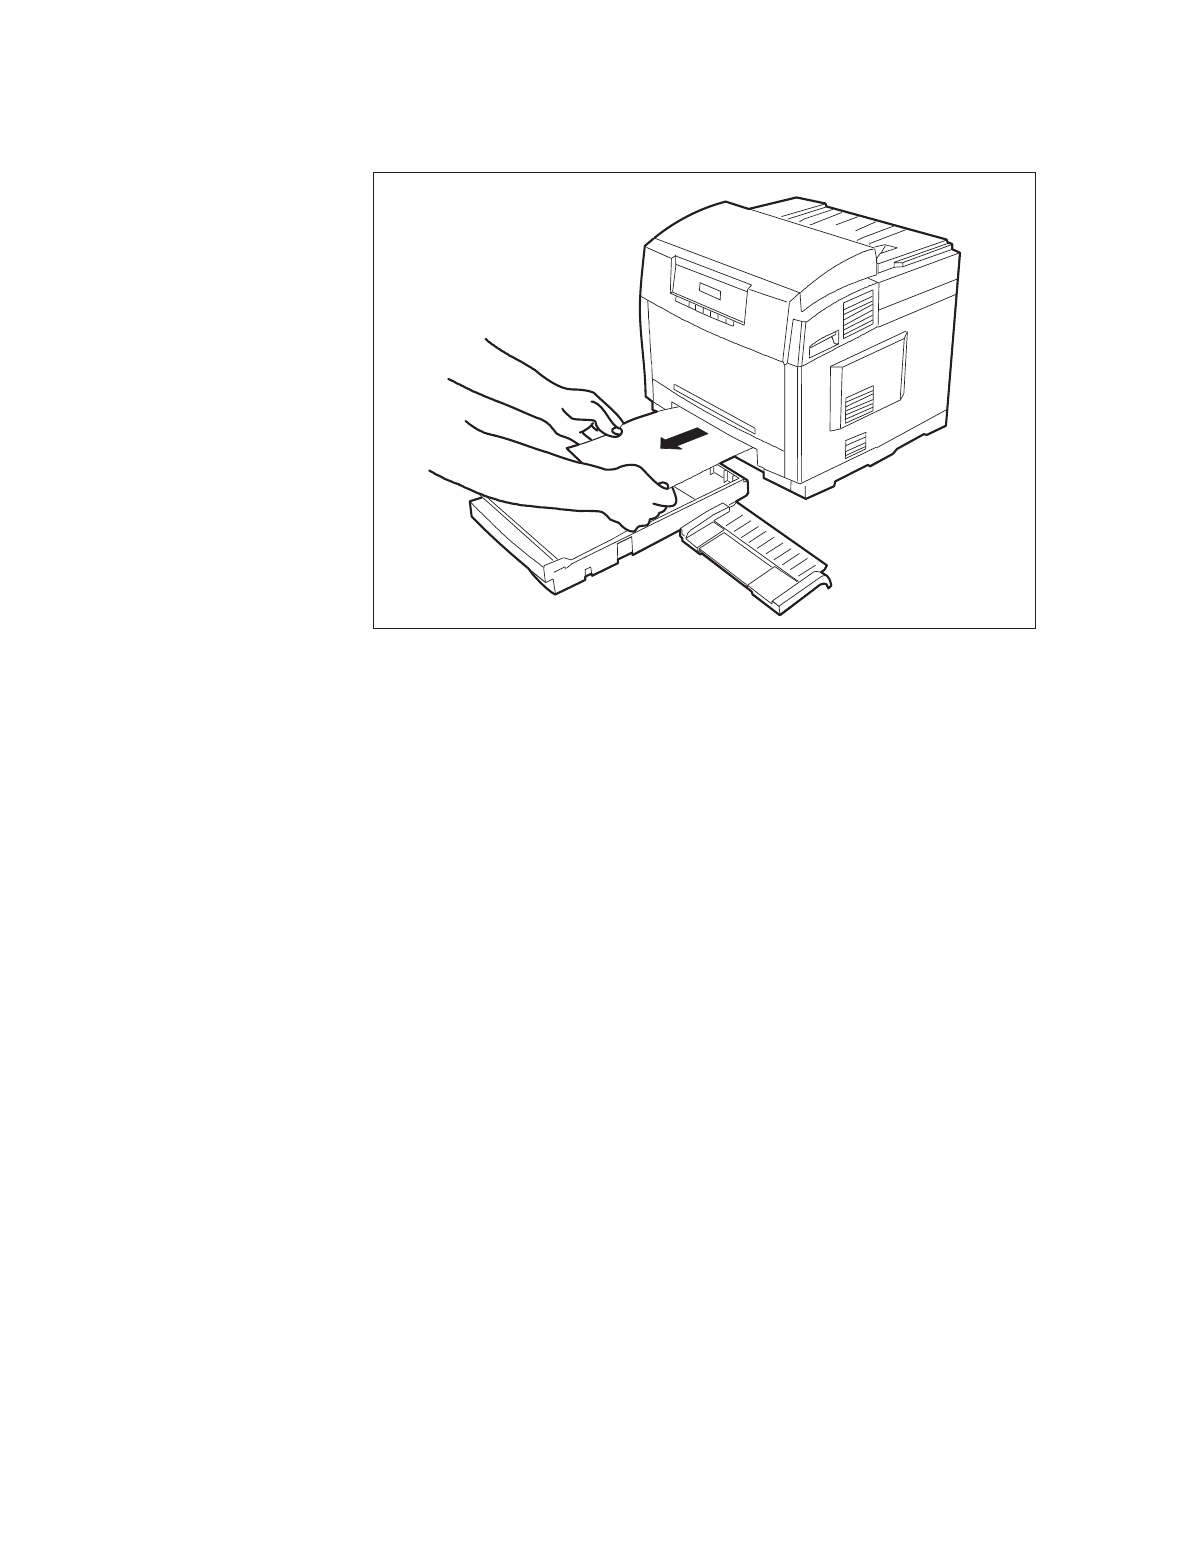
T R O U B L E S H O O T I N G 6–17
Tray/Manual Feed Slot Jam
(Error Codes E1, E2, E3)
Figure 6–4: Tray/Manual Feed Slot Jam
1. Remove Tray 1, Tray 2, or the Manual Feed Tray (as indicated
by the error code) from the printer.
2. Grasp the exposed corners of the jammed material gently.
3. Pull the material slowly toward you until it is completely
dislodged.
4. Reinsert the paper tray or the Manual Feed Tray.