
User's Manual


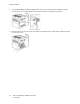
Table Of Contents
- User Guide
- 1 Safety
- 2 Getting Started
- Parts of the Printer
- Power Options
- Accessing the Printer
- Introduction to Apps
- Information Pages
- The Embedded Web Server
- Accessing the Embedded Web Server
- Finding the IP Address of Your Printer
- Viewing the IP Printer Address on the Control Panel
- Obtaining the Printer IP Address from the Configuration Report
- Certificates for the Embedded Web Server
- Downloading the Configuration Report from the Embedded Web Server
- Using the Remote Control Panel Feature
- Installation and Setup
- Connecting the Printer
- Selecting a Connection Method
- Connecting to a Computer Using USB
- Connecting to a Wired Network
- Connecting to a Wireless Network
- Configuring the Printer for a Wireless Network
- Installing the Wireless Network Adapter
- Removing the Wireless Network Adapter
- Connecting to a Wi-Fi Network at the Control Panel
- Configuring the Primary Network at the Control Panel
- Connecting to Wi-Fi Direct
- Initial Printer Setup
- Configuring AirPrint
- Configuring Google Cloud Print
- Installing the Software
- More Information
- 3 Customize and Personalize
- 4 Xerox® Apps
- 5 Printing
- Printing Overview
- Selecting Printing Options
- Printing Features
- Managing Jobs
- Printing Special Job Types
- Selecting Paper Options for Printing
- Scaling
- Printing on Both Sides of the Paper
- Print Quality
- Image Options
- Image Shift
- Color Adjustments
- Printing Mirror Images
- Printing Multiple Pages to a Single Sheet
- Printing Booklets
- Using Special Pages
- Printing Watermarks for Windows
- Orientation
- Printing Banner Pages
- Selecting Job Completion Notification for Windows
- Using Custom Paper Sizes
- 6 Paper and Media
- Supported Paper
- Recommended Media
- Ordering Paper
- General Paper Loading Guidelines
- Paper That Can Damage Your Printer
- Paper Storage Guidelines
- Supported Paper Types and Weights
- Supported Standard Paper Sizes
- Supported Standard Paper Sizes for Automatic 2-Sided Printing
- Supported Paper Types and Weights for Automatic 2-Sided Printing
- Supported Custom Paper Sizes
- Cardstock
- Loading Paper
- Printing on Special Paper
- Supported Paper
- 7 Maintenance
- 8 Troubleshooting
- A Specifications
- B Regulatory Information
- Basic Regulations
- Safety Certification
- Material Safety Data Sheets
- C Recycling and Disposal

Connecting the Printer
SSeelleeccttiinngg aa CCoonnnneeccttiioonn MMeetthhoodd
You can connect the printer to your computer using a USB cable, Ethernet cable, or wireless
connection. The method that you select depends on how your computer is connected to the network.
A USB connection is a direct connection and is the easiest to set up. An Ethernet connection is used
to connect to a network. If you are using a network connection, it is important to understand how
your computer is connected to the network.
Note: Hardware and cabling requirements vary for the different connection methods. Routers,
network hubs, network switches, modems, Ethernet cables, and USB cables are not included
with your printer and must be purchased separately.
USB
If you connect the printer to one computer and do not have a network, use a USB connection. A
USB connection offers fast data speeds, but typically not as fast as a network connection.
Note: To access the Embedded Web Server, a network connection is required.
Network
If your computer is connected to an office network or home network, use an Ethernet cable to
connect the printer to the network. You cannot connect the printer directly to the computer. A
connection through a router or network switch is required. An Ethernet network can be used for
one or more computers and supports many printers and systems simultaneously. An Ethernet
connection is typically faster than USB and allows you direct access to the settings of the printer
using the Embedded Web Server.
Wireless Network
If your environment includes a wireless router or wireless access point, you can connect the printer
to the network with a wireless connection. A wireless network connection provides the same access
and services as a wired connection. A wireless network connection is typically faster than USB and
allows direct access to the settings of the printer using the Embedded Web Server.
CCoonnnneeccttiinngg ttoo aa CCoommppuutteerr UUssiinngg UUSSBB
To connect using USB, you need one of these operating systems:
• Windows 7, Windows 8.1, Windows Server 2008, Windows 10, Windows Server 2008 R2, and
Windows Server 2012.
• Macintosh OS X version 10.10 and later.
• UNIX and Linux: Your printer supports connection to various UNIX platforms through the network
interface.
To connect the printer to the computer using a USB cable:
1. Connect the B end of a standard A/B USB 2.0 or USB 3.0 cable to the USB Port on the back of the
printer.
2. Connect the A end of the USB cable to the USB port on the computer.
Xerox
®
VersaLink
®
C400 Color Printer
User Guide
35
Getting Started