
User Manual


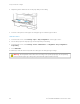


Table Of Contents
- User Guide
- Copyright (Sedona UGs and SRRDs)
- Safety information
- Learn about the printer
- Set up, Install, and Configure
- Selecting a location for the printer
- Attaching cables
- Finding the IP Address of the Printer
- Installing optional trays
- Initial Setup Wizard
- Networking
- Connecting the printer to a wired Ethernet network
- Connecting the printer to a Wi-Fi network
- Connecting the printer to a wireless network using Wi-Fi Protected Setup (WPS)
- Configuring Wi-Fi Direct
- Connecting a mobile device to the printer
- Connecting a computer to the printer
- Deactivating the Wi-Fi network
- Checking the printer connectivity
- Setting up the printer to fax
- Configuring the e-mail SMTP settings
- Using the e-mail setup wizard in the printer
- Using the Settings menu in the printer
- Using the Embedded Web Server
- Loading paper and specialty media
- Installing and updating software, drivers, and firmware
- Installing the printer software
- Adding printers to a computer
- Installing the fax driver
- Installing the Software
- Operating System Requirements
- Installing the Print Drivers for a Windows Network Printer
- Installing the Windows Print Driver .zip File
- Installing the Print Drivers for a Windows USB Printer
- Installing the Printer as a Web Service on Devices
- Installing the Drivers and Utilities for MacOS
- Installing Print Drivers and Utilities for UNIX and Linux
- Updating Firmware
- Exporting or importing a configuration file
- Adding available options in the print driver
- Printing the Menu Settings Page
- Secure the printer
- Copy
- Fax
- Scan
- Use printer menus
- Maintain the printer
- Troubleshoot a problem
- Print quality problems
- Printing problems
- Print quality is poor
- Blank or white pages
- Dark print
- Fine lines are not printed correctly
- Folded or wrinkled paper
- Gray background
- Incorrect margins
- Light print
- Mottled print and dots
- Paper curl
- Print crooked or skewed
- Solid black pages
- Text or images cut off
- Toner easily rubs off
- Horizontal light bands
- Vertical light bands
- Vertical white lines
- Vertical dark bands
- Vertical dark lines or streaks
- Vertical dark streaks with print missing
- Repeating defects
- Print jobs do not print
- Slow printing
- Job prints from the wrong tray or on the wrong paper
- Confidential and other held documents do not print
- Print quality is poor
- The printer is not responding
- Unable to read flash drive
- Enabling the USB port
- Network connection problems
- Issues with supplies
- Clearing jams
- Paper feed problems
- E-mailing problems
- Faxing problems
- Scanning problems
- Cannot scan to a computer
- Cannot scan to a network folder
- Partial copies of document or photo
- Scan job was not successful
- Poor copy quality
- Vertical dark streaks on output when scanning from the ADF
- Scanner does not close
- Scanning takes too long or freezes the computer
- Scanner does not respond
- Adjusting scanner registration
- Adjusting ADF registration
- Contacting customer support
- A Regulatory Information
- Basic Regulations
- Noise Emission Levels
- Static Sensitivity Notice
- ENERGY STAR
- Temperature Information
- Información de la energía de México
- Laser Notice
- Power
- Telecommunication Regulatory Notices
- Regulatory Notices for Wireless Products
- Federal Communications Commission (FCC) Compliance Information Statement
- Innovation, Science and Economic Development Canada Compliance Statement
- Germany
- Turkey RoHS Regulation
- Ukraine RoHS Compliance
- Copy Regulations
- Material Safety Data Sheets
- Basic Regulations
- B Recycling and Disposal
Operating System Requirements
• Windows 7 SP1, Windows 8, Windows 8.1, Windows 10, Windows 11, Windows Server 2008 R2, Windows Server
2012, Windows Server 2016, Windows Server 2019, and Windows Server 2022.
• MacOS version 10.14 and later.
• UNIX and Linux: Your printer supports connection to various UNIX platforms through the network interface.
Installing the Print Drivers for a Windows Network Printer
1. Insert the Software and Documentation disc into the appropriate drive on your computer. If the installer does
not start automatically, navigate to the drive, then double-click the SSeettuupp..eexxee installer file.
2. Click XXeerrooxx SSmmaarrtt SSttaarrtt —— DDrriivveerr IInnssttaalllleerr ((RReeccoommmmeennddeedd)).
3. At the License Agreement, click AAggrreeee.
4. From the list of discovered printers, select your printer.
When you install print drivers for a network printer, if your printer does not appear in the list, click DDoonn’’tt SSeeee
YYoouurr PPrriinntteerr??, then enter the IP address for your printer.
To view the IP address of your printer, refer to Finding the IP Address of the Printer.
5. Click QQuuiicckk IInnssttaallll.
A message appears that confirms that the installation is successful.
6. To complete the installation and close the Installer window, click DDoonnee.
Installing the Windows Print Driver .zip File
You can download print drivers from Xerox.com in a .zip file, then use the Windows Add Printer Wizard to install the
print drivers on your computer.
To install the print driver from the .zip file:
1. Download, then extract the required .zip file to a local directory on your computer.
2. At your computer, open the CCoonnttrrooll PPaanneell, then select DDeevviicceess aanndd PPrriinntteerrss >> AAdddd aa PPrriinntteerr.
3. Click TThhee pprriinntteerr tthhaatt II wwaanntt iissnn''tt lliisstteedd, then click AAdddd aa llooccaall pprriinntteerr oorr nneettwwoorrkk pprriinntteerr wwiitthh mmaannuuaall
sseettttiinnggss.
4. To use a previously established port, select UUssee aann eexxiissttiinngg ppoorrtt, then from the list, select a Standard TCP/IP
Port.
5. To create a Standard TCP/IP port:
a. Select CCrreeaattee aa NNeeww PPoorrtt.
b. For Type of port, select SSttaannddaarrdd TTCCPP//IIPP PPoorrtt, then click NNeexxtt.
c. In the Hostname or IP address field, type the printer IP address or host name.
d. To disable the feature, clear the check box for QQuueerryy tthhee pprriinntteerr aanndd aauuttoommaattiiccaallllyy sseelleecctt tthhee ddrriivveerr ttoo
uussee, then click NNeexxtt.
6. Click HHaavvee DDiisskk.
Xerox
®
B305/B315 Multifunction Printer User Guide 69
Set up, Install, and Configure