
User's Manual

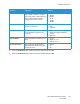


Table Of Contents
- Safety
- Getting Started
- Installation and Setup
- Using the Services
- Printing
- Paper and Media
- Maintenance
- Troubleshooting
- Security
- Specifications
- Regulatory Information
- Recycling and Disposal

Setting Up the Services
Xerox
®
B205 Multifunction Printer
User Guide
91
Configuring Email Security
1. In Xerox
®
CentreWare
®
Internet Services, click Properties Services.
2. Click Email.
3. To edit security settings, for Security, click the Pencil icon.
4. For Auto Send to Self, select Enable.
5. Click Save.
Configuring PDF Settings
1. In Xerox
®
CentreWare
®
Internet Services, click Properties Services.
2. Click Email.
3. For PDF Settings, to edit a setting, click the Pencil icon.
4. To use Flate Compression Capability, click Enable.
5. Click Save.
Configuring Email Settings Using the Printer Control Panel
Email Default Settings
1. To access the System Menus, press the Machine Status button on the control panel.
2. Press the Up/Down arrows to select Feature Defaults and press OK.
3. Press the Up/Down arrows to select Email and press OK.
The following Email Default options and settings are available:.
Feature Description Options
Original Size Allows you to specify the size of the
image to be scanned.
•Letter
•Legal
•Executive
•Folio
•A4
•A5
•B5 (JIS)
Original Type Used to improve the image quality by
selecting the document type for the
originals.
• Text/Photo
• Photo
•Text
Adjust Bkdg. This feature reduces or eliminates the
dark background resulting from
scanning colored paper or newspaper
originals.
•Auto
• Enhance Lev 1 - 2
• Erase Lev. 1 - 4
•Off