
User guide


Table Of Contents
- Contents
- Printer Features
- Network Basics
- Printing Basics
- Print Quality
- Controlling the Quality of Your Prints
- Solving Print-Quality Problems
- Light Lines or Streaks in One Color
- Dark Lines, Smudges, or Streaks Through All Colors
- Repeating Defects
- Colors Align Incorrectly
- Incomplete Fusing
- Image Is Offset
- Solid Fills Appear Mottled or Blotchy, Blacks Appear Blue
- Poor Transparency Print Quality
- All Colors Are Too Light or Too Dark
- Grays Are Not Neutral
- Colors Vary Between Computers
- Colors Do Not Match
- Printed Colors Do Not Match Monitor Colors
- PANTONE Colors Do Not Match
- Color Settings Not Applied
- Print Area Is Not Centered on the Paper
- Maintenance
- Troubleshooting
- User Safety
- Index
Printing on Specialty Media
Phaser® 7760 Color Laser Printer
3-34
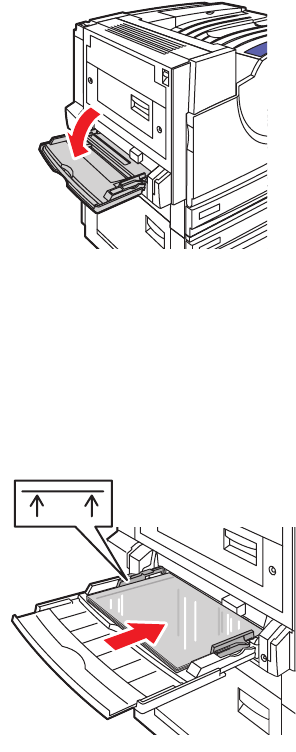
Printing Transparencies from Tray 1 (MPT)
1. Open Tray 1 (MPT).
2. Insert the transparencies into the tray and adjust the paper guides to match the size of the
transparencies.
■ Place the long edge of the transparencies entering the printer first.
■ Do not load more than 50 transparencies.
3. When the control panel prompts you to confirm the type and size of paper in the tray:
a. Select
Change setup, and then press the OK button.
b. Select
Xerox Transparency, and then press the OK button.
c. Select the transparency size, and then press the OK button.
Note: For some sizes that can be loaded in either direction, you need to select the size
with the letters
LEF (Long-Edge Feed) if you loaded the long edge of the paper to enter the
printer first or
SEF (Short-Edge Feed) if you loaded the short edge to enter the printer first.
4. In the printer driver, select Transparency as the paper type and/or select Tray 1 (MPT) as
the paper source.
7760-027
7760-121
MAX