CopyCentre WorkCentre C118 M118/M118i System Administration Guide 701P42722_EN
Prepared by: The Document Company Xerox GKLS European Operations Bessemer Road Welwyn Garden City Hertfordshire AL7 1HE ENGLAND © 2004 by Fuji Xerox Co., Ltd. All rights reserved. Copyright protection claimed includes all forms and matters of copyrighted material and information now allowed by statutory or judicial law or hereinafter granted, including without limitations, material generated from the software programs which are displayed on the screen, such as icons, screen displays, looks etc.
Table of Contents Table of Contents Table of Contents .....................................................................................3 1 Before Using the Machine .....................................................................9 Xerox Welcome Center ............................................................................9 Conventions ...........................................................................................10 Related Information Sources.......................................
Workstation Setup .............................................................................37 Test Print ...........................................................................................37 4 UNIX TCP/IP ..........................................................................................39 Information Checklist..............................................................................39 UNIX TCP/IP Environments ...................................................................
Table of Contents 7 TCP/IP (LPD or Port9100) ....................................................................71 Information Checklist..............................................................................71 TCP/IP (LPD or Port9100) Environments...............................................72 TCP/IP (LPD or Port9100) Installation ...................................................72 Installation Procedure ........................................................................
CentreWare Internet Services Installation..............................................93 Installation Procedure........................................................................93 Network Communication Setup .........................................................93 Test Access .......................................................................................94 Using CentreWare Internet Services to Configure Settings on the Machine................................................................
Table of Contents Problem using CentreWare Internet Services ......................................125 Problem using Mail Notice Service.......................................................127 14 Glossary ..............................................................................................129 Terms Defined......................................................................................129 15 Index ..............................................................................................
Xerox CopyCentre/WorkCentre 118 System Administration Guide
1 Before Using the Machine Welcome to the Xerox family of CopyCentre/WorkCentre products. This System Administration Guide provides detailed information, technical specifications and procedures for using the integral features of the machine. Xerox Welcome Center If you need assistance during or after product installation, visit the Xerox web site for on-line solutions and support. http://www.xerox.com/ If you require further assistance, contact our experts at the Xerox Welcome Center.
1 Before Using the Machine Conventions This section describes the conventions used throughout this System Administration Guide. In this guide, you will find that some terms are used interchangeably: • Paper is synonymous with media. • Document is synonymous with original. • Xerox CopyCentre/WorkCentre 118 is synonymous with the machine. Key Operator Key Operator describes the person who is responsible for hardware maintenance. Orientation Orientation is used to mean the direction of images on the page.
Related Information Sources Text in Indicate that these are names of the hard buttons, numeric or symbol buttons, lights on the control panel or symbols on the power switch label. For example: • Press the switch to the position to switch the machine on. • Press the button on the control panel. Italic Typeface The Italic Typeface is used to indicate references to other sections and chapters. For example: Machine Status – page 20.
1 Before Using the Machine 12 Xerox CopyCentre/WorkCentre 118 System Administration Guide
2 Product Overview This chapter gives an overview of the features and functions of the machine and enables familiarity with the device network installation. Detailed information is provided through the following sections.
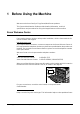
2 Product Overview NOTE: Depending on the configuration, the Document Glass Cover is attached instead of the Document Feeder. A maximum of three optional paper trays can be attached. Power On/Off Powering On Make sure that the machine is connected to a suitable power supply and that the power plug is firmly connected to the electrical outlet. For more information, refer to the Specifications chapter of the User Guide. The machine is ready to make copies about 25 seconds after the power is switched on. 1.
Cabling Cabling Interface Ports The machine has multiple interface ports as shown in the following diagram. Parallel Port Ethernet Port USB Port Ethernet 10BASE-T/100BASE-TX The machine is compatible with SMB, LPD, EtherTalk, NetWare, IPP, HTTP, DHCP, SMTP, POP, DDNS, RARP, and Port 9100. It supports T connector as a standard feature. There are three Ethernet interface options available on the screen: 10BASE-T, 100BASE-TX and AUTO. 10BASE-T and 100BASE-TX support 10 Mbps and 100 Mbps respectively.
2 Product Overview Modes The mode buttons are used to access the screens which allow you to select features, monitor the status of jobs and obtain general information about the machine. There are six mode buttons on the machine: • Copy • Fax • E-Mail • Log In/Out • Job Status • Machine Status NOTE: Depending on the configuration, there may be three mode buttons, the , and buttons, on the machine.
Modes Fax Use this button to access the optional Fax function which is used to send faxes and access functions such as Mailbox and Polling. The Fax mode contains seven screens used to access features such as Resolution, Delayed Start and Priority Send. 1. Press the button on the control panel. 2. Press the or button to switch between screens. 3. To exit the Fax mode, press another mode button. For more information about Fax features, refer to the Fax chapter of the User Guide.
2 Product Overview Job Status Use this button to view the progress of a job and if necessary, stop and delete the job. It can also display the log and detailed information about completed jobs. The latest job will be at the top of the list. 1. Press the button on the control panel. 2. Press the or button to switch between screens. 3. Press the button at any time to exit. For more information, refer to the following.
Modes • Receive – Displays the fax in-coming jobs. Select a job from the list using the
2 Product Overview Non-print Displays the error information for all jobs except print jobs. Select a job from the list using the
Modes Copy Meter Confirm the account data, such as the account name, the limit set for the account, and the total number of copies, for each account. Address Book Confirm the contents of Address Book. The contents are printed as a list with recipient names, fax numbers and F Code for fax, e-mail addresses for e-mail in numerical order of Speed Dial code. Fax Program Prints detailed information for each Fax Program.
2 Product Overview Job History Report Prints information on printing results, such as whether data from the PC has been printed correctly. The status of a maximum of 50 jobs can be printed on the report. Description of jobs with errors are printed in the [Job Status] column. For details on the error description, refer to Fault Codes in the Problem Solving Chapter of the User Guide. Error History Report Prints information of up to the latest 50 errors that occurred in the machine.
Modes 1. Select [Billing Meter] on the [Machine Status] screen using the
2 Product Overview • Password – If a password has been set for a PDF file, specify the password here in advance. Printing will be performed only when the password set in the PDF file to be printed matches the password specified here. • Collated – Select this to set whether to collate multiple copies of the printout by sets (sorted in the order of page 1, 2, 3,... 1, 2, 3...). • Paper Size – Select the paper size from [A4] or [Auto].
System Controls System Controls 1 2 29 3 4 28 27 26 5 6 7 25 24 23 22 21 20 19 Button/Indicator 18 8 17 16 9 10 15 11 12 14 13 Function 1 Allows you to send and receive documents manually. This button works only for faxing with the document feeder; When the document is loaded into the feeder, you can press the button only for sending. When the document is not loaded into the feeder, you can press the button only for receiving.
2 Product Overview Button/Indicator Function 14 Indicates that an error occurred. 15 Starts or resume a job. 16 Deletes a numeric value or the last letter and symbol entered. Also cancels the job. 17 <# (hash)> Indicates the symbols. 18 <*(asterisk)> Used when you switch the machine to tone. 19 Determines any changed settings or entered values. 20 Returns to the previous screen without acquiring any changed settings or entered values.
System Settings • Fax Settings • E-mail Settings NOTE: CentreWare Internet Services is software that enables you to display, configure and change the settings of the machine by using a browser on a computer instead of the machine’s control panel. For more information, refer to the CentreWare Internet Service chapter of the User Guide. Changing the Settings Password input is required to change the settings. The machine is delivered with the factory default password “11111”.
2 Product Overview Ethernet Port The Ethernet port is the default interface used on the machine. If you need to change the speed setting of the Ethernet port, perform the following steps: 1. Select [Print Settings] on the [System Settings] screen, and press the button. 2. Press the button on the [Network/Port] screen. 3. Select [Ethernet Settings] by selecting [T] or [S] using the
Resident Fonts Value Description Value Description 0 CG Times 41 Times New Bold 1 CG Times Italic 42 Times New Bold Italic 2 CG Times Bold 43 Symbol 3 CG Times Bold Italic 44 Wingdings 4 Univers Medium 45 Line Printer 5 Univers Medium Italic 46 Times Roman 6 Univers Bold 47 Times Italic 7 Univers Bold Italic 48 Times Bold 8 Univers Medium Condensed 49 Times Bold Italic 9 Univers Medium Condensed Italic 50 Helvetica 10 Univers Bold Condensed 51 Helvetica Oblique
2 Product Overview Value Description Value Description 31 Albertus Extra Bold 72 New Century Schoolbook Italic 32 Clarendon Condensed 73 New Century Schoolbook Bold 33 Coronet 74 New Century Schoolbook Bold Italic 34 Marigold 75 ITC Avant Garde Book 35 Arial 76 ITC Avant Garde Book Oblique 36 Arial Italic 77 ITC Avant Garde Demi 37 Arial Bold 78 ITC Avant Garde Demi Oblique 38 Arial Bold Italic 79 ITC Zapf Chancery Medium Italic 39 Times New 80 ITC Zapf Dingbats 40
Resident Fonts Code Value Short Display Long Display 7J 234 DESKTOP DeskTop 10J 330 PS TEXT PS Text 12J 394 MC TEXT MC Text 6J 202 MS PUB Microsoft Publishing 8M 269 MATH-8 Math 8 5M 173 PS MATH PS Math 15U 501 PI FONT Pi Font 1U 53 LEGAL Legal 1E 37 ISO-4 ISO 4 United Kingdom 0U 21 ISO-6 ISO 6 ASCII 0S 19 ISO-11 ISO 11 Swedish:names 0I 9 ISO-15 ISO 15 Italian 2S 83 ISO-17 ISO 17 Spanish 1G 39 ISO-21 ISO 21 German 0D 4 ISO-60 ISO 60 Norwegian v
2 Product Overview 32 Xerox CopyCentre/WorkCentre 118 System Administration Guide
3 NetWare This chapter explains how to install the machine onto a NetWare network. The following information is provided. Information Checklist – page 33 NetWare Environments – page 34 NetWare Installation – page 35 Installation Procedure – page 35 Network Communication Setup – page 35 NetWare Setup – page 37 Workstation Setup – page 37 Test Print – page 37 Information Checklist Before installing the machine onto a network, make sure that the following items are available or have been performed.
3 NetWare NetWare Environments System configuration The machine supports NetWare PServer mode in Bindery or NDS. NetWare 3.x/4.x/ 5.x/6.x is required to support Bindery. NetWare 4.11 or later is required to support NDS. In the PServer mode, the machine will function as a print server and print jobs from the print queue. The machine uses one file server user license. NOTE: The machine does not support RPrinter mode.
NetWare Installation NetWare Installation This section describes the installation procedures to use the machine in a NetWare environment. Installation Procedure The installation procedure is as follows. Network Communication Setup For more information, refer to Network Communication Setup on page 35. NetWare Setup For more information, refer to NetWare Setup on page 37. Workstation Setup For more information, refer to Workstation Setup on page 37.
3 NetWare If necessary, you may change the following settings. • Transport Protocol • Print Mode • PJL • Number of searches Next, establish TCP/IP if you use an IP address for a NetWare network. If IP address setting is unnecessary, press the button to go to NetWare Setup on page 37. 1. Press the button once or twice to display the [Network/Port] screen. 2. Select [TCP/IP Settings] by selecting [T] or [S] and then press the button. 3.
NetWare Installation NOTE: If you wish to filter access to the machine from the client computers, activate the IP Filter. The [Filter] screen is located in the same layer as the [TCP/IP Settings] screen. NetWare Setup Use PCONSOLE or NetWare Administrator (NWADMIN) to create a print queue, print server and printer, and assign the respective objects. For information on how to use PCONSOLE or NWADMIN, refer to the manual which comes with NetWare. When using in the PSERVER mode, set as follows.
3 NetWare 38 Xerox CopyCentre/WorkCentre 118 System Administration Guide
4 UNIX TCP/IP This chapter explains how to set up the machine to operate in a UNIX TCP/IP environment. The UNIX Workstation Operating Systems (OS) supported are Solaris, SunOS, and HP-UX. The following information is provided.
4 UNIX TCP/IP If you encounter problems during the installation of the machine, refer to Problem Solving chapter for assistance. CAUTION: Do not connect the network cable to the machine until instructed to do so. UNIX TCP/IP Environments System configuration The machine uses the Line Printer Daemon Protocol (LPD) that supports TCP/IP as the transport protocol. With the LPD, use the machine as a UNIX network printer.
UNIX TCP/IP Installation Test Print A print job should be submitted to make sure that the machine has been installed and configured correctly. Network Communication Setup Use this procedure to set up the network communication parameters of the machine. NOTE: Keep the SNMP port enabled while you use the machine on the TCP/IP network. NOTE: CentreWare Internet Services can also be used to configure the machine. Refer to CentreWare Internet Services chapter on page 91.
4 UNIX TCP/IP 6. Use the same steps as IP address setting to enter the subnet mask and gateway address. NOTE: You can enter 000, 128, 192, 224, 240, 248, 252, 254, or 255 into each section as the values for the subnet mask. NOTE: You cannot enter 127, 254, or 255 into the first section of the format for the gateway address. 7. Press the button. NOTE: If you wish to filter access to the machine from the client computers, activate the IP Filter.
UNIX TCP/IP Installation *: Option You can also add output parameters to the above printer name. The parameters are the same as those for -C option. Insert “_” between the printer name and output parameter, for example “PS_A4”. NOTE: If specifying a printer name other than above at printing, the print language or mode specified on the touch screen of the machine is used. NOTE: When setting print languages/modes from the same workstation to a single printer, it is recommended to set one kind each.
4 UNIX TCP/IP Solaris Follow the steps below to set up a Solaris workstation to communicate with the machine. 1. Log in as root at a client workstation. 2. Use the Solaris ADMINTOOL to add the machine to the system host files. NOTE: Refer to the Solaris documentation for instructions on using the ADMINTOOL. 1) Select [Browse]. 2) Select [Printers]. 3) Select [Edit]. 4) Select [Add]. 5) Select [Local Printer]. 6) Enter the [Host Name] in the Printer Name field and then select [OK]. 7) Select [File].
UNIX TCP/IP Installation 3. Edit the /etc/printcap file to contain an entry for the machine queue using the following example: PrinterName:\ :lp=:\ :rm=PrinterName:\ :mx#0:\ :sd=/var/spool/lpd/PrinterName:\ :lf=/var/spool/lpd/PrinterName/log: 1) PrinterName is the local client name of the machine. 2) lp= is the local device name for the printer output. For remote printers, this parameter must be set to nothing. NOTE: The recommended remote queue name is lp. That queue name will work with the machine.
4 UNIX TCP/IP HP-UX Follow the steps below to set up an HP-UX workstation to communicate with the machine. 1. Log in as root at a client and add the machine to the /etc/hosts file. For example: Ip address [tab] PrinterName 2. Verify connectivity to the machine, by using a UNIX command such as ping from a terminal command window, as shown in the following example: ping PrinterName NOTE: Select CTRL+C to cancel the ping command. 3. There are two methods to install the machine on an HP-UX workstation.
UNIX TCP/IP Installation 8. Continue with Test Print on page 47. Using the System Administrator Manager (SAM) GUI Method Follow the steps below to use the HP System Administrator Manager (SAM) GUI (Graphical User Interface). NOTE: Refer to the HP-UX documentation for additional information on using the System Administrator Manager (SAM). 1. Start the SAM application. 2. Select the [Printers and Plotters] icon. 3. Select [Actions] from the Menu Bar. 4.
4 UNIX TCP/IP 3. Repeat the procedure for all workstations that will be sending jobs to the machine. The UNIX TCP/IP installation is now complete. If the test print fails, refer to Problem Solving chapter for assistance. Printing Solaris/HP-UX This section describes printing from workstations running Solaris or HP-UX. Refer to the manuals supplied with the workstation for full details. Print (lp) The lp command is used for printing.
Printing Delete (cancel) The cancel command is used to delete print data. Command format cancel [printer name] [job number] Command options The following command options are available. • Printer name This option specifies the printer name. The cancel command can be effectively used with the combined use of -a, -e and -u as shown below. This option is only valid in the spool mode. -a Deletes all the print data belonging to the user issuing the command, from the specified printer.
4 UNIX TCP/IP SunOS This section describes printing from a workstation running SunOS. See the manuals supplied with the workstation for full details. Print (lpr) The lpr command is used to print. Command format /usr/ucb/lpr [-P printer name] [-# number of copies] [-C parameter] File name Command options The following command options are available. • -P printer name This option specifies the printer name registered at /etc/printcap.
Printing To print a file named file1 to a printer named fxPS as an A4-sized (210 × 297 mm/ 8.3 ×11.7 inches) duplex job, enter the following command: %lpr -PfxPS -C,DUP,A4 file1 Delete (lprm) The lprm command is used to delete print data. Command format /usr/ucb/lprm [-P printer name] job number Command options The following command options are available. • -P printer name This option specifies the printer name registered with /etc/printcap. If this option is omitted, the default printer lp will be used.
4 UNIX TCP/IP Example To delete the print data from printer fxPS for job number 351, enter the following command: %lprm -PfxPS 351 Printer Status Solaris/HP-UX The lpstat command is used to inquire about the status of the machine. NOTE: In the non-spool mode, this function is available to Windows NT clients but not to HP-UX/Solaris clients. Command format lpstat [option] Command options The following command options are available.
Printer Status Example To inquire about the print data received by a printer named fxPS, enter the following command: %lpstat -ofxPS SunOS The lpq command is used to inquire about the status of the machine. NOTE: In the non-spool mode, this function is available to Windows NT clients but not to SunOS clients. Command format /usr/ucb/lpq [-P printer name] [-l] [user name] [+interval] Command options The following command options are available.
4 UNIX TCP/IP Examples • To inquire about the print data received by a printer named fxPS, enter the following command: %lpq -PfxPS • To display a printer named fxPS in long format, enter the following command: %lpq -PfxPS -l -C Option On SunOS, the -C option can be used to specify the print format if the machine prints with the PostScript language in spool mode. This section explains the functions which can be specified and printing operations which will be affected using the -C option.
-C Option Parameter Description B5/b5 Selects the tray which has B5 (182 × 257 mm/7.2 × 10.1 inches) paper loaded. A5/a5 Selects the tray which has A5 (148 × 210 mm/5.8 × 8.3 inches) paper loaded. LETTER/letter Selects the tray which has letter size (216 × 279 mm/8.5 × 11.0 inches) paper loaded. LEGAL/legal Selects the tray which has legal size (216 × 356 mm/8.5 × 14.0 inches) paper loaded. NOTE: If several parameters are specified in the first lpr command, data may not be printed correctly.
4 UNIX TCP/IP Parameter Description PLB/plb Selects labels. PQU/pqu Selects bond paper. PRC/prc Selects recycled paper. Specifying double-sided printing The following parameters can be specified. Description Double-sided printing as follows: TUMBLE/tumble Double-sided printing as follows: AB C DUP/dup D Parameter AB CD SIMP/simp Single-sided printing NOTE: If several parameters are specified in an lpr command, data may not print correctly.
-C Option Parameter Description A5D/a5d Double-sided printing on A5 (148 × 210 mm/5.8 × 8.3 inches) paper and long-edge binding A5T/a5t Double-sided printing on A5 (148 × 210 mm/5.8 × 8.3 inches) paper and short-edge binding B5D/b5d Double-sided printing on B5 (182 × 257 mm/7.2 × 10.1inches) paper and long-edge binding B5T/b5t Double-sided printing on B5 (182 × 257 mm/7.2 × 10.
4 UNIX TCP/IP NOTE: For some print languages, the color parameter may be invalid. NOTE: The system default is used if no parameter is specified. Specifying stapling The following parameters can be specified for stapling. Parameter Description STAPLETL Places one staple in the upper left corner of the prints. STAPLETD Places two staples at the top of the prints. STAPLETR Places one staple in the upper right corner of the prints. STAPLELD Places two staples on the left side of the prints.
5 EtherTalk This chapter explains how to set up the machine to operate on an EtherTalk network. The following information is provided. Information Checklist – page 59 EtherTalk Environments – page 60 EtherTalk Installation – page 60 Installation Procedure – page 60 Network Communication Setup – page 60 Workstation Setup – page 62 Test Print – page 62 Information Checklist Before installing EtherTalk on the machine, make sure that the following items are available or have been performed.
5 EtherTalk EtherTalk Environments System configuration As the machine supports EtherTalk protocol, you can print from Macintosh. NOTE: You will need the optional PostScript Kit to use EtherTalk for printing. Target computers The machine supports a Macintosh or Power Macintosh with the following OS: • Mac OS 7.5 or later, 8.x, 9.x, or Mac OS X 10.2. EtherTalk Installation This section describes the installation procedure for using the machine in an EtherTalk Environment.
EtherTalk Installation 2. Press the button. 3. Select [System Settings]. 4. Enter the password using the numeric keypad and then select [Confirm]. 5. Select [Print Settings] and then press the button. 6. Press the button on the [Network/Port] screen. 7. Select [EtherTalk] by selecting [T] or [S] and then press the button. 8. Select [Port Status] by selecting [T] or [S] and then press the button. 9.
5 EtherTalk NOTE: You cannot enter 127, 254, or 255 into the first section of the format for the gateway address. 7. Press the button. NOTE: If you wish to filter access to the machine from the client computers, activate the IP Filter. The [Filter] screen is located in the same layer as the [TCP/IP Settings] screen. Workstation Setup Install the print driver (Adobe PS) for Macintosh. Install the screen font if necessary. Refer to the PostScript User Guide.
6 Microsoft Networking This chapter explains how to set up the machine to operate on a Microsoft network. The following information is provided. Information Checklist – page 63 SMB Environments – page 64 SMB Installation – page 65 Installation Procedure – page 65 Network Communication Setup – page 65 Workstation Setup – page 67 Test Print – page 67 Changing the Settings – page 68 Procedure – page 68 Setting Format of config.
6 Microsoft Networking SMB Environments Server Message Block (SMB) is a protocol for sharing files or printers on Windows OS. This section explains the installation procedure for connecting a printer to a Windows network through SMB. System configuration As the machine supports SMB protocol, you can send print data directly to the machine on the same network without going through the server. You can use either NetBEUI, TCP/IP, or even both as the transport protocol for SMB.
SMB Installation SMB Installation This section describes the installation procedure for using the machine on an SMB network. Installation Procedure The installation procedure is as follows. Network Communication Setup When using NetBEUI: Set the SMB port to [Enable] using the control panel or CentreWare Internet Services. When using TCP/IP: Set the SMB port to [Enable] using the control panel or CentreWare Internet Services. Set the IP address on the control panel.
6 Microsoft Networking 7. Select [SMB] by selecting [S] or [T] and then press the button. 8. Select [Port Status] by selecting [S] or [T] and then press the button. 9. Select [Enable] by selecting [S] or [T] and then press the button. If necessary, you may change the following settings for SMB: • Transport Protocol • Print Mode • PJL • TBCP Filter Next, establish TCP/IP if you use an IP address for a network.
SMB Installation NOTE: You cannot enter 127, 254, or 255 into the first section of the format for the gateway address. 7. Press the button. NOTE: If you wish to filter access to the machine from the client computers, activate the IP Filter. The [Filter] screen is located in the same layer as the [TCP/IP Settings] screen. Workstation Setup Install the print driver on the client computer. Refer to the HTML documentation in CentreWare Utilities CD-ROM.
6 Microsoft Networking Changing the Settings This section explains how the Key Operator uses [config.txt] to change the SMB settings. Procedure The steps below explain how to overwrite [config.txt] for the machine using a Windows networked computer. You will need the following information: SMB Host Name, Workgroup, Key Operator Name, and Key Operator Password. 1. Open [Network Neighborhood] from the Windows computer, followed by [Workgroup] (default: Workgroup) and then the [printer].
Changing the Settings 8. Switch off the machine. After the display on the screen clears, switch on the machine again. NOTE: The changes you have made will be enabled either after switching off and on, or after saving [config.txt] with its Reboot option set to [Yes]. Setting Format of config.
6 Microsoft Networking Item Remarks Value Default Daylight Saving Set the period of summer time. Set the time, date, and month for both the start date and end date of summer time. For example “1– 012803–023110” will advance the system clock by one hour at 1 a.m. on 28th March, and go back one hour at 2 a.m. on 31st October. hour-start-end (h-hhddmmhhddmm) Maximum Sessions Maximum connections of the machine. 3–10 5 Unicode Support Enable the use of Unicode.
7 TCP/IP (LPD or Port9100) This chapter explains how to set up the machine to print from a Windows computer through LPD or Port9100. The following information is provided.
7 TCP/IP (LPD or Port9100) TCP/IP (LPD or Port9100) Environments System configuration As the machine supports the LPD and Port9100 protocol, you can print directly from a Windows computer. When printing from Windows 95/Windows 98/Windows Me computers through the LPD port, use our TCP/IP Direct Print Utility. This tool is installed together with the print drivers. When printing from Windows NT 4.0/Windows 2000/Windows XP/Windows Server 2003 computers, use the OS standard LPR port.
TCP/IP (LPD or Port9100) Installation Network Communication Setup Enable the following ports using the control panel or CentreWare Internet Services. • Printing through LPD: LPD port • Printing through Port9100: Port9100 port Set the IP address using the control panel. NOTE: CentreWare Internet Services allows more detailed settings. Refer to CentreWare Internet Services chapter on page 91.
7 TCP/IP (LPD or Port9100) If necessary, you may change the following settings for LPD or Port9100: • Print Mode • PJL • Connect Time-out • TBCP Filter • Port No. Next, establish TCP/IP. 1. Press the button once or twice to display the [Network/Port] screen. 2. Select [TCP/IP Settings] by selecting [T] or [S] and then press the button. 3. Select [Get IP Address] by selecting [T] or [S] and then press the button. 4.
TCP/IP (LPD or Port9100) Installation NOTE: If you wish to filter access to the machine from the client computers, activate the IP Filter. The [Filter] screen is located in the same layer as the [TCP/IP Settings] screen. Workstation Setup Install print drivers on each client workstation that will be sending print jobs to the machine, and map to the machine as a printer. Refer to the HTML documentation in CentreWare Utilities CD-ROM or documentation provided with the optional PostScript Kit.
7 TCP/IP (LPD or Port9100) 76 Xerox CopyCentre/WorkCentre 118 System Administration Guide
8 Parallel Port This chapter explains how to set up the machine in a parallel port environment. The following information is provided.
8 Parallel Port Parallel Port Environment System configuration The machine can be connected directly to the parallel port of a host workstation. A document file can be sent from the host workstation via the parallel port to the machine for printing. Other workstations can be connected via a network to the host workstation. Each workstation has a queue that can hold a number of files.
Parallel Port Installation 4. Switch on the machine. Next, enable the Parallel port. NOTE: CentreWare Internet Services can also be used to configure the machine. Refer to the CentreWare Internet Services chapter. 1. Press the button. 2. Select [System Settings]. 3. Enter the password using the numeric keypad and then select [Confirm]. 4. Select [Print Settings] and then press the button. 5. Press the button on the [Network/Port] screen. 6.
8 Parallel Port 1. Open a document on a workstation. 2. Select the machine as the printer to which the document will be sent. 3. Print the selecter document on the machine and verify that it prints correctly. 4. Repeat the test for all workstations that will be sending jobs to the machine. The installation process is now complete. If the test print fails, refer to the Problem Solving chapter for assistance.
9 USB Port This chapter explains how to set up the machine in a USB port environment. The following information is provided. Information Checklist – page 81 USB Port Environment – page 82 USB Port Installation – page 82 Installation Procedure – page 82 USB Port Communication Setup – page 83 Workstation Setup – page 83 Test Print – page 84 Information Checklist Before starting the USB port installation procedures, make sure that the following items are available or have been performed.
9 USB Port USB Port Environment System configuration The machine can be connected directly to the USB port of a host workstation. A document file can be sent from the host workstation via the USB port to the machine for printing. Other workstations can be connected via a network to the host workstation. Each workstation has a queue that can hold a number of files.
USB Port Installation USB Port Communication Setup This section describes how to set up USB communication on the machine. The following parameters can be set depending on your requirements. These setups must be done without the USB cable connected. Enable the USB port. NOTE: CentreWare Internet Services can also be used to configure the machine. Refer to CentreWare Internet Services chapter on page 91. 1. Press the button. 2. Select [System Settings]. 3.
9 USB Port Test Print To make sure that the machine has been installed on the USB port correctly, submit a test print from a client workstation. Perform the following steps. 1. Open a document on a workstation. 2. Select the machine as the printer to which the document will be sent. 3. Print the selected document on the machine and verify that it prints correctly. 4. Repeat the test for all workstations that will be sending jobs to the machine. The installation process is now complete.
10 IPP (Internet Printing Protocol) This chapter explains how to set up the machine to operate in an IPP (Internet Printing Protocol) environment. The following information is provided.
10 IPP (Internet Printing Protocol) IPP Environment System configuration The machine supports Internet Printing Protocol (IPP). As Windows 2000/Windows XP/ Windows Me/Windows Server 2003 are installed with the client software needed to output to an IPP printer, you can specify this printer using the Add Printer Wizard. Using IPP, you can print to a remote printer through the Internet or intranet. The transport protocol for IPP can be TCP/IP. Target computers The following computers support IPP.
IPP Installation Network Communication Setup This section describes how to set up the network communication parameters of the machine. At the machine, perform these steps. NOTE: Keep the SNMP port enabled while you use the machine on the TCP/IP network. NOTE: CentreWare Internet Services can also be used to configure the machine. Refer to the CentreWare Internet Services chapter. Initially, enable the IPP port. 1. Connect the machine to the network. 2. Press the button. 3.
10 IPP (Internet Printing Protocol) NOTE: Use the DHCP server together with the Windows Internet Name Service (WINS) server. If you selected [Manual] in step 4, use the following steps to enter the IP address. If you selected other than [Manual], press the button and then go to Workstation Setup on page 88. 1. Press the button. 2. Select [IP Address] by selecting [T] or [S] and then press the button. 3. Use the numeric keypad to enter the IP address in the format “xxx.xxx.xxx.
IPP Installation 4. Make sure that the driver is installed on every workstation that will be sending jobs to the machine. Repeat the test for all workstations that will be sending jobs to the machine. The installation process is now complete. If the test print fails, refer to the Problem Solving chapter. for assistance.
10 IPP (Internet Printing Protocol) 90 Xerox CopyCentre/WorkCentre 118 System Administration Guide
11 CentreWare Internet Services This chapter explains how to enable and use the CentreWare Internet Services feature of the machine. The following information is provided.
11 CentreWare Internet Services Item By Obtain and record the following information: • A Unique IP Address • Gateway Address • Subnet Mask Refer to the glossary for additional information about the Gateway Address and Subnet Mask, if needed. Customer Test the machine to make sure that it is installed fully and functioning correctly. Customer If problems are encountered during the installation of the machine, refer to the Problem Solving chapter for assistance.
CentreWare Internet Services Installation OS Browsers Windows XP Internet Explorer 6.0 SP1 Netscape 7.1 Windows Server 2003 Internet Explorer 6.0 SP1 Netscape 7.1 Mac OS 8.x, 9.x Internet Explorer 5.1 Netscape 7.02 Mac OS X 10.2.6 Internet Explorer 5.2 Netscape 7.02 CentreWare Internet Services Installation This section describes the settings required to use CentreWare Internet Services. Installation Procedure There are two stages required to enable CentreWare Internet Services.
11 CentreWare Internet Services 9. Select [Enable] by selecting [T] or [S] and then press the button. Next, establish TCP/IP. 1. Press the button once or twice to display the [Network/Port] screen. 2. Select [TCP/IP Settings] by selecting [T] or [S] and then press the button. 3. Select [Get IP Address] by selecting [T] or [S] and then press the button. 4. Select [DHCP/Autonet], [DHCP], [BOOTP], [RARP], or [Manual] by selecting [T] or [S] and then press the button.
Using CentreWare Internet Services to Configure Settings on the Machine 2. In the URL field, enter "http://" followed by the internet address of the machine. Then press the key on the keyboard. Example: If the internet address is vvv.xxx.yyy.zzz, enter the following in the URL field: http://vvv.xxx.yyy.zzz If the Port number is set, append that to the internet address as follows. In this example, the port number is 80. http://vvv.xxx.yyy.zzz:80 3.
11 CentreWare Internet Services 1. At the CentreWare Internet Services home page for the machine, select the [Properties] tab. 2. In the [Properties] frame, select the plus symbol [+] to the left of the [Port Settings] folder. 3. Select [Ethernet]. 4. Set up the following options to be displayed in the frame. • Ethernet Settings NOTE: For more information about the options, refer to Properties in the CentreWare Internet Services chapter of the User Guide. 5.
Using CentreWare Internet Services to Configure Settings on the Machine 2. In the [Properties] frame, select the plus symbol [+] to the left of the [Port Settings] folder. 3. Select [USB]. 4. Set up the following options to be displayed in the frame. • Auto Eject Time • Adobe Communication Protocol (Only available when the optional PostScript Kit is installed.) NOTE: For more information about the optionss, refer to Properties in the CentreWare Internet Services chapter of the User Guide. 5.
11 CentreWare Internet Services 1. At the CentreWare Internet Services home page for the machine, select the [Properties] tab. 2. In the [Properties] frame, select the plus symbol [+] to the left of the [Protocol Settings] folder. 3. Select [SMB]. 4. Set up the following options to be displayed in the frame. • Workgroup • Host Name • Administrator Name • Administrator Password • Re-enter Password • Maximum Sessions • TBCP Filter (Only available when the optional PostScript Kit is installed.
Using CentreWare Internet Services to Configure Settings on the Machine • File Server Name • Polling Interval • Number of Searches • Password • Re-enter Password • TBCP Filter (Only available when the optional PostScript Kit is installed.) • Tree Name • Context Name • Transport Protocol • Frame Type • Network Address • SLP • Active Discovery NOTE: For more information about the options, refer to Properties in the CentreWare Internet Services chapter of the User Guide. 5.
11 CentreWare Internet Services • Get DNS Address • DNS Address 1–3 • DNS Name • Generate Domain Search List Automatically • Domain Name 1–3 • Connection Time-Out • Dynamic DNS Update • Get WINS Server Address • Primary WINS Server Address • Secondary WINS Server Address • IP Filter NOTE: For more information about the options, refer to Properties in the CentreWare Internet Services chapter of the User Guide. 5. Select [Apply New Settings] to reflect the new setting. 6.
Using CentreWare Internet Services to Configure Settings on the Machine NOTE: The default user ID is "admin" and the default password is "x-admin". SNMP This page allows you to configure the SNMP settings for the following options. NOTE: Some settings on this page will only be available after you reboot the machine from CentreWare Internet Services, or after the machine is switched off and on. 1. At the CentreWare Internet Services home page for the machine, select the [Properties] tab. 2.
11 CentreWare Internet Services • DNS • Connection Time-Out NOTE: For more information about the options, refer to Properties in the CentreWare Internet Services chapter of the User Guide. 5. Select [Apply New Settings] to reflect the new setting. 6. Enter the user ID and password, then select [OK]. NOTE: The default user ID is "admin" and the default password is "x-admin". Port9100 This page allows you to configure the Port9100 settings for the following options.
Using CentreWare Internet Services to Configure Settings on the Machine 4. Set up the following option to be displayed in the frame. • Port Number NOTE: For more information about the options, refer to Properties in the CentreWare Internet Services chapter of the User Guide. 5. Select [Apply New Settings] to reflect the new setting. 6. Enter the user ID and password, then select [OK]. NOTE: The default user ID is "admin" and the default password is "x-admin". 7.
11 CentreWare Internet Services 7. When the reboot message appears, select [Reboot]. HTTP This page allows you to configure the HTTP settings for the following options. NOTE: Some settings on this page will only be available after you reboot the machine from CentreWare Internet Services, or after the machine is switched off and on. 1. At the CentreWare Internet Services home page for the machine, select the [Properties] tab. 2.
12 E-mail This chapter describes how to set up the E-mail feature of the machine. The following information is provided. E-mail Overview – page 105 Information Checklist – page 105 E-mail Environments – page 106 E-mail Installation – page 107 Installation Procedure – page 107 Network Communications Setup – page 107 Test E-mail – page 109 E-mail Overview This section provides an overview of the settings for Scan to E-mail and Mail Notice Service features.
12 E-mail Item By Obtain and record the following information: • IP address • Gateway address • Subnet mask • Machine host name • Machine e-mail account • SMTP server address or SMTP server name • POP3 server address or POP3 server name • DNS server name (if mail server names are used instead of mail server addresses) Refer to the Glossary for additional information about the Gateway Address and Subnet mask, if needed. Customer Set up the mail server and E-mail accounts.
E-mail Installation NOTE: A file may not print if the format differs from those in the above table. NOTE: It is recommended to use Microsoft Outlook Express 5.5/6.0 or Netscape 7 as an E-mail software. E-mail Installation This section describes how to enable the E-mail feature. Installation Procedure To use the E-mail feature, configure the following settings through CentreWare Internet Services. Network Communication Setup For more information, refer to Network Communications Setup on page 107.
12 E-mail NOTE: The default user ID is "admin" and the default password is "x-admin". 6. When the reboot message appears, select [Reboot]. 7. In the [Properties] frame, select [Port Status]. 8. Check [Enable] for [Send E-mail] and [Mail Notice Service] 9. Select [Apply New Settings]. 10. When the reboot message appears, select [Reboot]. Next, set the E-mail feature. 1. At the CentreWare Internet Services home page for the machine, select the [Properties] tab.
E-mail Installation 2. In the [Properties] frame, select [Mail Notice Settings]. 3. Set the following items. – Notice Frequency - This setting specifies the frequency of sending the status of an e-mail to members of the Mail Recipient list. – Notice Day (Weekly) -- Specifies the day of the week that e-mails are sent if the Notice Frequency is set to Weekly. – Notice Date (Monthly) -- Specifies the date when the e-mails are sent if the Notice Frequency is set to monthly.
12 E-mail 110 Xerox CopyCentre/WorkCentre 118 System Administration Guide
13 Problem Solving This chapter contains problem solving procedures and how to seek further assistance. For more information, refer to the following.
13 Problem Solving Problems using a NetWare Environment This section explains what to do when problems occur while using NetWare. The causes, confirmation methods, and actions are as follows. If a problem still exists after the corrective action has been performed, follow the Problem Solving Procedures on page 111 to seek further assistance.
Problems using a NetWare Environment Cause The user name or group name of the job is not defined in the print server. The print job is in a print queue that is not assigned to the machine. Confirmation Method Action Use NWADMIN or PCONSOLE to check whether the user name or group name of the job is registered in the target print server.* Re-send the print job to a print queue in which the user name or group name has been registered correctly.
13 Problem Solving Cause The data format of the print job does not match the print environment setting of the client. 114 Confirmation Method Action – When printing a binary file in the PostScript language, make TBCP valid in the machine. If using Windows on the client, disable Ctrl-D. For details, refer the Windows PRINTER.WRI file. The IPX checksum is set to an invalid level. Use the Set command on the file server console to check whether the IPX checksum is set to level 0 or 2.
Problems using a NetWare Environment Cause Confirmation Method Action Print the System Settings List, then check that the port is activated. Activate the NetWare port. Print the System Settings List. When using IPX/SPX, check that the network number remains set to 00000000 (NetWare server down). When using TCP/IP, check that the IP address remains set to 0.0.0.0 (fixed IP address not specified) or an address supply server (DHCP server down).
13 Problem Solving When a switch off/on message is displayed Cause Confirmation Method A fault occurred in the NetWare interface. – Action Switch the machine off and on. When the required printing result is not obtained Cause Confirmation Method The specified print language of the print job is different from one specified in the machine. Check the print language of the machine. Specify the same print language of the print job as that of the machine. Banner page print is specified for the job.
Problems using an SMB Environment When there is no notification of error When there is no message displayed on the client which has sent print request, the possible causes, confirmation methods, and actions are as follows. When there is no notification of printer error Cause The user is not registered in the Notify list of the print server. Confirmation Method Use NAWADMIN or PCONSOLE to check whether the user name or group name of the job is registered.
13 Problem Solving When the machine is not found from client computers Cause Confirmation Method Action The transport protocol is different between the client and the machine. Select [Searching as another computer] ([Start] > [Find] > [Computer]) on the client, the machine can be found. Match the SMB transport protocol between the machine and each client. Multiple master browsers exist.
Problems using a UNIX Environment Cause The number of sessions exceeds the maximum. Confirmation Method Action Check that the machine is processing simultaneous requests (such as print request or status inquiry request) from multiple clients. In Windows 95/Windows 98/ Windows NT 4.0, the write error dialog, which indicates insufficient memory for the waiting print job is displayed. Wait for a while, send a print request again.
13 Problem Solving Cause Confirmation Method Action A network error occurs on the network between the client and the machine. Use the PING command to check the communication status. Check the error. The printer entry setting is not correctly defined on the client. Check the printer entry setting on the client. Check the /etc/printcap file of the client or use the lpstat command to troubleshoot. Define the correct printer entry setting. The system is in offline. Check if the online lamp is off.
Problems using a Windows Environment Cause The data format of the print job does not match the print environment of the client (print data sent from the client is in the binary notation). Confirmation Method – Action Set the logical printer name to PSBIN to print a binary file in the PostScript language. Print paper is out. Check the paper refilling message on the control panel. Load the paper into the paper tray. When changing the paper size, specify the new size, if required.
13 Problem Solving When using Windows 95/Windows 98/Windows Me When printing fails The following table explains what action to take when a printer disabled status (network error) or (spool error) is displayed when you click [Start] > [Settings] > [Printers] on your computer. Cause Confirmation Method Action The machine is connected to a network that is not available to your computer. Check whether a router or gateway is between the network connected to your computer and one connected to the machine.
Problems using a Windows Environment When using Windows NT 4.0/Windows 2000/Windows XP/Windows Server 2003 When printing fails Cause Confirmation Method Action The correct IP address is not specified. Check whether the IP address of the machine is correct. Specify the correct IP address for the machine. When [Ipd spool] is set to memory, the size of print data sent in one print request exceeds the maximum size specified.
13 Problem Solving Cause Confirmation Method The print driver that accompanies the machine is not being used (a third party print driver is being used). Check whether the print driver that accompanies the machine is selected. Action Select the print driver that accompanies the machine. If the print driver is not found, install and select it. If a third party print driver is used, you may have unexpected results.
Problem using CentreWare Internet Services Cause Confirmation Method Action Unable to obtain the required print results. Check that the print language between the machine and the print driver are consistent. Select the print language correctly. If the print language of the machine is in the dump mode, the data sent from the Macintosh will be printed in hexadecimal notations. Check the installation procedure for the print driver.Check the print driver which came with the machine displays in Chooser.
13 Problem Solving Cause Confirmation Method Cannot access to CentreWare Internet Services. The “please wait” message is displayed. The [Refresh Status] button is not working. Action Check if the machine is switched on. Switch the machine on. Print out the System Settings List to check if CentreWare Internet Services port is activated. Activate the CentreWare Internet Services port. Check if the internet address is correctly entered. Check the internet address.
Problem using Mail Notice Service Cause Confirmation Method Action – Wait for a while and then click the [Refresh Status] button. Cannot delete the job. Problem using Mail Notice Service This section explains what to do when a problem occurs while using Mail Notice Service feature. The possible causes, confirmation methods, and actions are as follows. If a problem still exists after the corrective action has been performed, follow the Problem Solving Procedures on page 111 to seek further assistance.
13 Problem Solving 128 Xerox CopyCentre/WorkCentre 118 System Administration Guide
14 Glossary This chapter contains a list of terms used in the System Administration Guide. Each term has a corresponding definition that reflects the meaning of the term as it is used in this Guide. Terms Defined Use the following definitions to learn more about the meanings of terms used in this Guide. 10Base-T A specification for baseband Ethernet running up to 10-Mbps on two pairs of twisted-pair wiring: one pair for transmitting data and the other for receiving.
14 Glossary 130 Driver Software that is loaded on the client workstation that prepares data to be sent to the machine. Ethernet Network transport technology commonly used to send data from one network node to another. FTP An abbreviation of File Transfer Protocol. An application protocol, part of the TCP/IP protocol stack, used for transferring files between network nodes.
Terms Defined NetBEUI An abbreviation of NetBIOS (Network Basic Input/Output System) Extended User Interface. It is an enhanced version of the NetBIOS protocol that is used by network operating systems, such as LAN Manager, LAN Server, Windows for Workgroups, and Windows NT. NetBEUI formalizes the transport frame and adds additional functions. NetWare A network operating system from Novell. Clients log onto one or more file servers, which provide services such as e-mail, printing, and filing.
14 Glossary 132 Print driver See Driver. Protocol The rules that control the transmitting and receiving of data. Queue A place where jobs are stored temporarily, while they are waiting to be processed. A print queue will hold several print jobs. RARP An abbreviation of Reverse Address Resolution Protocol. This is a method for providing IP Addresses to nodes on a network. When a node powers up, it broadcasts a RARP packet containing its Ethernet Address.
15 Index C CentreWare Internet Services ............................91 CentreWare Internet Services Environments 92 Information Checklist ....................................91 Network Communication Setup ....................93 Test Access ..................................................94 Changing the Settings ........................................27 E E-mail ................................................................105 E-mail Environments ..................................
15 Index SunOS ..........................................................44 Test Print ......................................................47 UNIX TCP/IP Environments .........................40 Workstation Setup ........................................42 USB Port .............................................................81 Information Checklist ....................................81 Test Print ......................................................84 USB Port Communication Setup ..................