
User's Manual


Printing a job using the DocuSP web interface
Guide to Printing Using Xerox Production Print Services 4-13
• Sides Coated: Select the number of sides that are
coated from the pull-down menu. Select [Uncoated] if
the stock has no special coating.
• Coating Type: Select a surface coating from the pull-
down menu for one or both sides of the stock. Options
are Glossy, High Gloss, Semi Gloss, Semi, or Matte
• Uncoated Finishing: Printer Default, Smooth,
Regular, or Rough
• Grain: Printer Default, Short or Long
NOTE: If the print job is 1-sided, you may still specify
different coatings for side 1 and side 2.
4. When you have finished specifying properties, select [OK]
in the bottom-right corner of the Custom window to
implement your changes and to close the Custom
window. The new stock is displayed in the [User Stock]
section of the stock window.
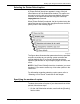
Specifying the sides imaged
To select the number of sides of the paper on which the job
will be printed, follow these steps:
1. On the Job Submission window, scroll until the [Sides
Imaged] field is visible.
2. From the Sides Imaged pull-down menu, select the
number of sides on which you want to print. The options,
depending on the capabilities of your printer, may include
the following:
• 1 sided: Prints the document on one side of each
sheet (simplex).
• 2 sided: Prints the document on both sides of each
sheet (duplex).
For landscape documents, this selection prints the
document in calendar format. Both sides of the page
are printed but the position of the image is reversed
(from top to bottom) on every other page. This is also
known as “head-to-toe” or “tumble” printing.
• Head-to-toe: Prints the document on both sides of
each sheet (duplex).
This selection prints the document in head-to-toe
format for portrait oriented documents.