
Corporation Printer User Guide
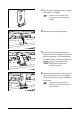
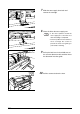


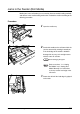
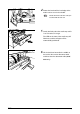
Table Of Contents
- 6030/6050/6050A Wide Format Printer User Guide
- Preface
- Safety Notes
- Regulatory Information
- Environmental Compliance
- Product Recycling and Disposal
- Illegal Copies and Printouts
- Table of Contents
- Product Overview
- 1.1 Product Configurations
- 1.2 Major Components
- 1.3 Power On/Off
- 1.4 Power Save Mode
- 1.5 Printer Control Panel Overview
- 1.6 Print Services on Web Overview (6030/ 6050)
- 1.7 Logical Printers Overview (6030/6050)
- 1.8 Loading Roll Media
- 1.9 Drawer Media Size Indicators
- 1.10 Loading Media for Manual Feeding
- 1.11 Cutting Roll Media
- Printer Overview
- Printer Setup
- 3.1 Communication Parameters
- 3.2 Communication Parameter Setup (Printer Control Panel, 6030/6050)
- 3.3 Communication Parameter Setup (Printer Control Panel, 6050A)
- 3.4 Communication Parameter Setup (Print Services on Web, 6030/6050)
- 3.5 Communication Parameter Setup (Web Printer Management Tool, 6050A)
- 3.6 System Parameter Setup (Printer Control Panel, 6030/6050)
- 3.7 System Settings Setup (Printer Control Panel, 6050A)
- 3.8 System Parameter Setup (Print Services on Web, 6030/6050)
- 3.9 System Parameter Setup (Web Printer Management Tool, 6050A)
- 3.10 Printing a Configuration List (6030/ 6050)
- 3.11 Printing a Configuration List (6050A)
- 3.12 Software Option (Print Services on Web, 6030/6050)
- 3.13 Software Option (Web Printer Management Tool, 6050A)
- 3.14 Change Password (Print Services on Web, 6030/6050)
- 3.15 Change Password (Web Printer Management Tool, 6050A)
- 3.16 Change Default Language (Print Services on Web, 6030/6050)
- 3.17 Change Default Language (Web Printer Management Tool, 6050A)
- Logical Printer Setup and Operation (6030/6050 only)
- 4.1 Creating a New Logical Printer
- 4.2 Defining the Print Settings
- 4.3 Logical Printer Print Settings
- Media Series
- Size/Media Mapping
- Media Source
- Media Type
- User-Defined Size
- Input Option
- Input Size Margin
- Plot Area
- Priority
- Title Block
- Split Drawing
- Message Option
- Printed Copy
- Output Option
- Size Recognition
- Color Option
- Transform
- Define Single Pen
- Define Multi Pen
- Pen Option
- Emulation
- PS Command
- EOP Command
- VCGL Pen Style (VCGL Define Pen)
- VCGL Pen Width
- VRF Define Pen (Define Single Pen)
- VRF Define Multi Pen
- TIFF Option
- CALS Option
- PS/PDF Option
- 4.4 Logical Printer Operations
- 4.5 Print Services on Web: Job and Log
- 4.6 Print Services on Web: Status
- 4.7 Print Services on Web: Tools
- 4.8 Manual Feed Printing
- Additional Operations from the Printer Menu
- 5.1 Introduction
- 5.2 Printer Control Panel Menu (6030/6050)
- 5.3 Printer Control Panel Menu (6050A)
- 5.4 Test Printing (6030/6050 only)
- 5.5 Managing the Job and Error Logs (6030/6050 only)
- 5.6 Reprinting (6030/6050 only)
- 5.7 Billing Meter Confirmation (6030/6050)
- 5.8 Billing Meter Confirmation (6050A)
- 5.9 Print Setup Menu
- 5.10 Automatic Cut Using the Printer Control Panel
- Ethernet Print Service (for UNIX)
- Maintenance
- Problem Solving
- Specifications
- Appendixes
253
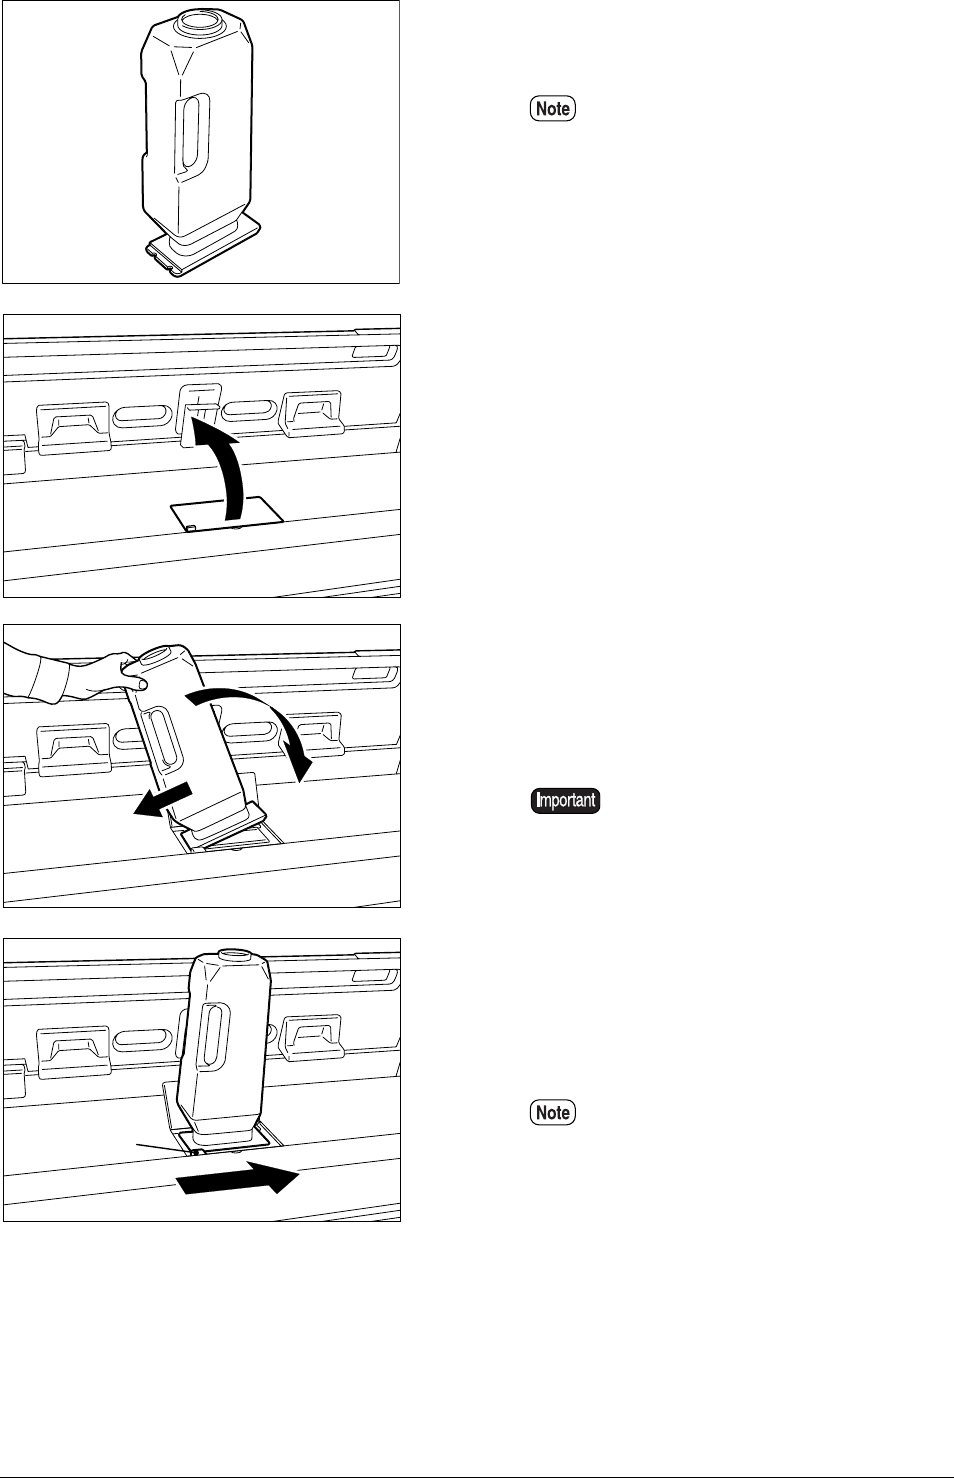
7.1 Loading Toner
3 Take the toner cartridge out of the package
and prepare it for loading.
4 Open the lid of the toner supply port.
5 Insert the left side notch, located at the
bottom of the toner cartridge, into the end of
the toner supply port. Then hold the toner
cartridge vertically on top of the supply port.
6 Slide the toner supply lever to the right. The
cover at the bottom of the toner cartridge
will open and the toner will be released into
the machine.
Shake the toner cartridge well to
ensure that the toner will dispense
properly.
Align the protruding part of the
cartridge with the notch when
inserting it in the port.
Tap the toner cartridge gently to
ensure that all of the toner is poured
into the machine.
Toner supply
lever