XEROX Xerox 4050/4090/4450/4650 Laser Printing Systems Forms Creation Guide April 1995 720P93990
Xerox Corporation 701 S. Aviation Boulevard El Segundo, CA 90245 © 1991, 1992, 1993, 1994, 1995 by Xerox Corporation. All rights reserved. Copyright protection claimed includes all forms and matters of copyrightable material and information now allowed by statutory or judicial law or hereinafter granted, including without limitation, material generated from the software programs which are displayed on the screen, such as icons, screen displays, looks, etc.
Table of contents Introduction vii Document conventions vii Related publications viii 1.
TABLE OF CONTENTS GRID 2-7 FONT 2-8 Description commands 2-9 LINE 2-10 BOX 2-11 TEXT 2-13 LOGO 2-17 GRAPHIC 2-18 SECTION 2-19 COMMENT 2-21 END 2-22 3. Compiling and printing forms 3-1 Form printing process 3-1 FSL data transfer 3-1 Compiling a form 3-2 Using the compilation options 3-4 Printing a compiled form 3-6 4.
TABLE OF CONTENTS FDL statistics 4-16 Grid unit scaling 4-16 Appendices A. FDL command syntax summary A-1 B. System default summary B-1 C. Sample form creation C-1 D. FDL capacity limits D-1 E. Standard print formats E-1 F. Support tools and measurements F-1 G.
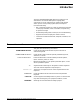
Introduction The Xerox 4050/4090/4450/4650 LPS Forms Creation Guide describes the use of Forms Description Language (FDL) commands you use to create forms for merging with variable data to print on a laser printing system (LPS).
INTRODUCTION Related publications You can find additional information related to the 4050/4090/4450/4650 LPS in the following publications. viii Publication Number Xerox 4050/4090/4450/4650 LPS Master Index 720P94030 Xerox 4050/4090/4450/4650 LPS Bypass Transport Instructions, V3.5/3.
1. Basic concepts The laser printing system (LPS) provides the capability to create electronic forms tailored to meet your individual requirements. You create electronic forms using the Forms Description Language (FDL). This simple-to-learn, easy-to-use language enables you to design and alter forms in minutes. FDL-defined forms are input to the printer as data, using the LPS keyboard and display, or a host computer terminal.
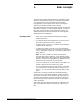
BASIC CONCEPTS Page orientation There are two types of page, or text, orientation: • • Portrait Landscape. In portrait orientation, the vertical side of the page is longer than the horizontal side. In landscape orientation, the horizontal side of the page is longer than the vertical side. Portrait and landscape orientations are illustrated in figure 1-1. Figure 1-1. Page orientation LANDSCAPE PORTRAIT Landscape is the usual orientation for computer reports.
BASIC CONCEPTS Because the length of a line printed with a proportional font is unpredictable, the system uses fixed fonts for variable data on a report to avoid overprinting of forms by variable data. The system uses proportional fonts for forms data such as titles, headings, and so forth. A business letter is an example of the use of proportional fonts for variable data. Figure 1-3 shows an example of the difference in line length. Figure 1-3.
BASIC CONCEPTS Font memory Increasing font memory improves processing time for applications that require large fonts or a large number of different fonts on a single page. In the pass through mode, the LPS prints up to 128 fonts on a single page. In normal mode, the amount of fonts per page that the LPS prints depends on the font definitions for the emulated line printer. When processing the page data, the controller stores font information in a special memory cache called font memory.
BASIC CONCEPTS Physical page This refers to the size of the paper itself. You can use any page dimension as long as the paper physically fits in the feeder trays and you can preselect the following paper sizes at system generation (sysgen), as shown in table 1-1. Table 1-1. Physical page sizes Inches Millimeters 8.0 x 10.0 203 x 254 8.0 x 10.5 203 x 267 8.0 x 13.0 8.27 x 10.63 203 x 330 210 x 270 8.27 x 11.69/A4 8.27 x 13.0 210 x 297 210 x 330 8.37 x 10.78 213 x 274 8.46 x 10.
BASIC CONCEPTS The upper left corner of the virtual page is called the “virtual page origin,” as shown in figure 1-5. The virtual page origin is also used to establish a form origin. Figure 1-5.
BASIC CONCEPTS Non-imaged elements Elements, such as text and graphics, may begin at the edge of the physical page on two sides, and off the physical page on the top and on the left side (except with 8.5 by 14 inch paper). However, if any part of a printed element begins off the system page, no part of the element images. • If a line of variable data begins off the system page, no part of the line prints. • If a ruled line begins off the system page, no part of the ruled line prints.
aaaaaaaaaaaa aaaaaaaaaaaa aaaaaaaaaaaa aaaaaaaaaaaa aaaaaaaaaaaa aaaaaaaaaaaa aaaaaaaaaaaa aaaaaaaaaaaa aaaaaa aaaaaaaa aaaaaaaa aaaaaaaa aaaaaaaa aaaaaaaa aaaaaaaa aaaaaaaa aaaaaaaa aaaa aaaaaaaaaaaaaaaa aaaaaaaaaaaaaaaa aaaaaaaaaaaaaaaa aaaaaaaaaaaaaaaa aaaaaaaaaaaaaaaa aaaaaaaaaaaaaaaa aaaaaaaaaaaaaaaa aaaaaaaaaaaaaaaa aaaaaaaaaaaaaaaa aaaaaaaaaaaaaaaa aaaaaaaaaaaaaaaa aaaaaaaaaaaaaaaa aaaaaaaaaaaaaaaa aaaaaaaaaaaaaaaa aaaaaaaaaaaaaaaa aaaaaaaaaaaaaaaa aaaaaaaaaaaaaaaa aaaaaaaaaaaaaaaa aaaaaaaaaa aaaaaa
BASIC CONCEPTS Figure 1-8.
BASIC CONCEPTS Print density Highlight color Full throughput estimates are based on pages with an average print density of approximately seven percent of the page. Pages which are very dense require more time to image and to print. The LPS running V3.8 Color Compatibility Release or XDDI software is compatible with the 4850/4890 printer running V3.7, V4.0, or V5.0 highlight color software. Highlight color applications can be printed when using V3.8 or XDDI software on the LPS.
BASIC CONCEPTS Positioning form elements The following elements may be placed on a form with FDL commands: • • • • • • Lines Boxes Fixed text Logos and signatures Images Sections. All of these elements are located in relation to the form origin at the upper left corner of the form. Each form element has an origin, a point used to position it relative to the form origin, as shown in table 1-2. Table 1-2.
BASIC CONCEPTS Grids The location of a form element on a page is specified in terms of its horizontal and vertical displacement from the form origin. The units of measurement used to define this displacement can be any of the following: • Linear units—inches or centimeters • Dots—300 per inch • Xdots—600 per inch • cpi and lpi—characters per inch horizontally and lines per inch vertically. x and y coordinates The y coordinate describes the vertical position on a grid.
BASIC CONCEPTS Example Negative coordinates UNIT value You placed the letter “A” at location (2,1). If you are measuring grid units in inches, the origin of the “A” character cell is located two inches down and one inch to the right of the form origin. If you are measuring the grid in cpi and lpi units, the origin of the “A” character cell is located two lines down and one character width to the right of the form origin. At 10 cpi and 6 lpi, the “A” is .33 inches down from the form origin and .
BASIC CONCEPTS Data types Two types of data are used in creating and printing LPS forms, as shown in table 1-3. Table 1-3. 1-14 Data types Data type Description Variable Generally refers to computer-produced information that the LPS merges with a form. Typically this data varies from page to page. Forms Refers to information that is used to print the form, such as lines between columns and rows, boxes, and shading.
2. Forms Description Language This chapter describes the function and use of each Forms Description Language (FDL) command in generating a form electronically. The FDL commands discussed throughout this guide apply to all version 3 laser printing systems. Reference Refer to the “FDL command syntax summary” appendix for a summary of all FDL commands and their syntax. The conventions used to present command syntax are listed in the “Introduction” and in the “FDL command syntax summary” appendix.
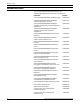
FORMS DESCRIPTION LANGUAGE Command summary The five types of commands and the associated FDL commands are described in table 2-1. Table 2-1. Command types and commands FDL command summary Command function FORM/RESOLUTION Identifies the name of a form in the forms library and the resolution at which the form should be compiled for printing. PAPER Identifies the paper size for which the form is designed. LANDSCAPE/PORTRAIT Specifies the page orientation and virtual page size.
FORMS DESCRIPTION LANGUAGE Form creation process The following three basic steps are required to produce an electronic form: 1. Initiate an editing session. 2. Enter the FDL commands. 3. Compile and print the form. Initiating an editing session Use the editor utility to create and modify your Forms Source Library (.FSL) source files. If you use your host editor utility, follow the instructions provided in your host documentation.
FORMS DESCRIPTION LANGUAGE FORM/RESOLUTION Defines the name and resolution of the form. Naming the form Defines the name of the form. Once the form is compiled and stored on the system disk, this is the name used by the LPS software to reference the form. Syntax Parameter options Default Example Considerations FORM name; name A one- to six-character identifier that references the form. None. A form name is mandatory.
FORMS DESCRIPTION LANGUAGE PAPER Identifies the paper size for which the form is designed. It is an optional command that enables you to select a paper size that is different than the sysgen-defined paper size. Syntax Parameter options PAPER SIZE IS value; value USLETTER 8.5 by 11 inches/216 by 279 mm. A4 8.27 by 11.69 inches/210 by 297 mm. USLEGAL 8.5 by 14 inches/216 by 356 mm. x unit BY y unit Specifies nonstandard sizes.
FORMS DESCRIPTION LANGUAGE The forms compiler is capable of compiling a number of paper sizes. Although a form file may be compiled without an error, it may not be printable on a particular system if the paper size exceeds the maximum feeder capacity of that system. Examples of these are A3, B4, and 11 by 17 inch paper sizes. If you attempt to print a form with an incompatible paper size, the following message is displayed on the system controller: Paper size in cluster AUTO is too small When coding .
FORMS DESCRIPTION LANGUAGE GRID Specifies how far apart to space the horizontal and vertical grid lines. This command also specifies the location of the form origin with respect to the virtual page origin. All FDL commands create and place form elements (lines, boxes, and so on) relative to the form origin. Syntax Parameter options GRID UNIT IS format id ORIGIN y unit x unit; or GRID UNIT IS value ORIGIN y unit x unit; format id Name of a predefined format.
FORMS DESCRIPTION LANGUAGE The GRID command, when specified in number of dots, allows a greater flexibility than more conventional methods of specifying the grid. For example, instead of being limited to two decimal places of accuracy when specifying inches or centimeters, the grid can be specified to the dot. This feature also eliminates any errors caused by rounding. If the GRID command specifies explicit unit parameters and no ORIGIN is specified, the form origin coincides with the virtual page origin.
FORMS DESCRIPTION LANGUAGE Description commands Description commands specify the location, size, and characteristics of the following form elements: lines, boxes, logos, graphics, form sections, and text. The following commands are used for entering descriptive form data: • • • • • • LINE BOX TEXT AT TEXT IN BOX LOGO GRAPHIC. You can enter these commands in any sequence. For a discussion of the problems you may encounter when entering these commands, refer to the “Troubleshooting” chapter.
FORMS DESCRIPTION LANGUAGE Figure 2-1. Use of a negative coordinate Form origin x= -1 LINE Specifies that one or more lines are to be drawn in the same direction. A LINE command defines the following: Syntax Parameter options • Point at which the line begins • Direction of the line • Length of the line • Type of line • Thickness of the line • Number of times the same line is to be drawn, either from different origins or at specified intervals from the initial origin.
FORMS DESCRIPTION LANGUAGE cs ce The coordinate of the start of the line, measured on the x or y axis, depending on the direction of the line. The coordinate of the end of the line, measured on the x or y axis, depending on the direction of the line. type SOLID An unbroken, straight line. BROKEN The line is divided into many equal sections, separated by small amounts of space. DOTTED The line consists of dots of equal size and spaced equally apart.
FORMS DESCRIPTION LANGUAGE unit Unit of linear measurement, expressed as inches (IN), centimeters (CM), or DOTS. If units are not specified, the measurement is in grid units. n Number of boxes to be drawn. the default is 1. p Width of the box. q Height of the box. type Line style making up the border of the box. SOLID An unbroken, straight line. BROKEN The line is divided into many equal sections, separated by small amounts of space.
FORMS DESCRIPTION LANGUAGE TEXT Two methods are available for specifying the text that is to be placed on forms. The TEXT AT command places the text at a specified location anywhere on the form; the TEXT IN BOX command places text inside a box. TEXT AT Allows you to print text in specific locations. Syntax Parameter options direction TEXT SPACED d units PER LINE ALIGNED alignment USING FONT n AT y units x units ‘text’ ‘text’ ...
FORMS DESCRIPTION LANGUAGE Default Considerations If direction and alignment are not specified, the defaults are HORIZONTAL and CENTER. FDL gives you control over vertical line spacings and horizontal character placement. The SPACED parameter in the TEXT command is used to control the amount of vertical space between two lines of text. Character spacing cannot be overridden.
FORMS DESCRIPTION LANGUAGE Other character-block orientations are shown in the “Command examples” appendix. TEXT IN BOX Allows you to place text within a box. Syntax Parameter options direction TEXT SPACED d units PER LINE ALIGNED alignment USING FONT n IN position BOX y unit x unit ‘text’ ‘text’ ... IN NEXT direction BOX ‘text’ ‘text’ ...; direction HORIZONTAL VERTICAL d Amount of vertical space occupied by a line of text. All specifications except lpi are actual line height measurements.
FORMS DESCRIPTION LANGUAGE text Text characters that are printed at the specified location. Multiple text strings can be specified by enclosing each text string in single quotation marks. Separate each text string with one or more spaces. (A string is a series of characters.) Each string is printed as one physical line of text.
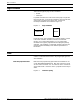
FORMS DESCRIPTION LANGUAGE Assuming that the upper left corner of the first box above is located two grid units down from the form origin and one grid unit to the right of the form origin, you would use the following statements: TEXT IN BOX 2,1 ‘A: IN NEXT BOX ‘B‘ IN NEXT BOX ’C’ IN NEXT VERTICAL BOX ’D’; TEXT IN BOX 2,1 ‘A‘ or BOX ‘B‘ BOX ’C’ VERTICAL BOX ’D’; The results of either statement are shown in figure 2-4. Figure 2-4.
FORMS DESCRIPTION LANGUAGE LOGO Keyword LOGO EAGLE The name of the logo, a one- to six-character alphanumeric label, is given to the logo when it is digitized by the Xerox Font Center or Rank Xerox. AT 10,12 The keyword AT and the coordinates (y,x) indicating where the logo is to be placed. Considerations Sample .FSL Be sure that font memory capacity is not exceeded. Logos larger than two square inches may be used if they are the result of using smaller components of the logo to gain the desired effect.
FORMS DESCRIPTION LANGUAGE n/d Specifies the reference scale factor. Each parameter, n and d, must be an integer in the range of 1 to 8 to allow a reference scale factor in the range of 1/8 to 8. The reference scale factor is multiplied by that specified at the time the graphic was digitized, and the product is rounded to the nearest integer in the range of 1 to 8. That integer becomes the effective scale factor with which the graphic is imaged. Default Example Sample .
FORMS DESCRIPTION LANGUAGE x Coordinate of the origin on the x axis of the section in relation to the origin of the form. Default Considerations None. SECTION can also be used to define an entire form as a section. Within the section, any other command, statement, or specification may be used except another SECTION command, DO SECTION command, FORM command, or END command.
FORMS DESCRIPTION LANGUAGE DO SECTION PHONE AT 0,0; DO SECTION PHONE AT 30,37; DO SECTION Keywords. PHONE Section name. The section must previously have been defined by the BEGIN SECTION and END SECTION commands. AT 0,0; AT 30,37; Coordinates of the origin of the section in relation to the origin of the form. COMMENT It is often helpful to use comments to include in the source statements a description of certain FDL commands and their functions.
FORMS DESCRIPTION LANGUAGE END Use the END command to terminate the description of a form. Syntax END; Parameters None. Default None. Example An .FSL file can contain more than one file. Therefore, if additional .FSL files follow an END command, the end of all .FSLs to be processed is indicated by two consecutive END commands.
3. Compiling and printing forms Once the Form Source Library (.FSL) file has been created, the file can be stored on the laser printing system (LPS) system disk. The next step is to compile the file and print a copy of the form. Form printing process Follow these steps to print an electronic form on a Xerox laser printing system: 1. Enter the editor utility and create a file of FDL commands to describe the form. This file is called a Forms Source Library (.FSL) file.
COMPILING AND PRINTING FORMS Online If your LPS is channel-attached to a host computer, enter the source code at the host terminal through the host editor facility. The file must be preceded by the necessary control record identifiers. Refer to your host reference documentation for details. The LPS HOSTCOPY utility enables you to download files from the host and store them on the LPS system disk. Remote communications The LPS can also receive forms data from a remote device on the Ethernet network.
COMPILING AND PRINTING FORMS TRAY Specifies that the sample form, source statement, and summary sheet will go to the sample tray instead of the currently active output stacker. DEBUG Specifies that no attempt to print the sample form will be made. This ensures that the source statement and summary sheet are printed even if the sample form cannot be printed. XPAN Specifies printing of the source statement of section expansions.
COMPILING AND PRINTING FORMS If an .FSL with multiple forms has one form name which has the same name as another .FSL, this second .FSL will be overwritten when the first is compiled. For example, assume that file A.FSL contains forms X, Y, and Z. When it is compiled, files X.FRM, Y.FRM, and Z.FRM are produced, as are files X.FSL, Y.FSL, and Z.FSL. If there already is a file name X.FSL on the system, it is overwritten by X.FSL from the A.FSL file.
COMPILING AND PRINTING FORMS File storage A large number of forms may be stored in the forms source directory (uncompiled) and form directory (compiled) on the system disks. Two files with the same name cannot be stored in the same directory. The number of forms that can be stored depends on the amount of data required to describe each form and the total amount of disk space allocated to the libraries. The forms are filed in the system under their identifying names.
COMPILING AND PRINTING FORMS • If the form names on the invocation line and in the .FSL are different, the compilation is aborted and a single sheet is printed. The sheet contains the heading for the page and the portion of the .FSL that was processed before the security violation was detected. For example, TRYIT1.FSL is a secured file. You enter: FDL TRYIT TRAY The .
4. Troubleshooting Physical printer constraints and forms compiler methods are factors that can affect form design. This chapter provides coding technique suggestions and hints and tips to help you avoid coding problems. This chapter also covers factors that may impact the following: • • • • • Image complexity Boxes Shading Sections Rounding measurements. Suggested coding techniques Converting preprinted forms Follow these steps to convert preprinted forms: 1.
TROUBLESHOOTING Table 4-1. Layout sheet forms and paper sizes Layout sheet forms Paper size FLSF1 through FLSF11 8.5 x 11 inch/ 216 x 279 mm FLSF1A and FLSF11A A4 FLSF12 and FLSF13 8.5 x 14 inch/ 216 x 356 mm Recommended coding sequence The FDL compiler imposes a number of constraints on the sequence in which commands are coded. The form name must come first.
TROUBLESHOOTING • [DOT\TED is interpreted as [DOT\S. For example: AT 18 DRAW 5 HORIZONTAL LINES FROM 27.5 TO 37.5 DOT...; The keyword DOT is interpreted as DOTS, which is valid in this position. The keyword DOTTED is also valid in this position, but must be spelled out in full. • [CEN\TER is interpreted as [CEN\TIMETERS. For example: TEXT 10 CEN IN BOX.....; The keyword CEN is interpreted as CENTIMETERS, which is valid in this position.
TROUBLESHOOTING Table 4-2. Keywords Hints and tips Coding text • • • • • • Hints and tips (continued) Use a COMMENT command. Remember that different fonts of a given point size are not necessarily the same physical size. Be aware that vertical error messages, generated when the system calculates that too much text has been specified for placement in a box, are an approximation. Use the TEXT SPACED AT command to force exact text placement.
TROUBLESHOOTING Generally, the line table limits are reached because the form contains a large number of short line segments. The most probable reason for this is a series of vertical lines (for example, tick marks) or horizontal lines (for example, a series of long dashes). With either of these conditions, it is possible to reduce the number of entries in the line table as the form is being constructed.
TROUBLESHOOTING Figure 4-2. Lines entered in unintended locations These two examples of lines entered in the line table result in lines that are visually contiguous but are not logically contiguous. As indicated in the following sections that describe problems with boxes, such conditions can result in a situation where FDL cannot find a box, or creates a box that has one or both of its dimensions equal to zero.
TROUBLESHOOTING The hardware limitation of 320 dispatchable items per 300 spi scan line (640 for 600 spi) includes the required overhead of two dispatchable items. For example, a dispatchable item could be a maximum of 32 dots wide for 300 spi (64 dots for 600 spi), and thereby might be a full character (less than point size 8 or 9), a fraction of a character (greater than point size 8 or 9), or a line segment that is equal to or smaller than 32 dots in the scan direction.
TROUBLESHOOTING On a 300 spi portrait page, a 12-point font drops the dispatchable-item count below the 320-character level. A form with a 12-point font cannot have more than 160 characters on a scan line. When using an 8-point 300 spi font on a portrait page, the maximum dispatchable item count is approximately 200 per scan line. This limit falls off to 170 characters for a 6-point font, 150 characters for a 5-point font, and 120 characters for a 4-point font.
TROUBLESHOOTING Considerations If a form you described causes page setup errors, examine the form and variable data to see if there are many lines or a large amount of text in a small area. If there are, you can reduce the density of this area by spreading out the material or by deleting parts of the form.
TROUBLESHOOTING Text in boxes When text is entered for placement within a box, the system attempts to determine whether the given text exceeds the largest font size that can fit within the boundaries of the box. If FDL computations indicate that the entered text may not fit within the box, the following error message is displayed: TEXT WILL NOT FIT IN THE BOX The system checks the horizontal and vertical directions of the box.
TROUBLESHOOTING Figure 4-5. Measurements used in computing vertical box TEXT IN LINE 1 D TEXT IN LINE 2 N TEXT IN LINE 3 The result of this equation is rounded up and displayed in the error message. Thus, what the error message actually signifies is the largest font that could be accommodated within the box if no leading were involved.
TROUBLESHOOTING Text might be spaced at four dots, while the line spacing is really 59 dots. It seems paradoxical to designate that text be spaced at four dots and create a form that actually has 59 dots of spacing. However, you can do this by using blank lines. A small line spacing along with blank lines allows you to get positioning control and forces visual centering of text within a box.
TROUBLESHOOTING Avoiding boundary line density problems Terminating the shading before reaching the boundary line helps to avoid line density problems, conserves space in the form file and in the form image buffer, and enhances the appearance of the form. Figure 4-6. Terminating shading to avoid line density problems Normal shading using the same coordinates and sizes as the box. Early shading termination using a smaller box for shading.
TROUBLESHOOTING Rounding measurement factors Laser printing systems use only dot units when actually compiling forms. Therefore, as long as all positioning commands within FDL are defined in terms of dots or an integral number of dots, there are no rounding problems. Converting other unit values to dots You can define positions in decimal-value inches, in centimeters, in lines per inch, and in characters per inch. The LPS converts all of these commands to dots while the form is being compiled.
TROUBLESHOOTING Rounding variable data Alignment problems Under certain circumstances, a form and variable data do not align properly, even though it appears that both use the same line spacing. This may be the result of the effects of rounding on the line spacing. As an example, construct a form with a grid unit of 13.6 cpi and 9 lpi. Horizontal lines are specified at 0, 4, 7, 10, 13, 16, 19, 22, 25, 28, 31, 34, 37, 40, 43, 46, 49, 52, 55, 58, 61, 64, and 67.
TROUBLESHOOTING FDL statistics If a form is compiled successfully, the following FDL statistics are displayed on the summary sheet. • • • • Size of the source output file (FSL) Size of the printable form file (FRM) Size of the form image buffer Amount of font memory used by the form. Grid unit scaling Table 4-3 shows grid unit scaling specifications when the grid parameters are omitted or specified.
A. FDL command syntax summary This appendix contains an alphabetized summary of the Forms Description Language (FDL) commands syntax described in this guide. The conventions and definitions used to describe the commands are shown in table A-1. Table A-1. FDL command syntax conventions Syntax Meaning UPPERCASE BOLD BLUE Required words (keywords*) in the command syntax appear in uppercase bold blue. ... Ellipses indicate that you can repeat a parameter option, or list a series of parameter options.
FDL COMMAND SYNTAX SUMMARY Table A-2. FDL command syntax Command Syntax BOX AT y unit x unit DRAW n BOXES IN unit p unit WIDE BY q unit HIGH USING type thickness SHADING density AND REPEAT direction AT ca unit ca unit ...
B. System default summary This appendix lists the default parameters that the system automatically substitutes when specifications are omitted in FDL commands. Grid unit dimensions are rounded to the nearest tenth. The grid and origin substitutions made when printing on 8.5 by 11 inch/216 by 279 mm paper are shown in table B-1. Table B-1. Grid and origin substitutions for 8.5 by 11 inch/216 by 279 mm paper Specification Substitution FMT1 LANDSCAPE; GRID UNIT IS 13.6 CPI, 8.1 LPI, ORIGIN 0.18 INCH, 0.
SYSTEM DEFAULT SUMMARY The grid and origin substitutions made when printing on 8.5 by 14-inch/216 by 356 mm paper are shown in table B-2. Table B-2. Grid and origin substitutions for 8.5 by 14 inch/216 by 356 mm paper Specification Substitution FMT12 LANDSCAPE; GRID UNIT IS 13.6 CPI, 8.1 LPI, ORIGIN 0.18 INCH, 0.66 INCH; FMT13 PORTRAIT; GRID UNIT IS 13.6 CPI, 8.1 LPI, ORIGIN 0.57 INCH, 0.58 INCH; The grid and origin substitutions made when printing on 8.27 by 11.
SYSTEM DEFAULT SUMMARY Substitutions made for all paper sizes are shown in table B-4. Table B-4.
C. Sample form creation This appendix reviews the commands discussed earlier in this guide, and illustrates a sample form along with the entire Forms Source Library (FSL) that created it. Practice entering the Forms Description Language (FDL) commands that instruct the LPS to produce a sample form accurately. Refer to the command definitions discussed earlier in this guide as needed. Enter the commands as shown in the sample FSL to produce the form.
SAMPLE FORM CREATION Writing the setup commands Recall that the setup commands precede the form description commands for lines, boxes, and text. In general, the setup commands specify the parameters which describe the form. Invoke the Editor utility and enter the commands shown in figure C-2. Figure C-2. Setup commands FORM 1STFRM; GRID FMT1; FONTS UN114A,UN106A,UN104C; Notice that the PORTRAIT or LANDSCAPE command and the PAPER command are omitted.
SAMPLE FORM CREATION Drawing lines LINE commands are used to construct horizontal and vertical lines which, in turn, are used to construct boxes. Drawing horizontal lines Enter the horizontal line commands shown in figure C-4. You have the option of abbreviating the commands to the first three characters. Figure C-4.
SAMPLE FORM CREATION Drawing boxes Use the BOX command to construct individual, standalone boxes or boxes that share common sides. You can also create a shaded area or construct an invisible box to place “floating” text such as titles conveniently. Enter the following COMMENT and BOX command, as shown in figure C-6. Figure C-6.
SAMPLE FORM CREATION Placing text in a box The TEXT IN BOX command allows you to place text at a particular location within a box that was previously described. Enter the COMMENT and TEXT IN BOX commands, as shown in figure C-8. Figure C-8. TEXT IN BOX command COMMENT *** TEXT IN BOX COMMANDS ***; TEXT USI FONT 2 IN BOX 5.1,24 'THIS PAY' BOX 'REGULAR' BOX 'OVERTIME'; TEXT USI FONT 2 IN BOX 7,0 'NAME' BOX 'GROSS' 'ADJ. NET' 'NET PAY' BOX 'UNITS-UNITS YTD' 'CURRENT AMT.
SAMPLE FORM CREATION Compiling the form This exercise gives you practice using most of the FDL commands discussed throughout this guide. The next step is to compile the .FSL which produces a sample of the form, provided there are no syntax errors. The summary statement also prints any errors. After you have entered the END command, SAVE, CLEAR, and END the editing session, as shown in figure C-10. Figure C-10. SAVE, CLEAR, and END commands END; SAVE 1STFRM.
SAMPLE FORM CREATION Figure C-12. FDL VERSION B03 13:13 DISK-ID: VX.7 ARIEL 30-APR-XX R9.7 PAGE REL #5 Source statement (1STFRM.
D. FDL capacity limits The available memory space imposes the following maximums for use, as shown in table D-1: Table D-1. Capacity limits Item Maximum Text Buffer capacity: Lines per TEXT statement: 512 bytes 64 Space allocation TEXT AT command: TEXT IN BOX command: 16 bytes + S1 + S2 . . . Sn 18 bytes + S1 + S2 . . . Sn (1st box) 6 bytes + S1 + S2 . . . Sn (second and all succeeding boxes) . . .where n bytes S is fixed overhead.
E. Standard print formats Predefined print formats that provide commonly used impact printer conversion formats for use with specific page sizes and orientations are provided on the Operating System Software (OSS). Table E-1. Standard LPS print formats Format ID No. of lines No.
F. Support tools and measurements There are two separate functions of form creation: forms design and forms description. Any form can be converted to an electronic form stored on the system by describing it in Forms Description Language (FDL). Forms design involves laying out and measuring a form and is only a peripheral concern of this guide. A forms design ruler is provided for the forms designer.
SUPPORT TOOLS AND MEASUREMENTS F-2 Side 1 Side 1 of the ruler is typically used for measuring impact-printed computer output reports in which the spacing is 10 cpi (scale 1) and either 6 lpi (scale 2) or 8 lpi (scale 3). Side 2 Side 2 should be used for measuring laser printing systems output. Default spacing The default spacings on the system are 13.6 cpi (scale 5) and 8.1 lpi (scale 6); they were chosen for optimal readability for the standard computer format of 132 columns by 66 lines.
G. Command examples The examples presented in this appendix illustrate the functions of the FDL commands. Use these examples together with the command information in the “Forms Description Language” chapter. GRID examples The following examples illustrate how virtual page and form origins are determined. Reference Refer to the “Grids” section in the “Basic concepts” chapter and the “GRID” section in the “Forms Description Language” chapter for more information.
aaaaaaaaaaaa aaaaaaaaaaaa aaaaaaaaaaaa aaaaaaaaaaaa aaaaaaaaaaaa aaaaaaaaaaaa aaaaaaaaaaaa aaaaaaaaaaaa aaaaaaaaaaaa aaaaaaaaaaaa aaaaaaaaaaaa aaaaaaaaaaaa aaaaaaaaaaaa aaaaaaaaaaaa aaaaaaaaaaaa aaaaaaaaaaaa aaaaaaaaaaaa aaaaaaaaaaaa aaaaaaaaaaaa aaaaaaaaaaaa aaaaaaaaaaaa aaaaaaaaaa aaaaaaaaaa aaaaaaaaaa aaaaaaaaaa aaaaaaaaaa aaaaaaaaaa aaaaaaaaaa aaaaaaaaaa aaaaaaaaaa aaaaaaaaaa aaaaaaaaaaaa aaaaaaaaaaaa aaaaaaaaaaaa aaaaaaaaaaaa aaaaaaaaaaaa aaaaaaaaaaaa aaaaaaaaaaaa aaaaaaaaaaaa aaaaaaaaaaaa aaaaaaaaaa
COMMAND EXAMPLES Form results with grid specified, but no origin or format aaaaaaaaaa aaaaaaaaaa aaaaaaaaaa aaaaaaaaaa aaaaaaaaaa aaaaaaaaaa aaaaaaaaaa aaaaaaaaaa aaaaa Figure G-4.
COMMAND EXAMPLES Form results with grid, origin, and page size specified aaaaaaaaaaaa aaaaaaaaaaaa aaaaaaaaaaaa aaaaaaaaaaaa aaaaaaaaaaaa aaaaaaaaaaaa aaaaaaaaaaaa aaaaaaaaaaaa aaaaaa Figure G-6.
COMMAND EXAMPLES Example 2 AT 3.5 DRAW LINE IN INCHES FROM 4 TO 10; This command specifies the drawing of a horizontal line 3.5 inches down from the form origin, beginning four inches to the right of the form origin and ending 10 inches to the right of the form origin. Figure G-8. Example 3 Drawing a horizontal line (inches) AT 2 DRAW 5 VERTICAL LINES FROM 5 TO 10 AND REPEAT EVERY 2; This command specifies the drawing of five vertical lines.
COMMAND EXAMPLES Example 4 AT 4 DRAW 5 LINES FROM 2 TO 4 AND REPEAT HORIZONTALLY EVERY 4; This command specifies five short lines to be drawn, each two grid units long, with each starting point spaced four grid units apart and separated two grid units from the end of the preceding line. Figure G-10.
COMMAND EXAMPLES Example 2 AT .5,0 DRAW 4 BOXES IN INCHES 5 WIDE BY .5 HIGH USING SHADING AND REPEAT VERTICALLY EVERY 2; This command specifies four 5-inch wide, .5-inch high bars placed with the top edges at .5 inches, 2.5 inches, 4.5 inches, and 6.5 inches. Figure G-12.
COMMAND EXAMPLES TEXT AT examples Figure G-13 gives the command syntax for and demonstrates aligned text. Figure G-13.
COMMAND EXAMPLES Figure G-14. Character block orientations for portrait and landscape pages This character indicates the positioning origin of the text block. If the font and page have the same orientation, letters appear upright. They appear sideways or upside down if orientations differ. Text is aligned horizontally or vertically relative to page orientation, not relative to the font.
COMMAND EXAMPLES TEXT IN BOX examples The following examples give the command syntax and demonstrate the nine positions in a box where text can be placed. Figure G-15.
Glossary batch A3 International paper size measuring 297 by 420 mm or 11.69 by 16.54 inches. A4 International paper size measuring 210 by 297 mm or 8.27 by 11.69 inches. B4 International paper size measuring 250 by 353 mm or 9.84 by 13.9 inches. processing BCD bitmap Process that allows for repetitive operations to be performed sequentially on batched data without much involvement from the computer operator. Binary coded decimal.
GLOSSARY CME compiler Copy Modification Entry copy-sensitive cpi See CME. Job in which multiple copies of a report contain different data, such as paychecks and banking statements. Characters per inch. Value assigned to a field by the system if no input is received from the operator. You can change the default value of a field. DJDE Dynamic Job Descriptor Entry. Command within an input data stream used to modify the printing environment dynamically. dot Picture element (pixel) imaged by a printer.
GLOSSARY FCB Forms Control Buffer. Controls the vertical format of printed output. FCP File Control Parameter. FCU File Conversion Utility. FDL Forms Description language. LPS-resident source language used to design electronic forms. See also FSL and form. FDR File directory. FIS floating accent font Font Interchange Standard form Font Interchange Standard. Defines the digital representation of fonts and character metrics for the generation of an entire series of Interpress fonts.
GLOSSARY initialize Interpress Industry-standard page description language developed by Xerox. Interpress documents can be printed on any sufficiently powerful printer equipped with Interpress print software. JCB Job Control Block. JCL Job Control Language. JDE Job Descriptor Entry. Collection of job descriptions. JDL Job Description Library. Collection of compiled job descriptions. See also JSL. JID Job Identifier.
GLOSSARY line feed literal logical page lpi LPS Control character that (unless set to be interpreted as a line end) causes the printing system to begin printing in the current character position of the next line. Alphanumeric character beginning with a letter, including an asterisk, period, colon, or slash, and not enclosed in single quotes. In Xerox printing systems, a logical page is a formatted page that is smaller than the physical page.
GLOSSARY orientation origin overprint ratio packet page end palette parameter parse In reference to image area, the upper left corner of a sheet. Maximum number of variable data and form characters that can be intersected by a single scan line. A group of DJDE records terminated by an END command. Command character (form feed) to terminate the current page. Predefined set of colors or inks. Different versions are provided with the printer and with host- or PC-based application software.
GLOSSARY ppm Print Description Language print file PSC query See PDL. Portion of the system disk memory (up to 4 MB) reserved for temporary storage of formatted pages for printing. Pages are retained until they are delivered to the output tray. Printer Subsystem Controller. Request for data or other information, entered by an operator while the system is processing. record A line of data as defined in the RECORD command. report A single output data set, delimited by an RSTACK command or as a file.
GLOSSARY syntax Rules governing the structure of expressions in a programming language. system page Maximum area in which text and graphics can be imaged on a printing system. tape density Expression of the format of a magnetic tape measured in number of bytes that can be stored per inch of tape. TOF two-up UCSB UCS variable data virtual page vpos wildcard XDDI xdot xerographic mode XNS XPAF, XPF GLOSSARY-8 Top of form. Printing two logical pages on one side of a physical page.
Index Symbols .
INDEX typefaces, 1-3 FORM command definition, 2-4 RESOLUTION parameter, 2-4 form image buffer, 4-12 to 4-13 forms compiler, 2-6, 2-8, 3-2 to 3-5 compiling, 3-1 to 3-6, C-6 to C-7 creating, 2-3, C-1 to C-7 design ruler, 1-13, F-1 elements, 1-11 to 1-13, 2-7 naming, 2-4 new, designing, 4-1 to 4-2 origin, 1-10 to 1-13, 2-7 printing, 3-1 to 3-6 formats, standard, 1-13, E-1 Forms Description Language, see FDL Forms Source Library, see FSL FSL compiling, 3-3 to 3-5 data transfer offline, 3-1 online, 3-2 modifyin
INDEX density, 4-7 to 4-8 FMT1, 2-7 font, text block origin, 1-11 image registration, 1-7 to 1-9 shading factors, 4-12 see also page PORTRAIT command, 2-6 PostScript, 1-9 predefined formats, 1-13, 2-6 to 2-7 print density, 1-9 printing forms, 3-1 to 3-6 procedures form converting preprinted, 4-1 designing, 4-1 printing, 3-1 offline, transferring data, 3-1 proportional fonts, 1-2 to 1-3 publications, related, viii AT, 2-13 to 2-14, G-8 to G-9 IN BOX, 2-15 to 2-17, G-10 troubleshooting, 4-1 to 4-16 R Raste